
Self-Join Link VS Join Code
Understanding the difference between the Self-Join Link and the Join-Code will help you efficiently manage your classes. Please note, if you’re rostering your classes via Clever, ClassLink, Google Classroom, or MS Teams, you will not be able to use the Self-Join Link or the Join-Code. In this guide, we’ll explain the differences between the Self-Join Link and the Join-Code, and how to use them effectively.
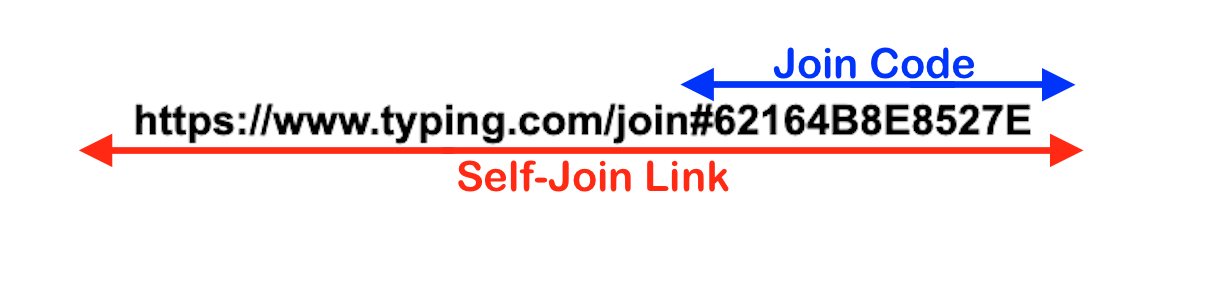
Self-Join Link
What is the Self-Join Link?
The Self-Join Link is a unique link that allows students to join a class using either a new or existing student account.
Where can I find the Self-Join Link?
To find the Self-Join Link:
Log into your teacher account.
Click on "Classes" in the left sidebar.
Select any class.
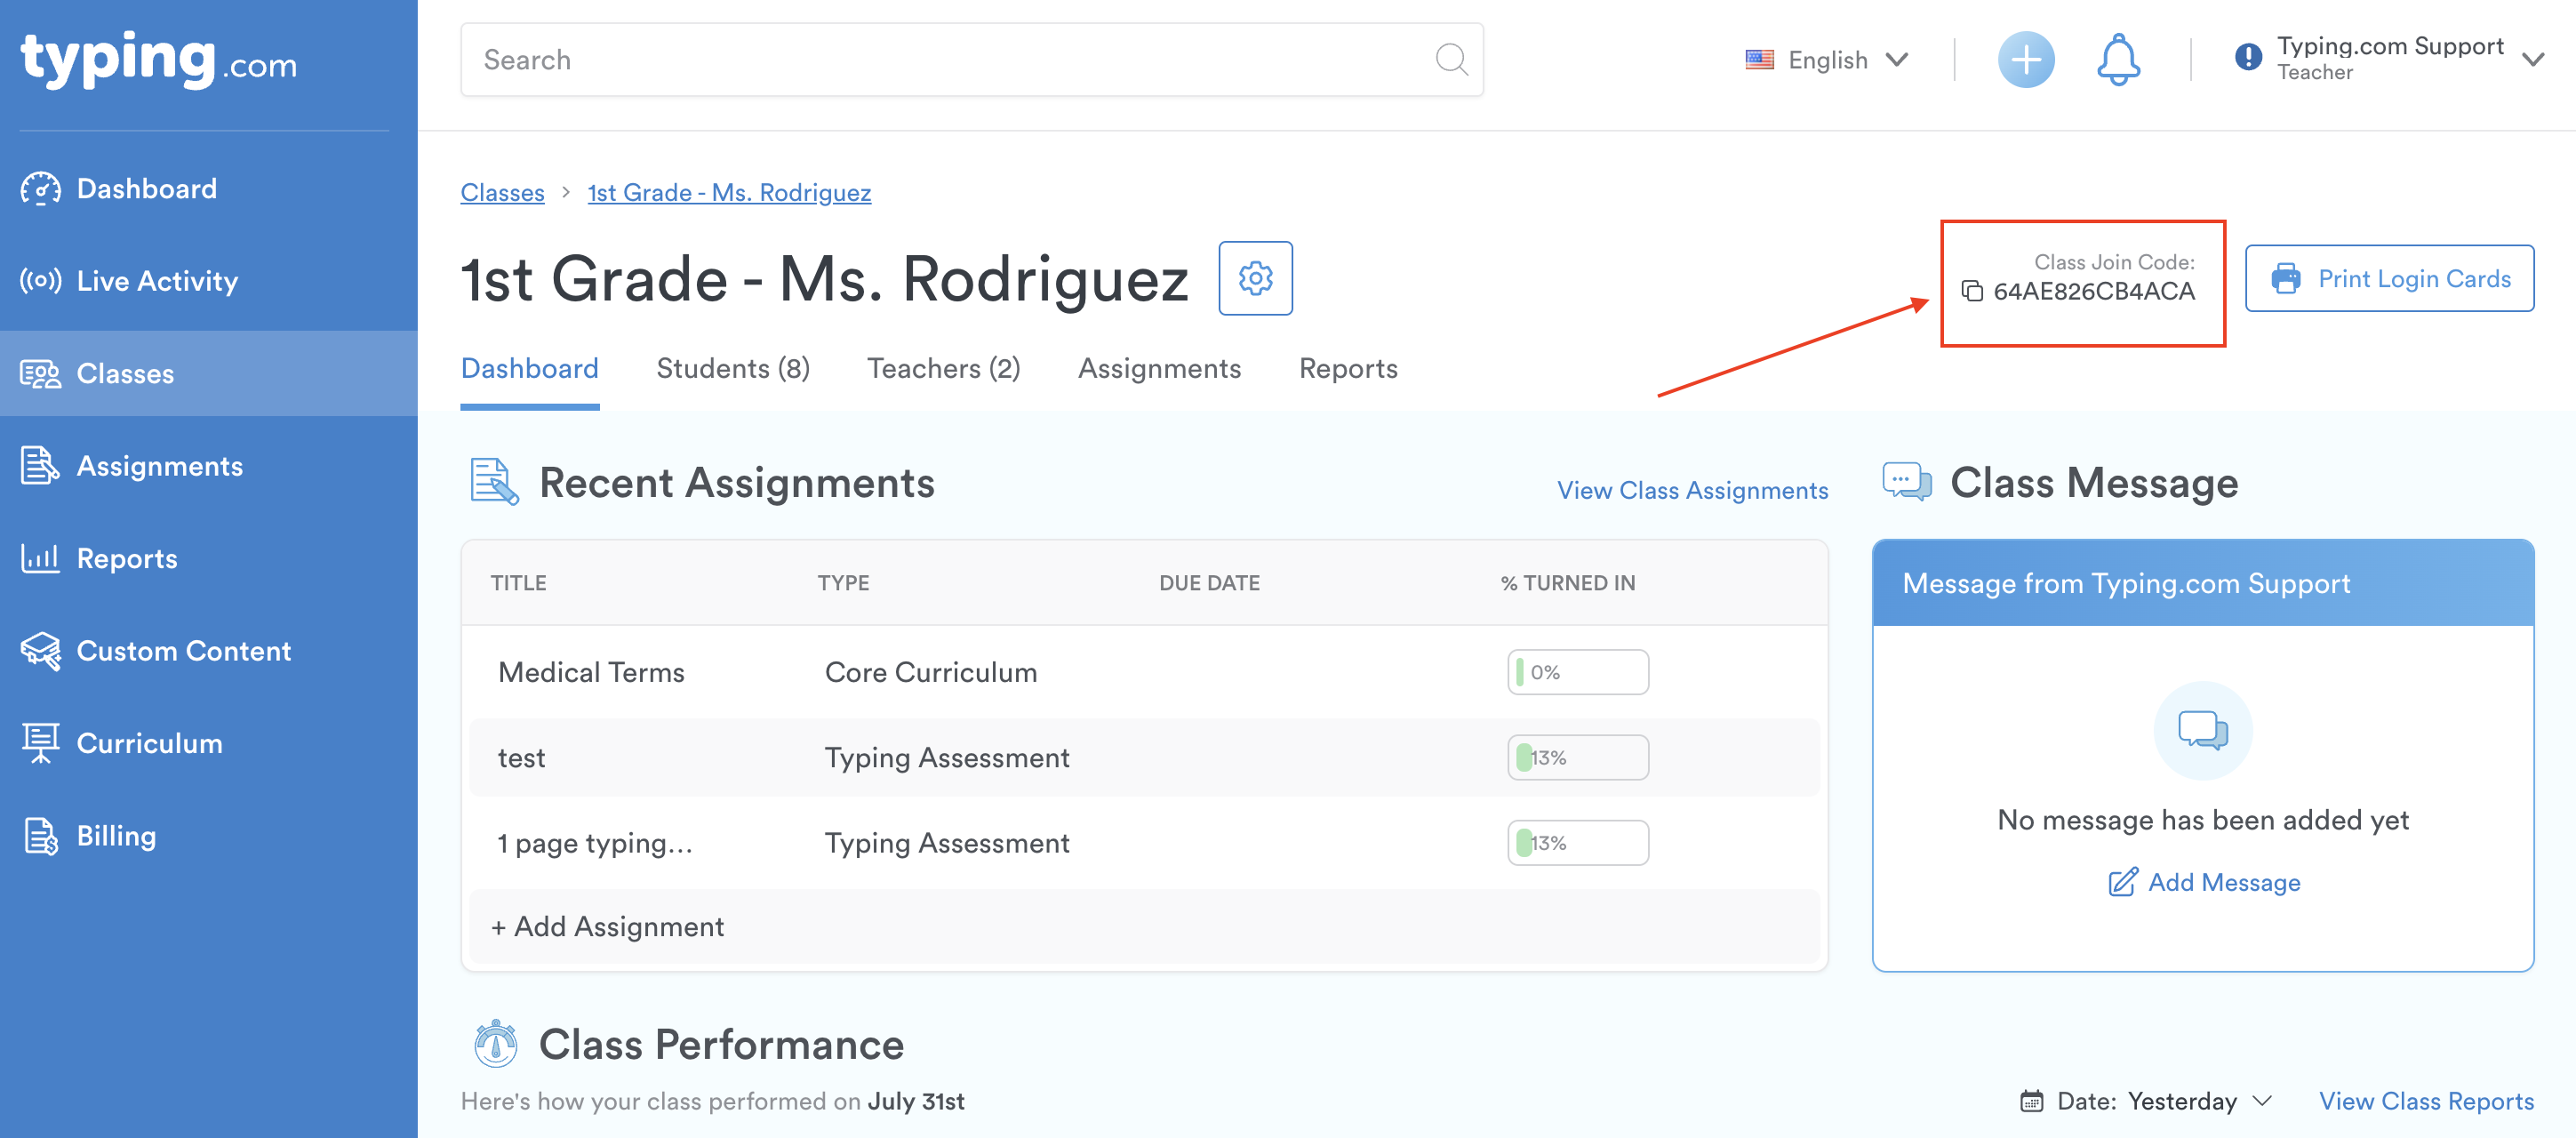
Click on the "Class Join-Code" located in the top-right corner of the screen to copy the link.
Note: If you don't see the "Class Join-Code," it’s because your classes are rostered via Clever, ClassLink, Google Classroom, or MS Teams, and you won’t be able to use the self-join link or the join-code.
When should I use the Self-Join Link?
Use the self-join link when students need to join a new class. They can either move their existing student accounts from one class to another or join with a brand new account. As a teacher, you are responsible for sharing the self-join link with your students.
How do I use the Self-Join Link?
Log into your teacher account.
Click on "Classes" on the left sidebar.
Select one of the classes.
Click on the "Class Join-Code" in the top-right corner to copy the link.
Share the Self-Join Link with your students.
Ask students to open the Self-Join Link in a new browser window.
Students will see options to join your class either with a new account or an existing account.
Finally, go back to the teacher portal and accept the students' requests to join the class.
Join-Code
What is the Join-Code?
The Join-Code is a unique code that students can use to join a class with an existing student account.
Note: The student must have an existing student account to be able to use the Join-Code
Where can I find the Join-Code?
To find the Join-Code:
Log into your teacher account.
Click on "Classes" in the left sidebar.
Select any class.
Click on the "Class Join-Code" in the top-right corner to copy the code.
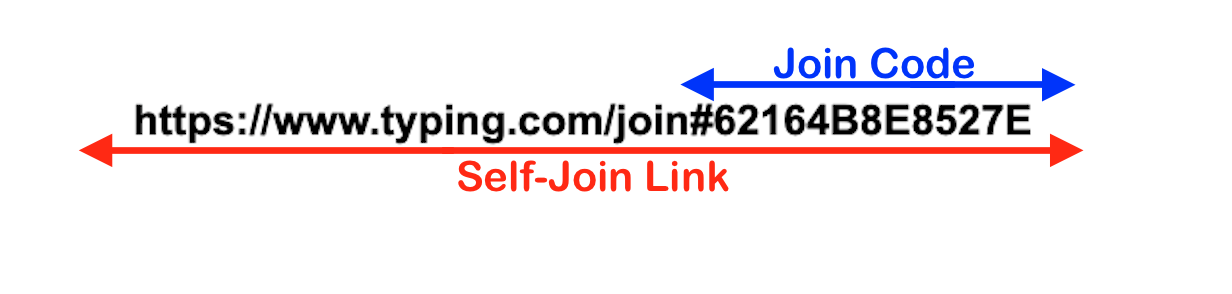
Note:If you don’t see the "Class Join-Code," it’s because your classes are rostered via Clever, ClassLink, Google Classroom, or MS Teams. Also, ensure you copy only the Join-Code, which is the last part of the Self-Join Link after the "#" symbol.
When should I use the Join-Code?
Use the Join-Code when students need to join a new class. They will be able to move their existing student accounts from one class to another using this code. As a teacher, you are responsible for sharing the Join-Code with your students.
How do I use the Join-Code?
Go to your teacher account.
Click on "Classes" on the left sidebar.
Select one of the classes.
Click on the "Class Join-Code" in the top-right corner and copy only the Join-Code (the part after the "#" symbol).
Share the Join-Code with your students.
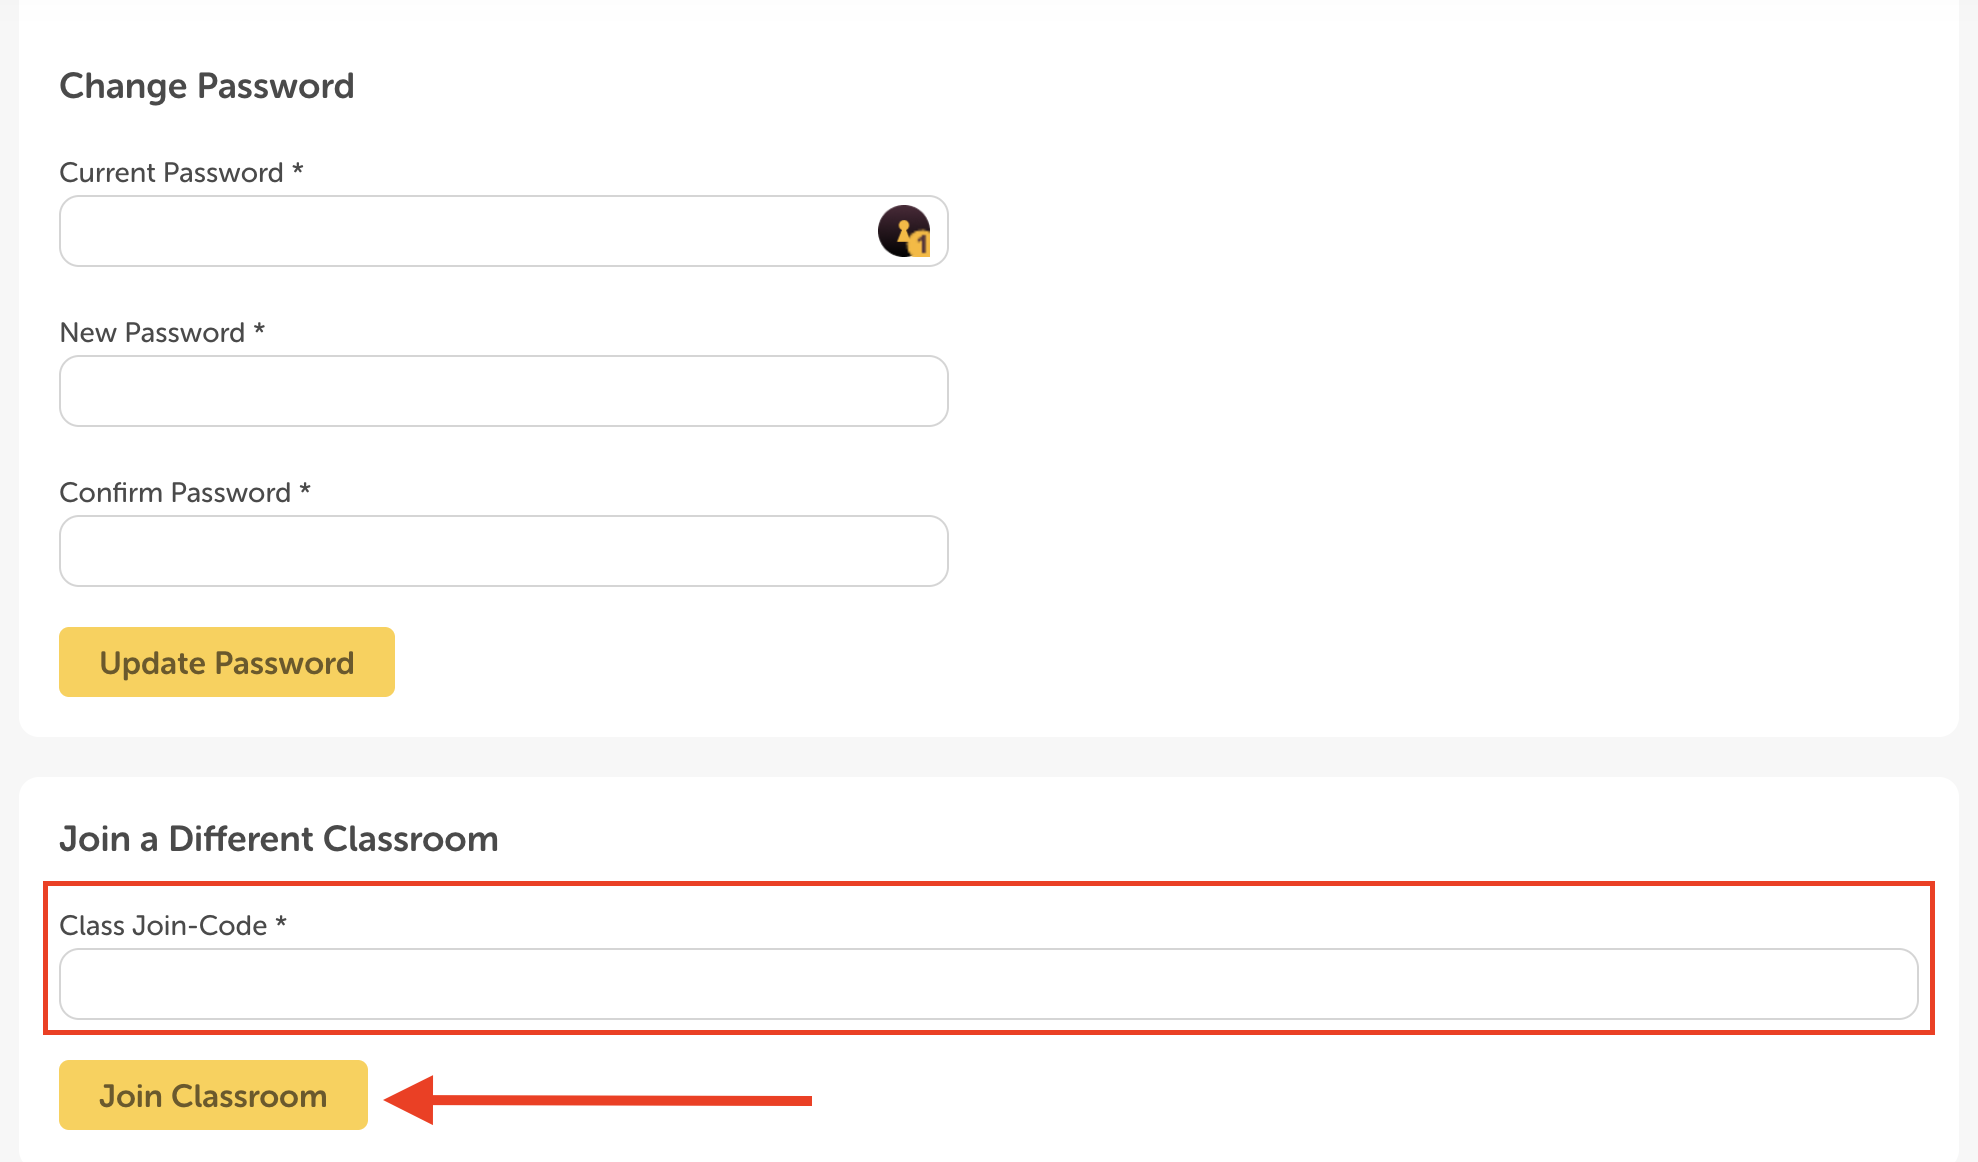
Ask students to log into their Typing.com accounts and click on "Account Settings.

Paste the Join-Code in the "Class Join-Code" field and click "Join Classroom."
Finally, go back to the teacher portal and accept the students' requests to join the class.
Edit the Join-Code
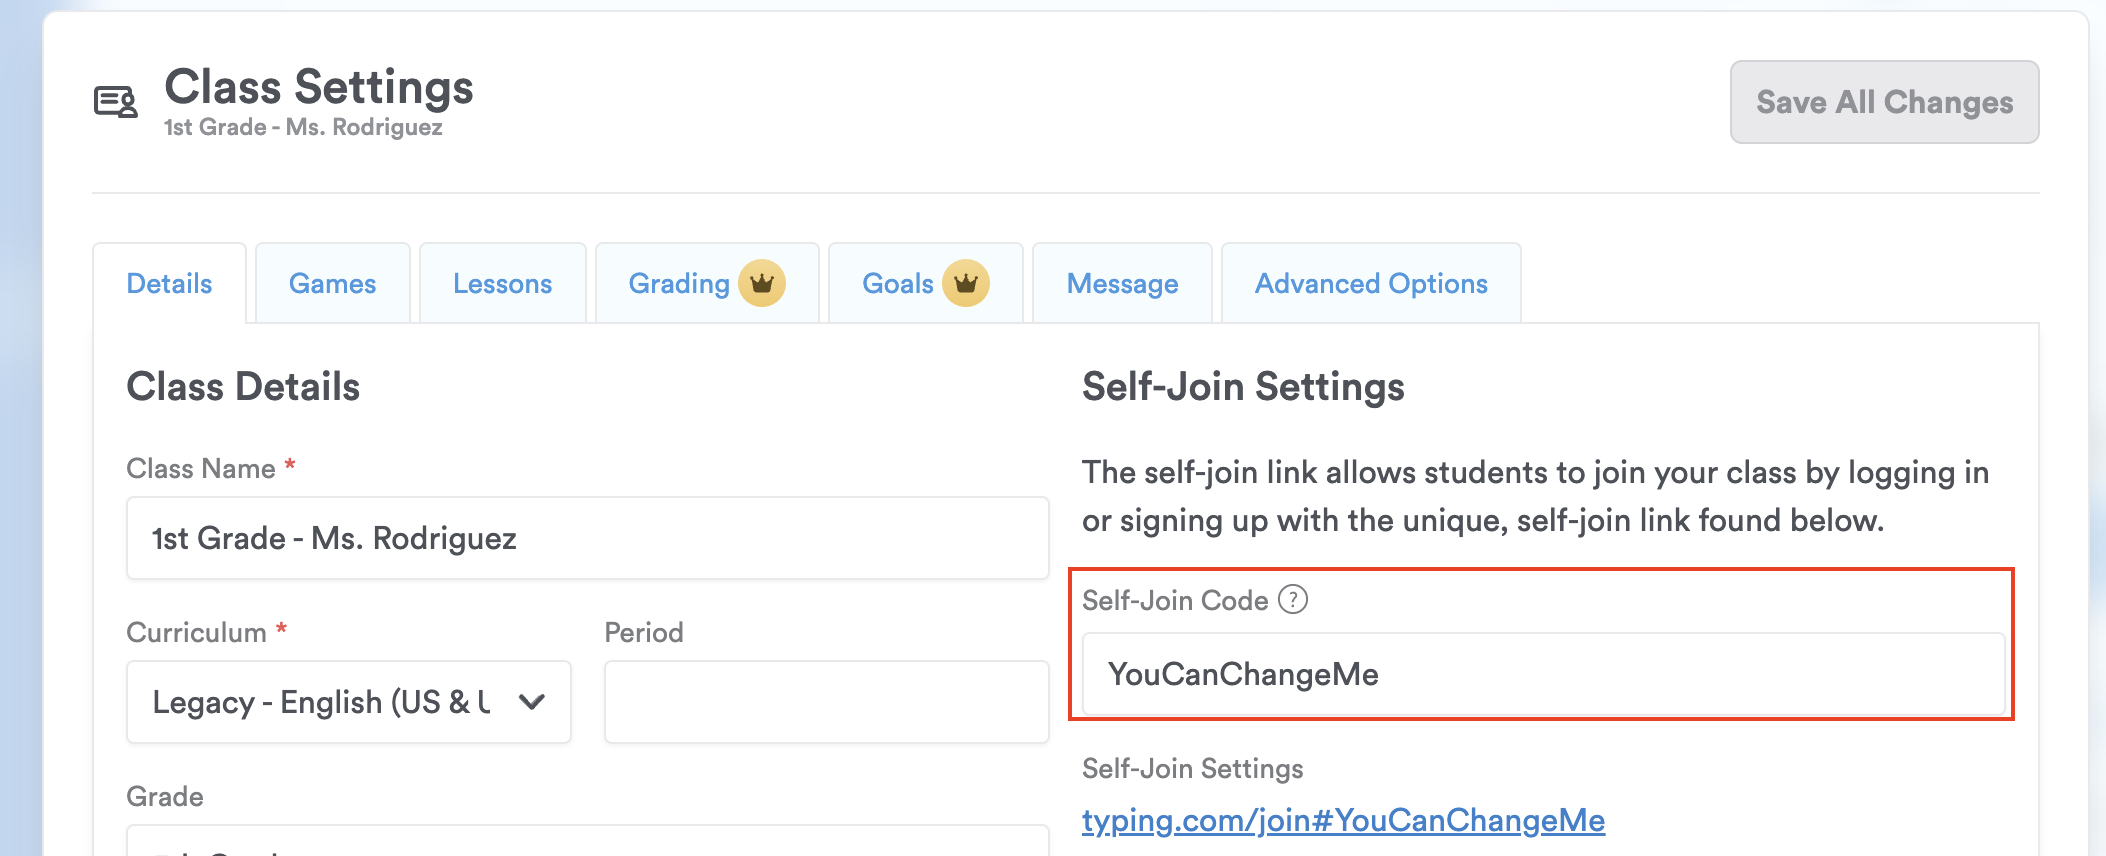
By default, the Join-Code will be a series of numbers and letters. Teachers can change the Join-Code to something easier to remember, like "ilovecats."

How can I edit the Join-Code?
Log into your teacher account.
Click on "Classes" on the left sidebar.
Hover over one of the classes and click on "Edit" on the right side.
Edit the Join-Code and click "Save all changes."
We hope this helps you manage your classes more effectively. If you have any questions or need further assistance, our support team is always here to help at support@typing.com!