
Print Login Cards (Teacher)
When your class starts, the first step is having students log into their accounts. You can help your students by printing login cards so they always remember their login information. These cards can be kept by the students or managed by you. This way, your students will never forget their passwords, emails, or usernames. Let’s get started!
Pro-Tip 1: If you're syncing your classes via Google Classroom, Microsoft Teams, Clever, or ClassLink, you won't be able to print login cards. Typing.com doesn't store this information (passwords) if the accounts are syncing through any of those platforms.
Step 1: Log in to your Teacher Portal HERE.
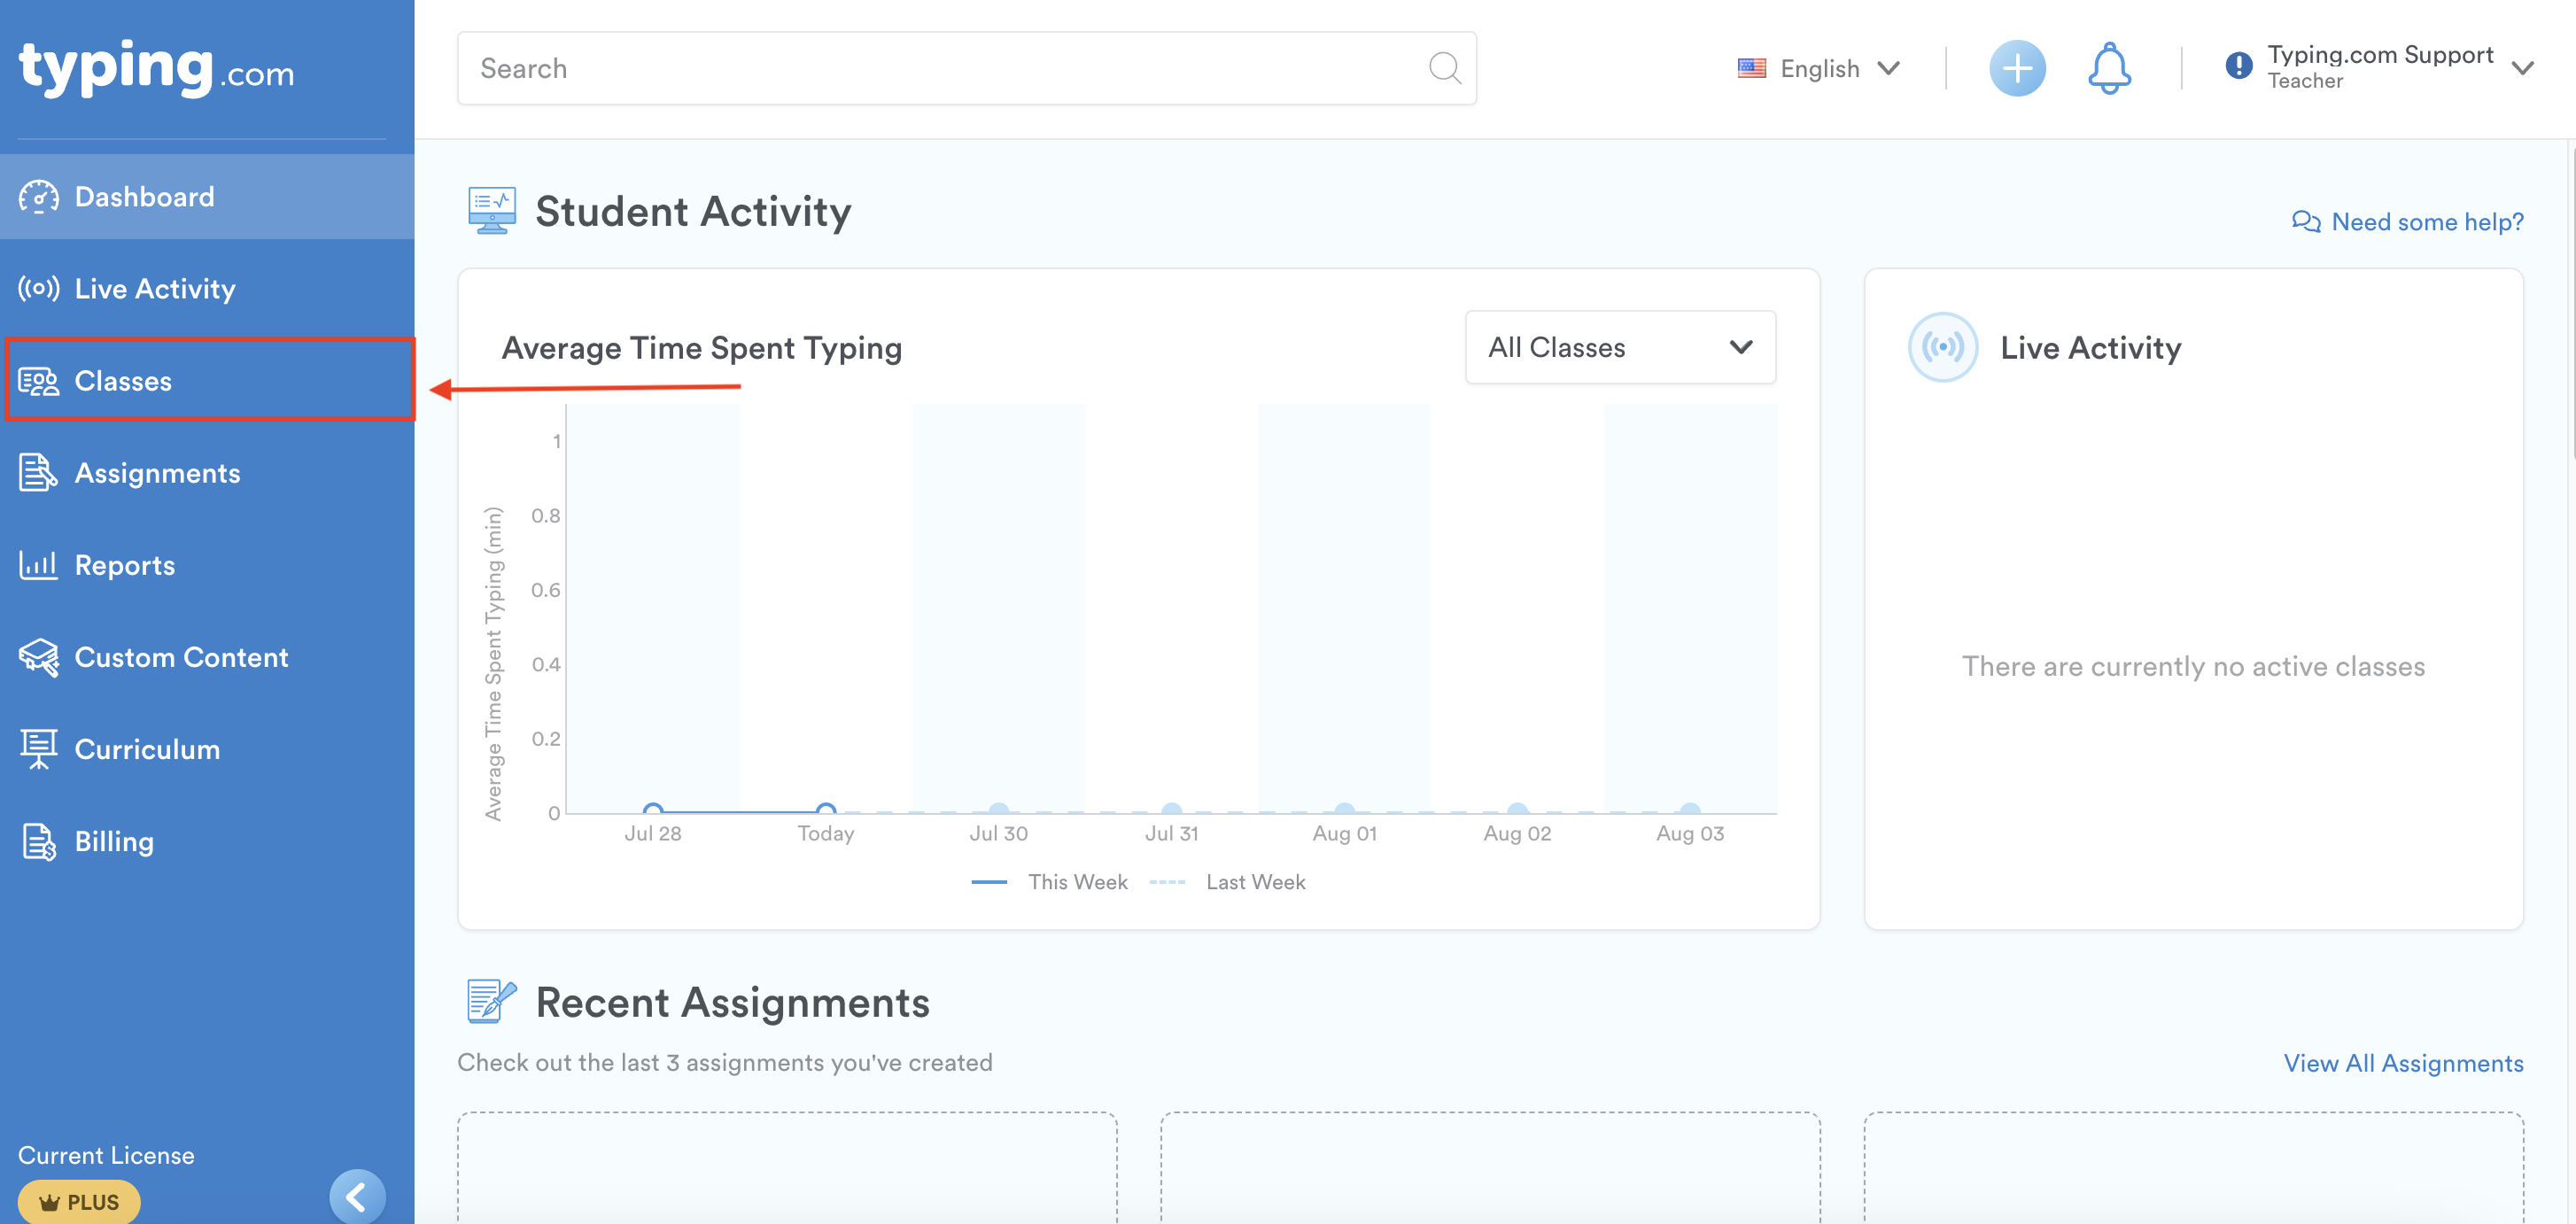
Step 2: Click on “Classes”
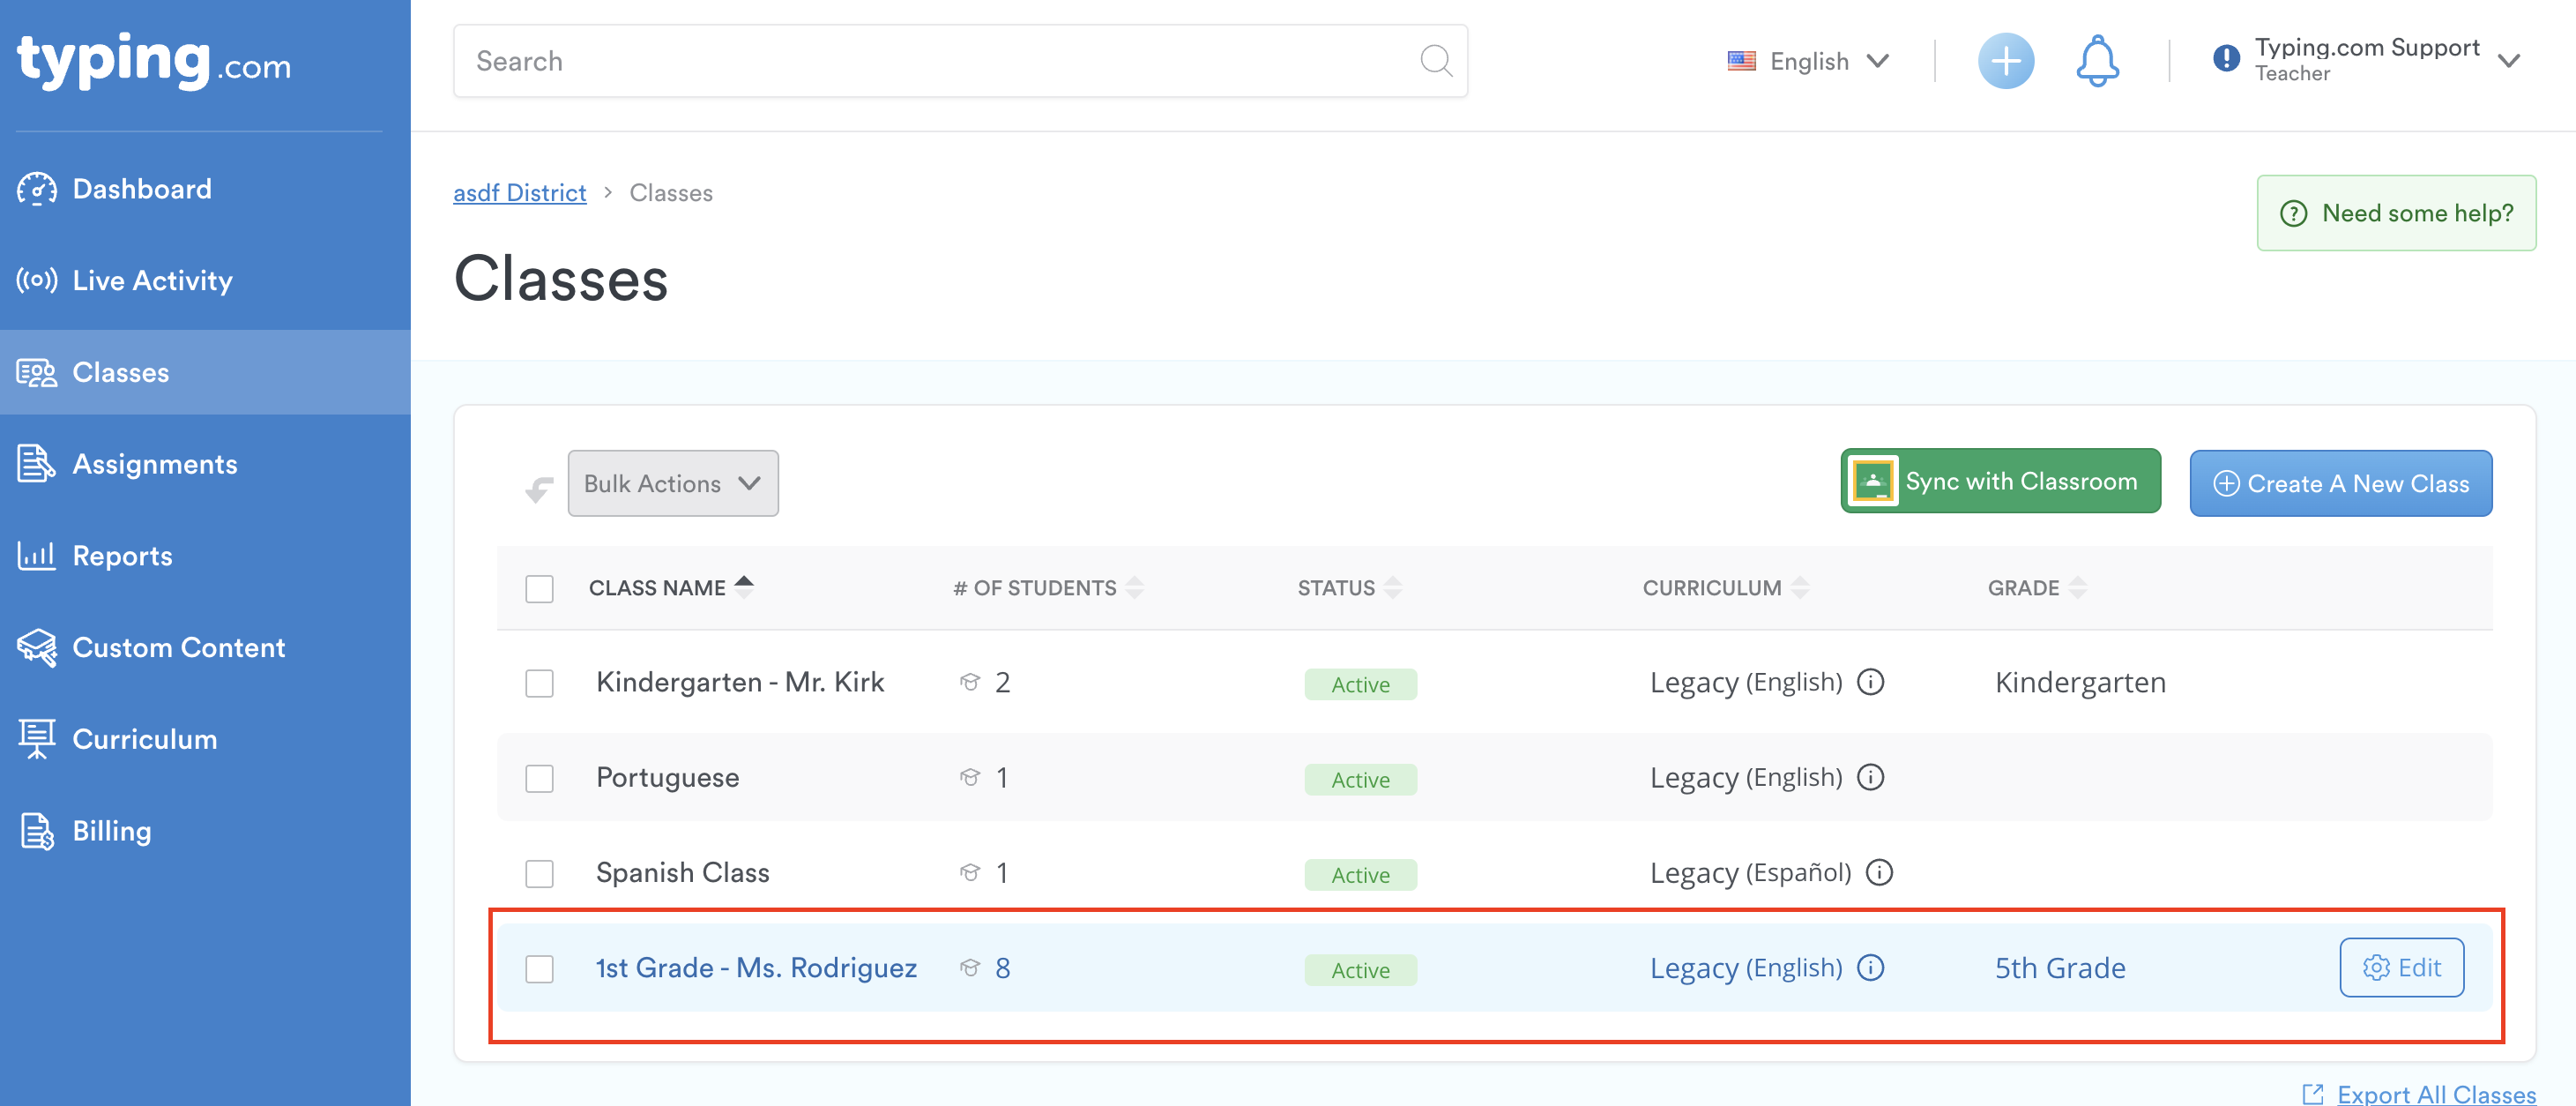
Step 3: Select the name of the class for which you want to print login cards.
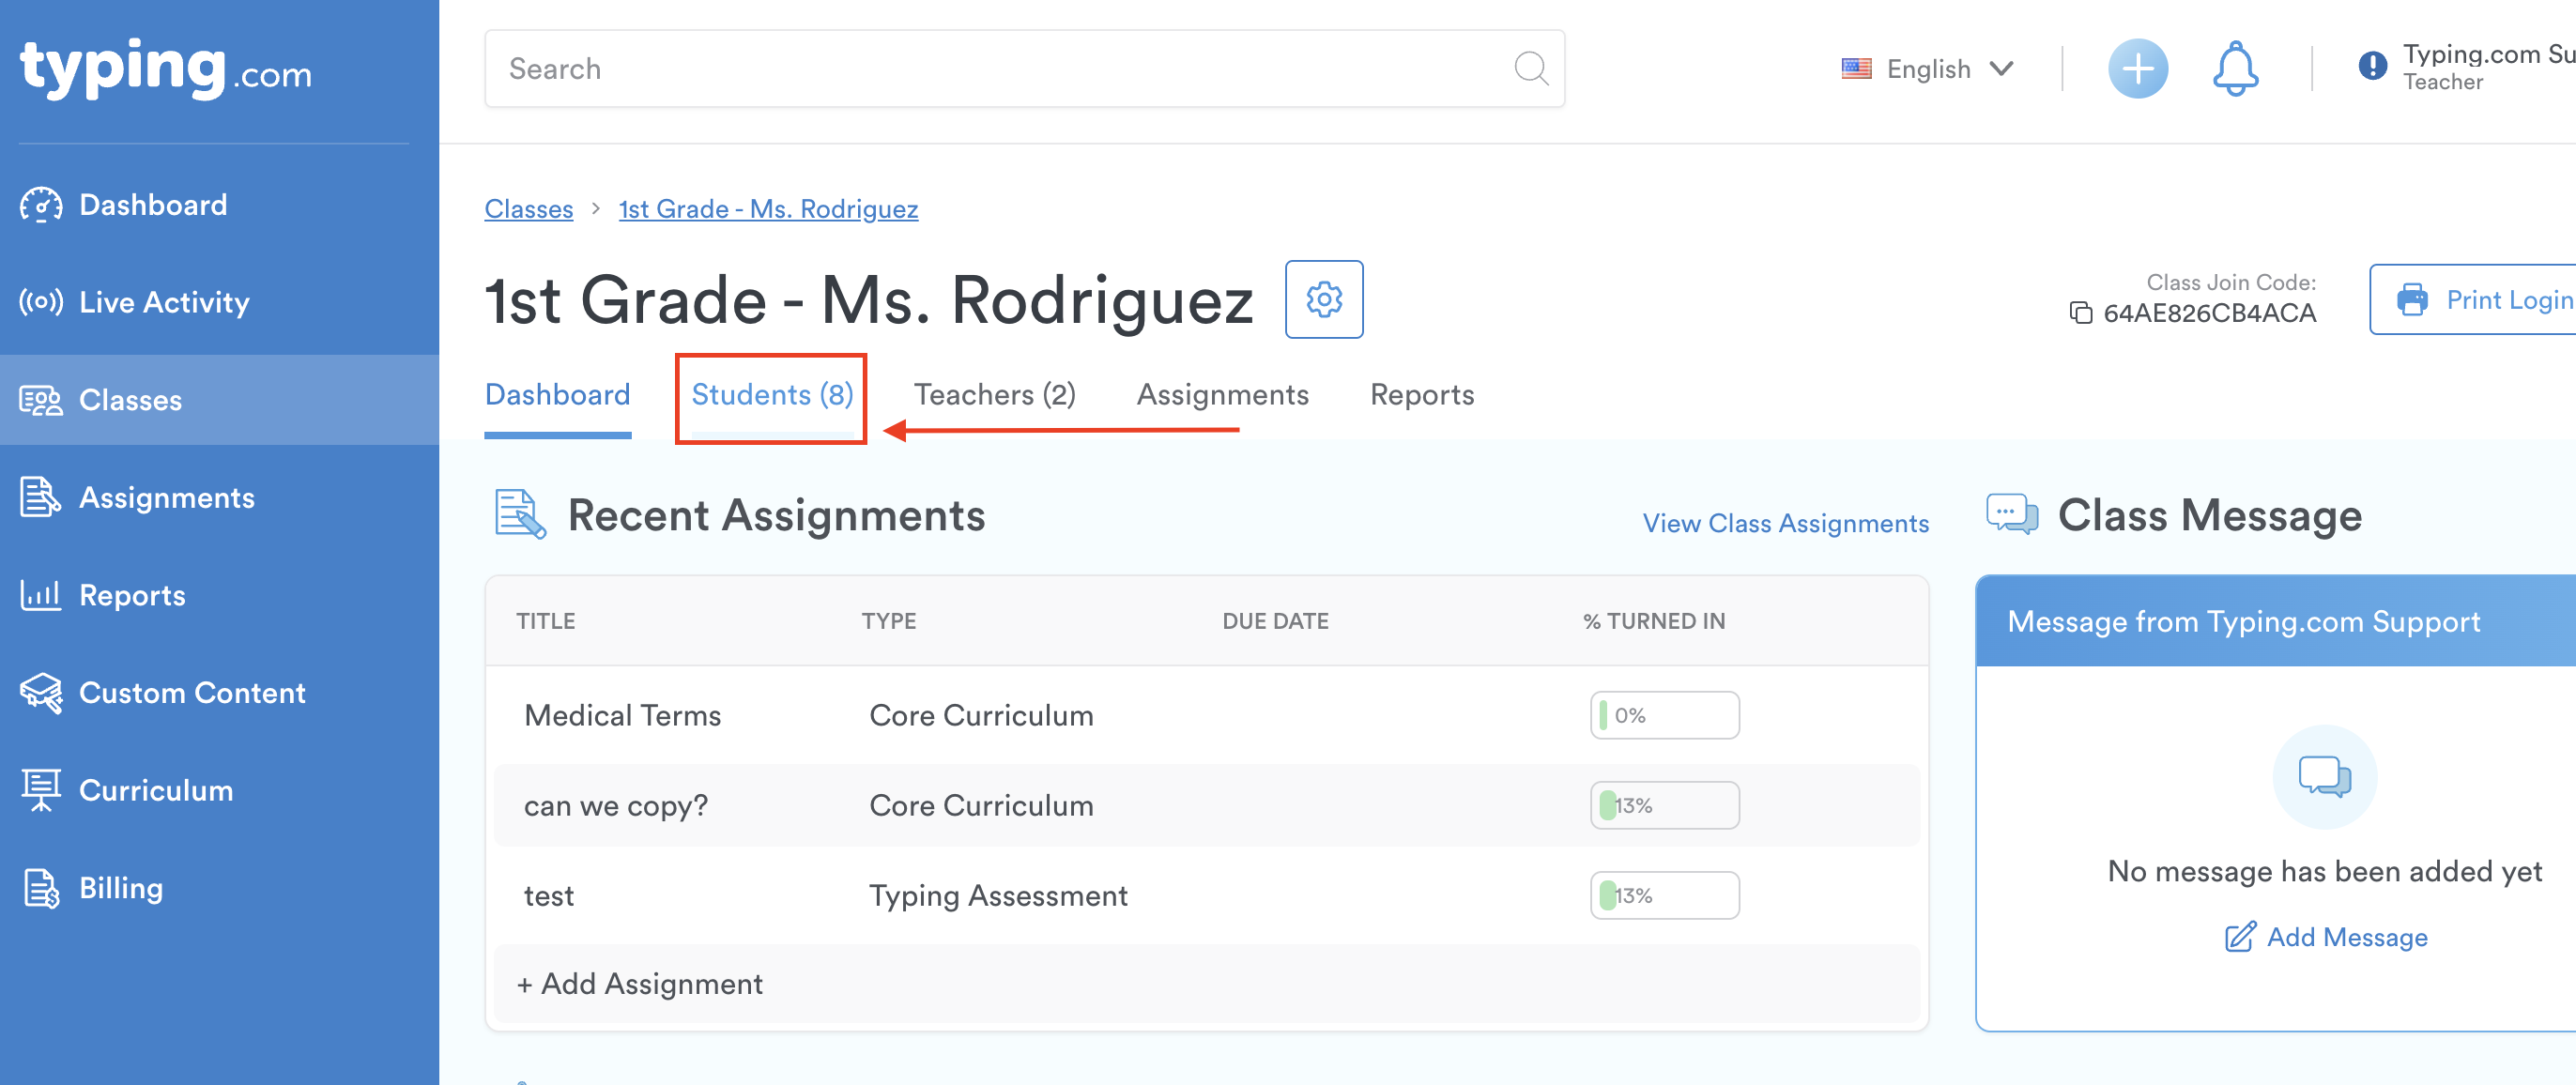
Step 4: Once inside the class page, click on the 'Students' tab to access the class roster.
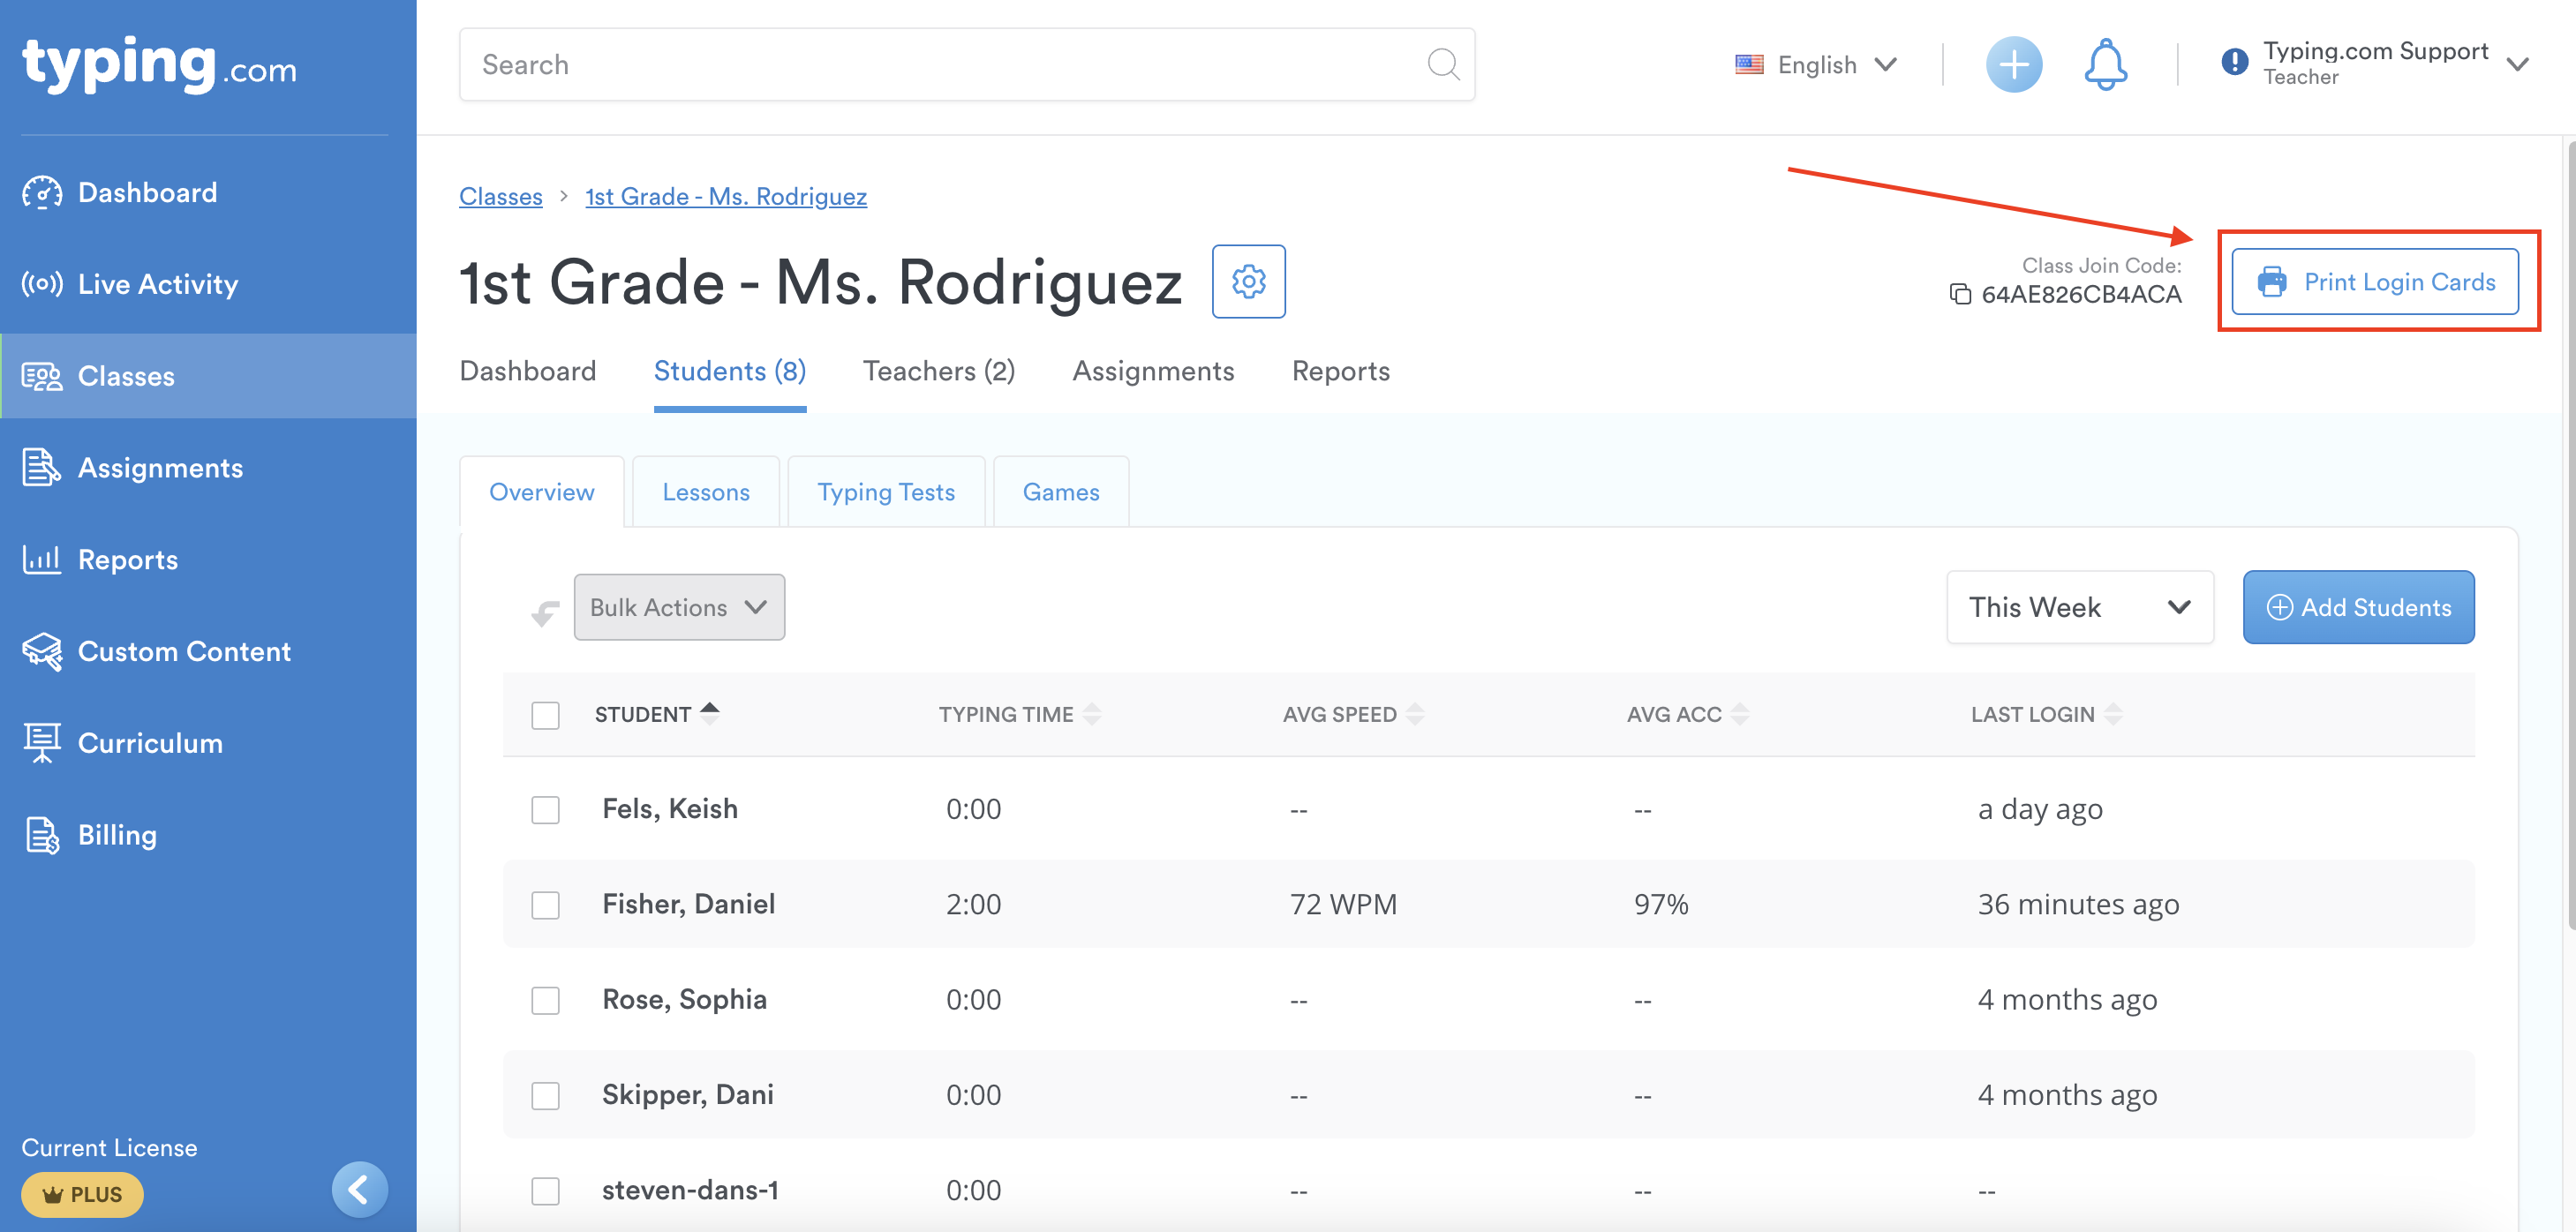
Step 5: Click on 'Print Login Cards' on the right-hand side to print the entire class roster.
Step 6: A new window tab will open where you can print or download the login cards. Click the “Print” 🖨button.
Printing Individual Student Login Cards
Sometimes, you might need to print login cards for just one or a few students. Here’s how:
Step 1: Select the student(s) by clicking the white box to the left of the username/name. A checkmark will appear.
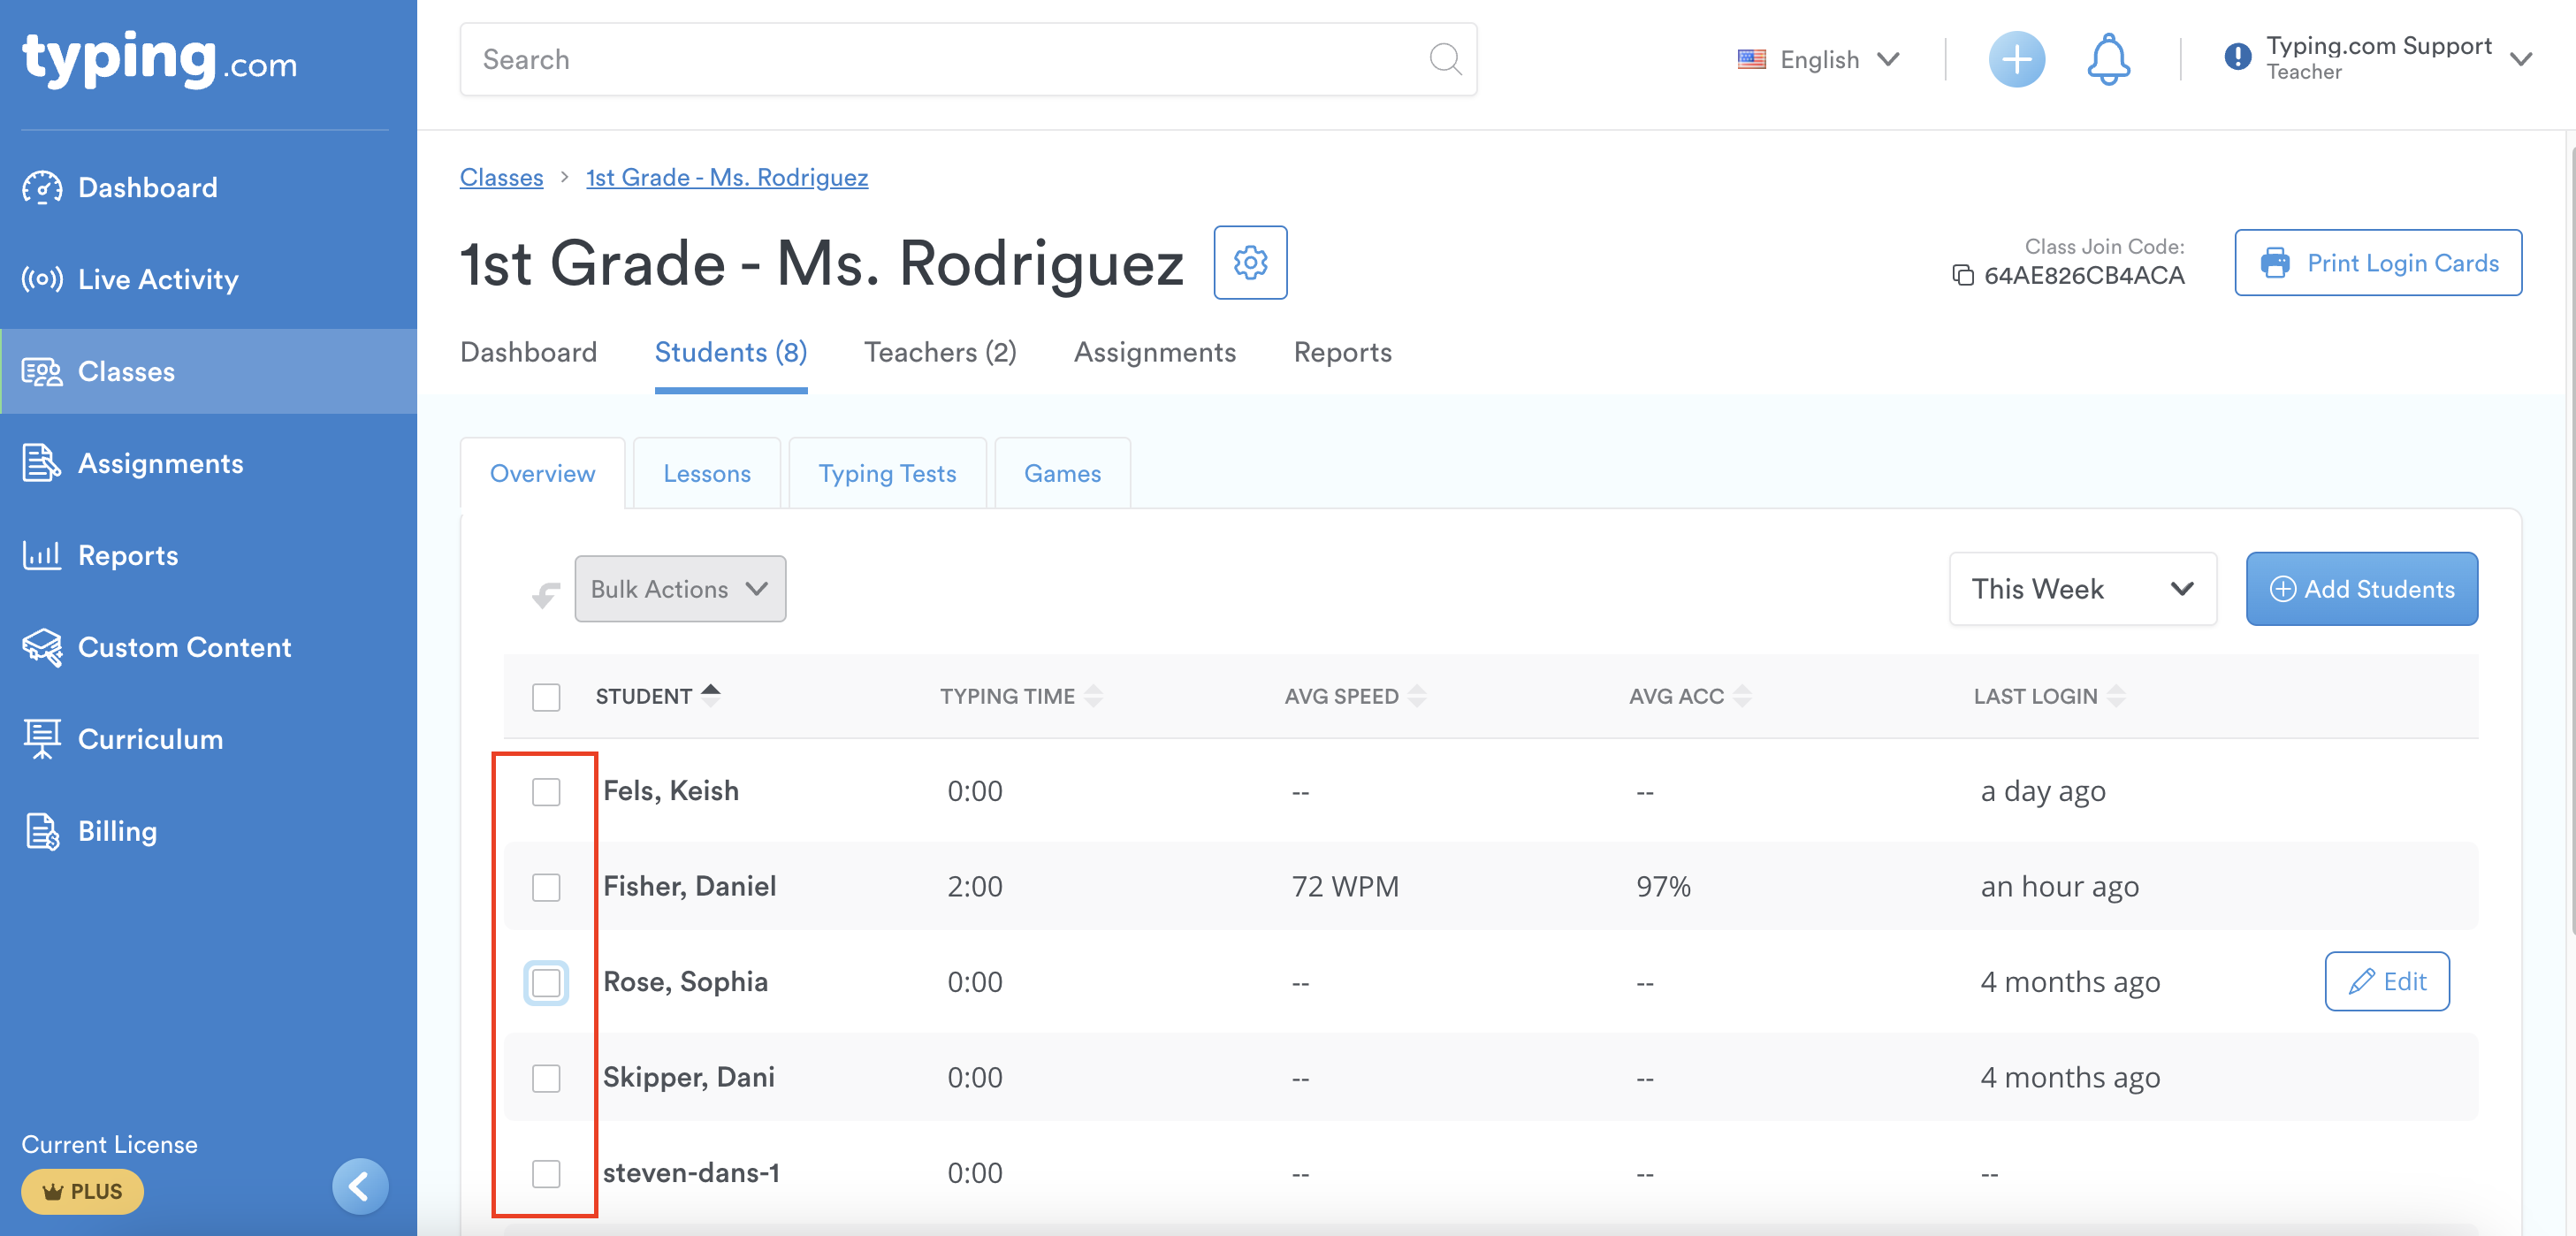
Step 2: Click on “Bulk Actions” and select “Print Login Cards” from the dropdown menu.
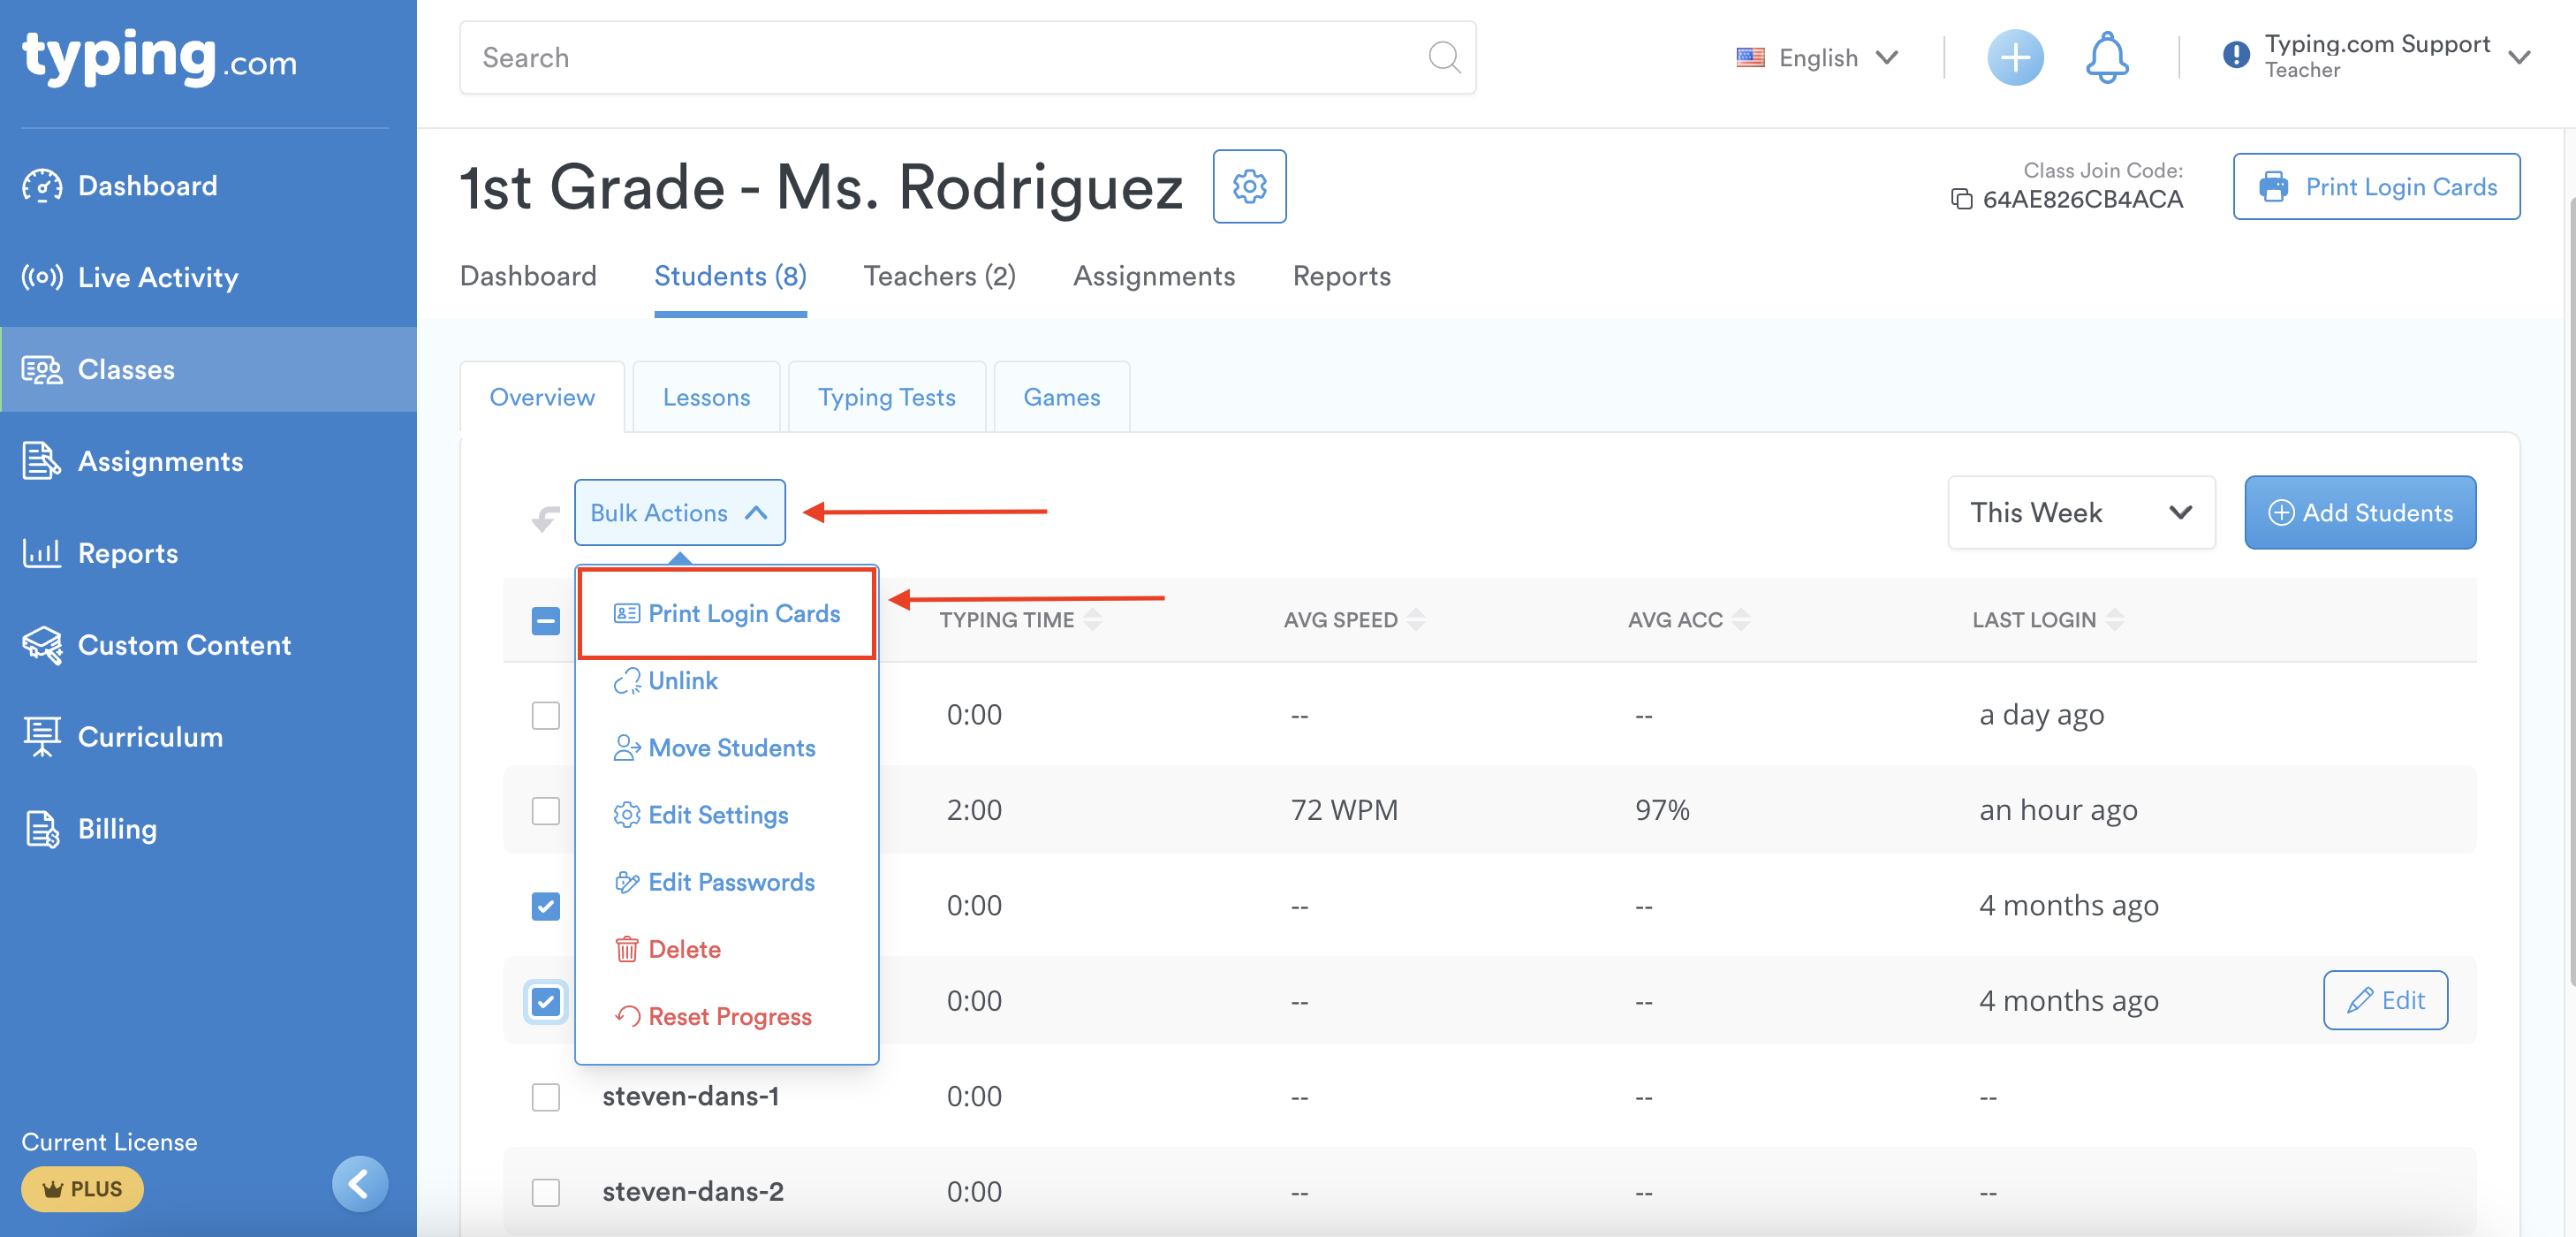
Step 3: A new window tab will open where you can print or download the login cards. Click the “Print” 🖨button.
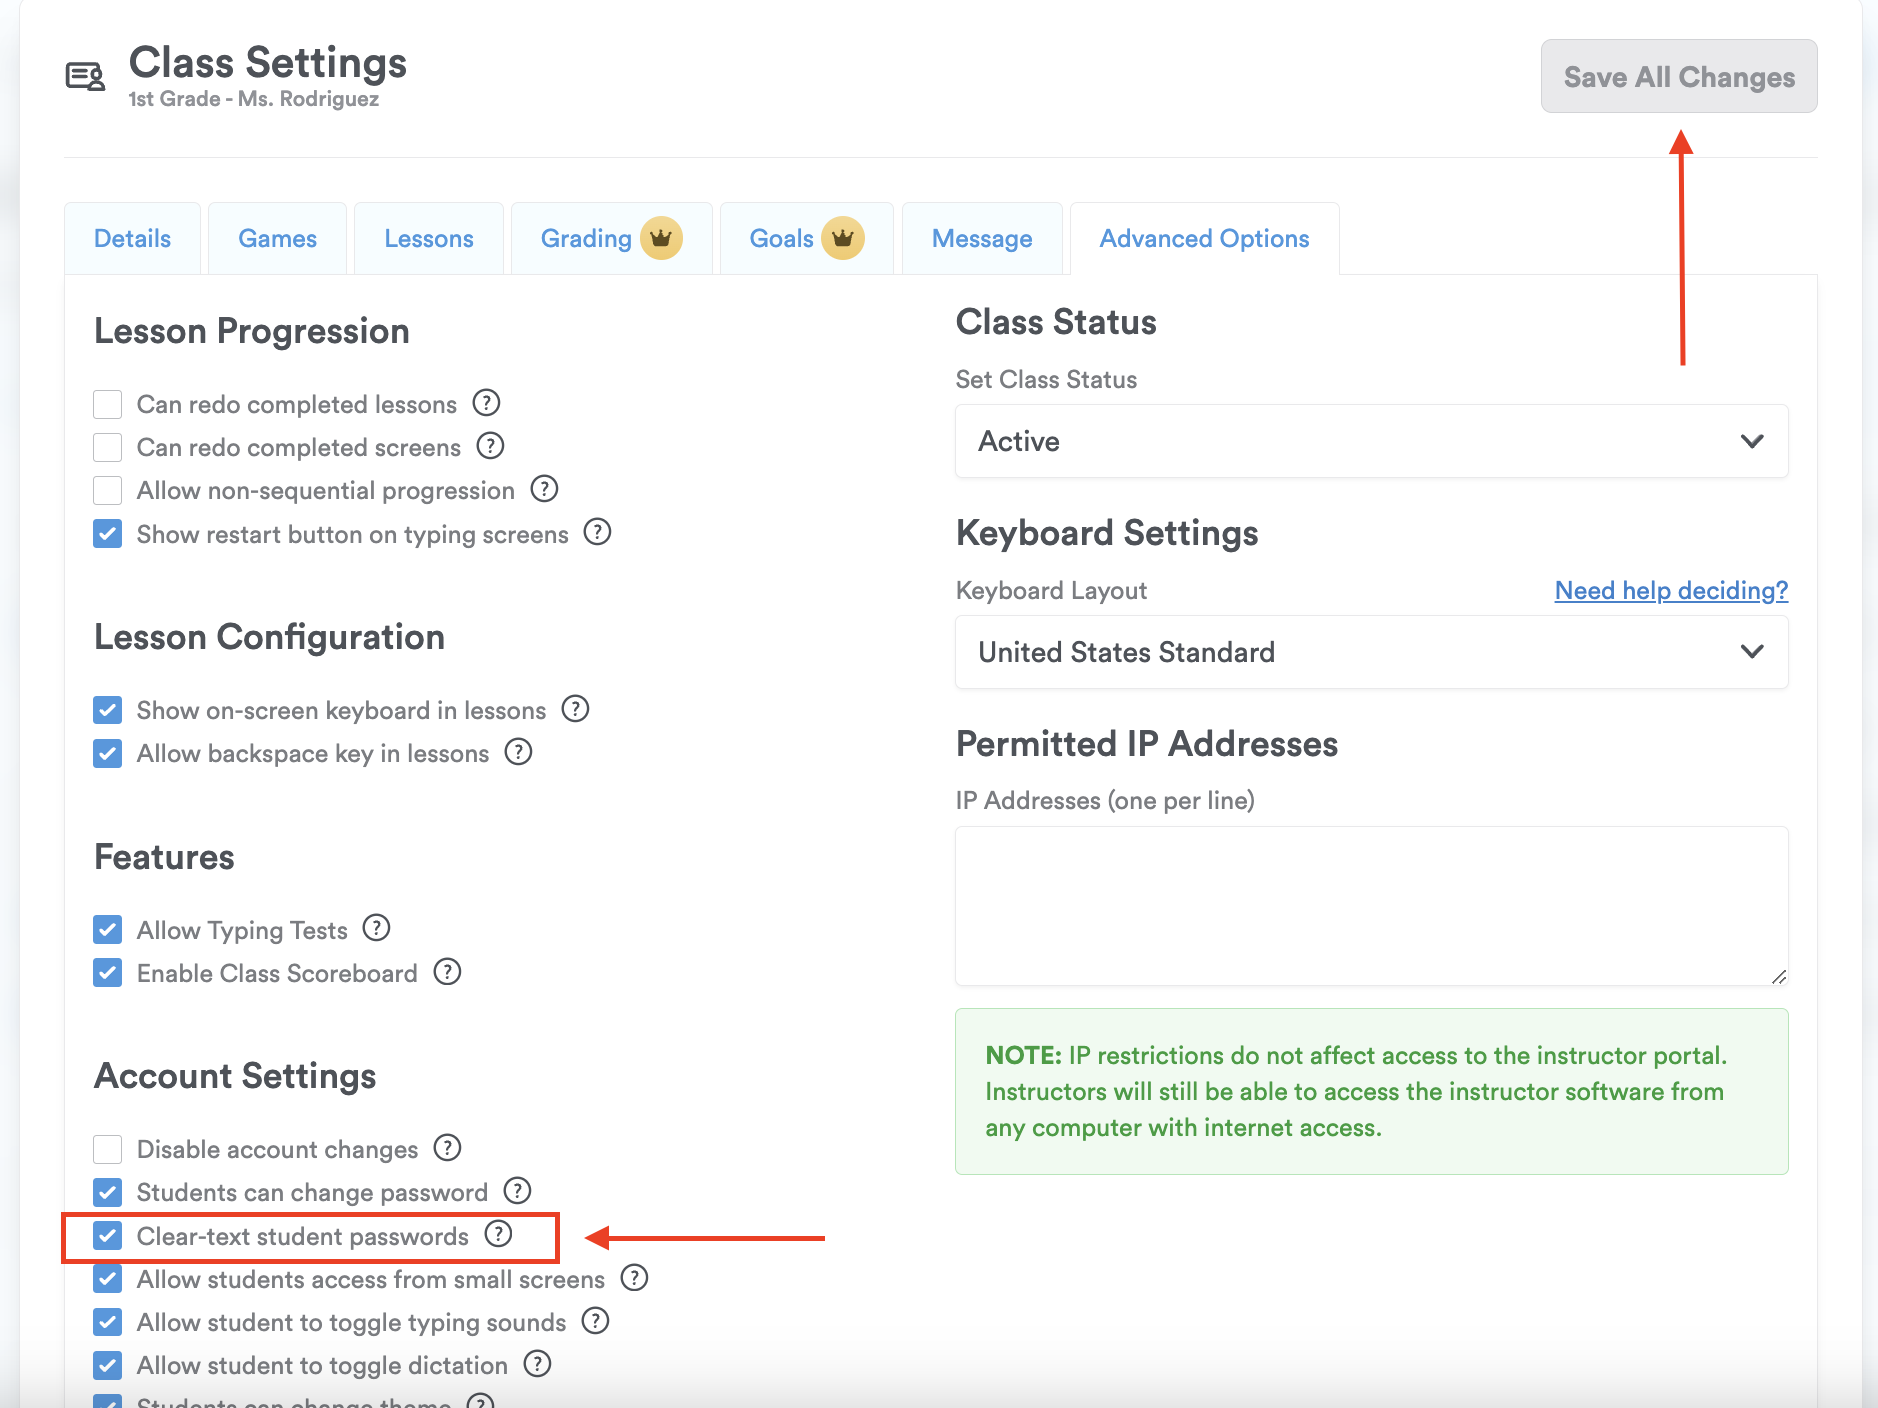
Pro-Tip: If the password is encrypted, go to the class's settings and click on the "Advanced Options" tab. Check the box that reads "Clear-text student passwords," then click "Save All Changes."
That’s it! Now you know how to print login cards. 😀