
How to Create an Assignment (Teachers)
Ready to streamline your students' learning experience? With Typing.com, you can assign lessons that appear directly on your students’ dashboards, making it easier for them to stay on track. This feature is available with a PLUS account, and in this article, we’ll guide you through the process. Let's get started!
Note: This feature is only available with a PLUS account.
Video: https://www.youtube.com/watch?v=dE13YGCqzZQ&t=12s
Pro-Tips:
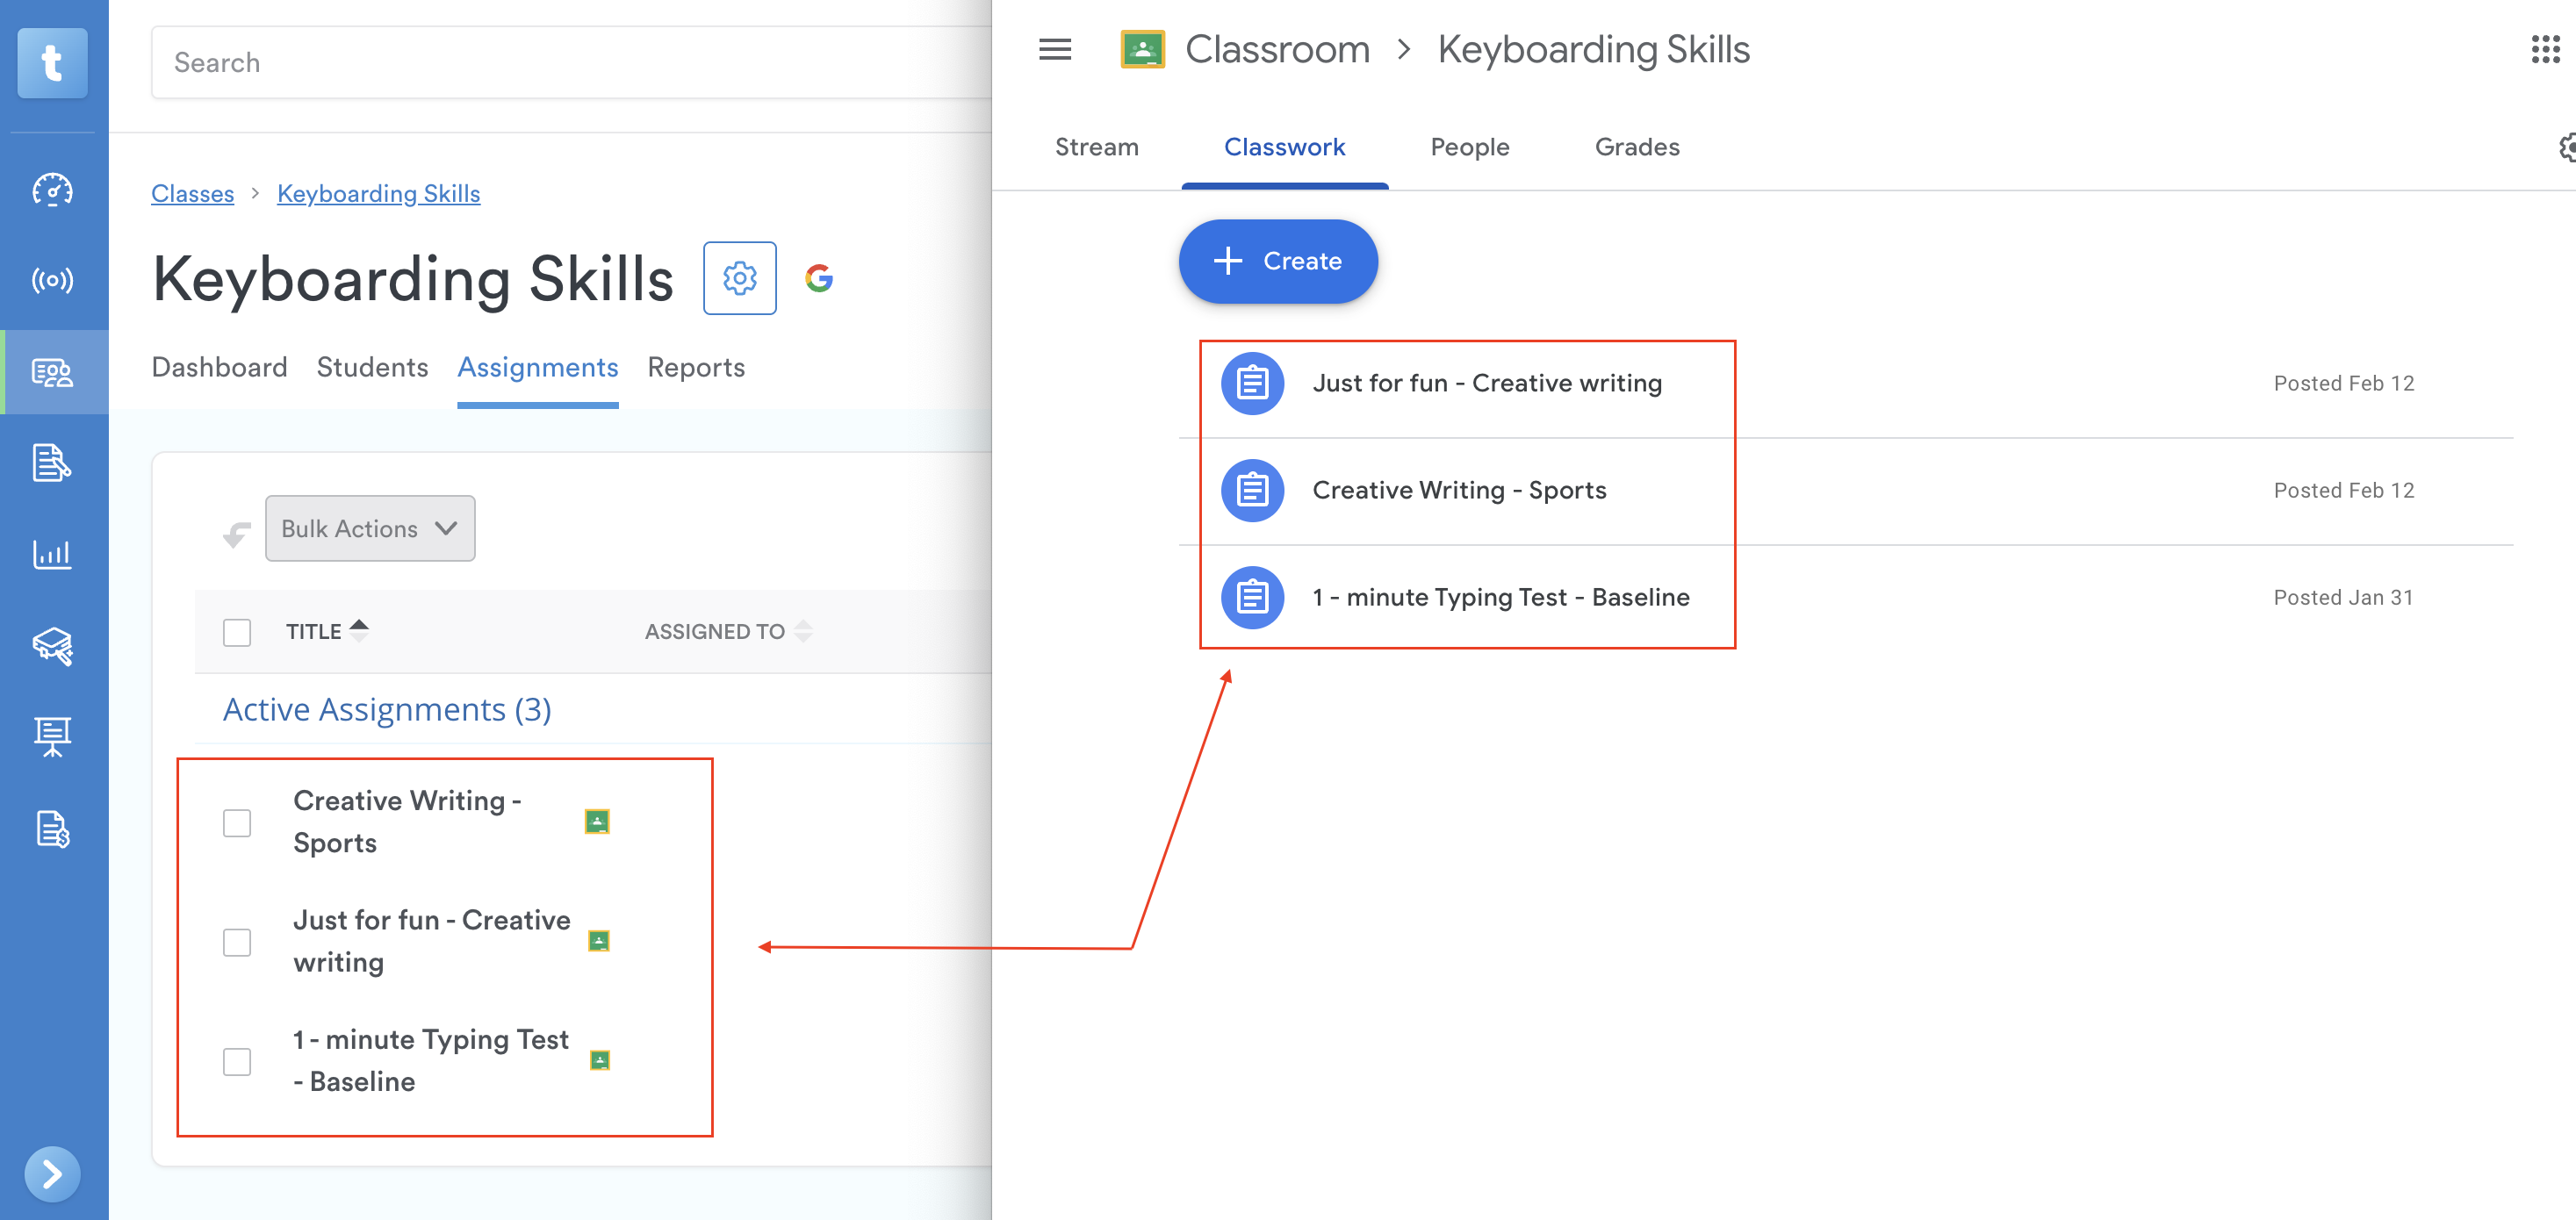
Google Classroom: You can create assignments in Typing.com and sync them with Google Classroom, but you cannot create assignments directly in Google Classroom.
Assignment Visibility: Once an assignment is submitted, already completed before assigned, or the due date passes, it will be removed from the student’s dashboard.
Lesson Availability: Ensure that the lessons for the assignment are enabled. If students don't see the assignment, check this setting HERE.
Curriculum Lessons: On the 'Curriculum' page, you can view the content of any lesson or timed test at any time by clicking the “View” button.
Steps to Create an Assignment
Method 1: From the Assignments Page
Step 1: Log in to your Teacher Portal HERE.
Step 2: From your Dashboard, click on the 'Assignments' tab in the blue menu on the left-hand side.

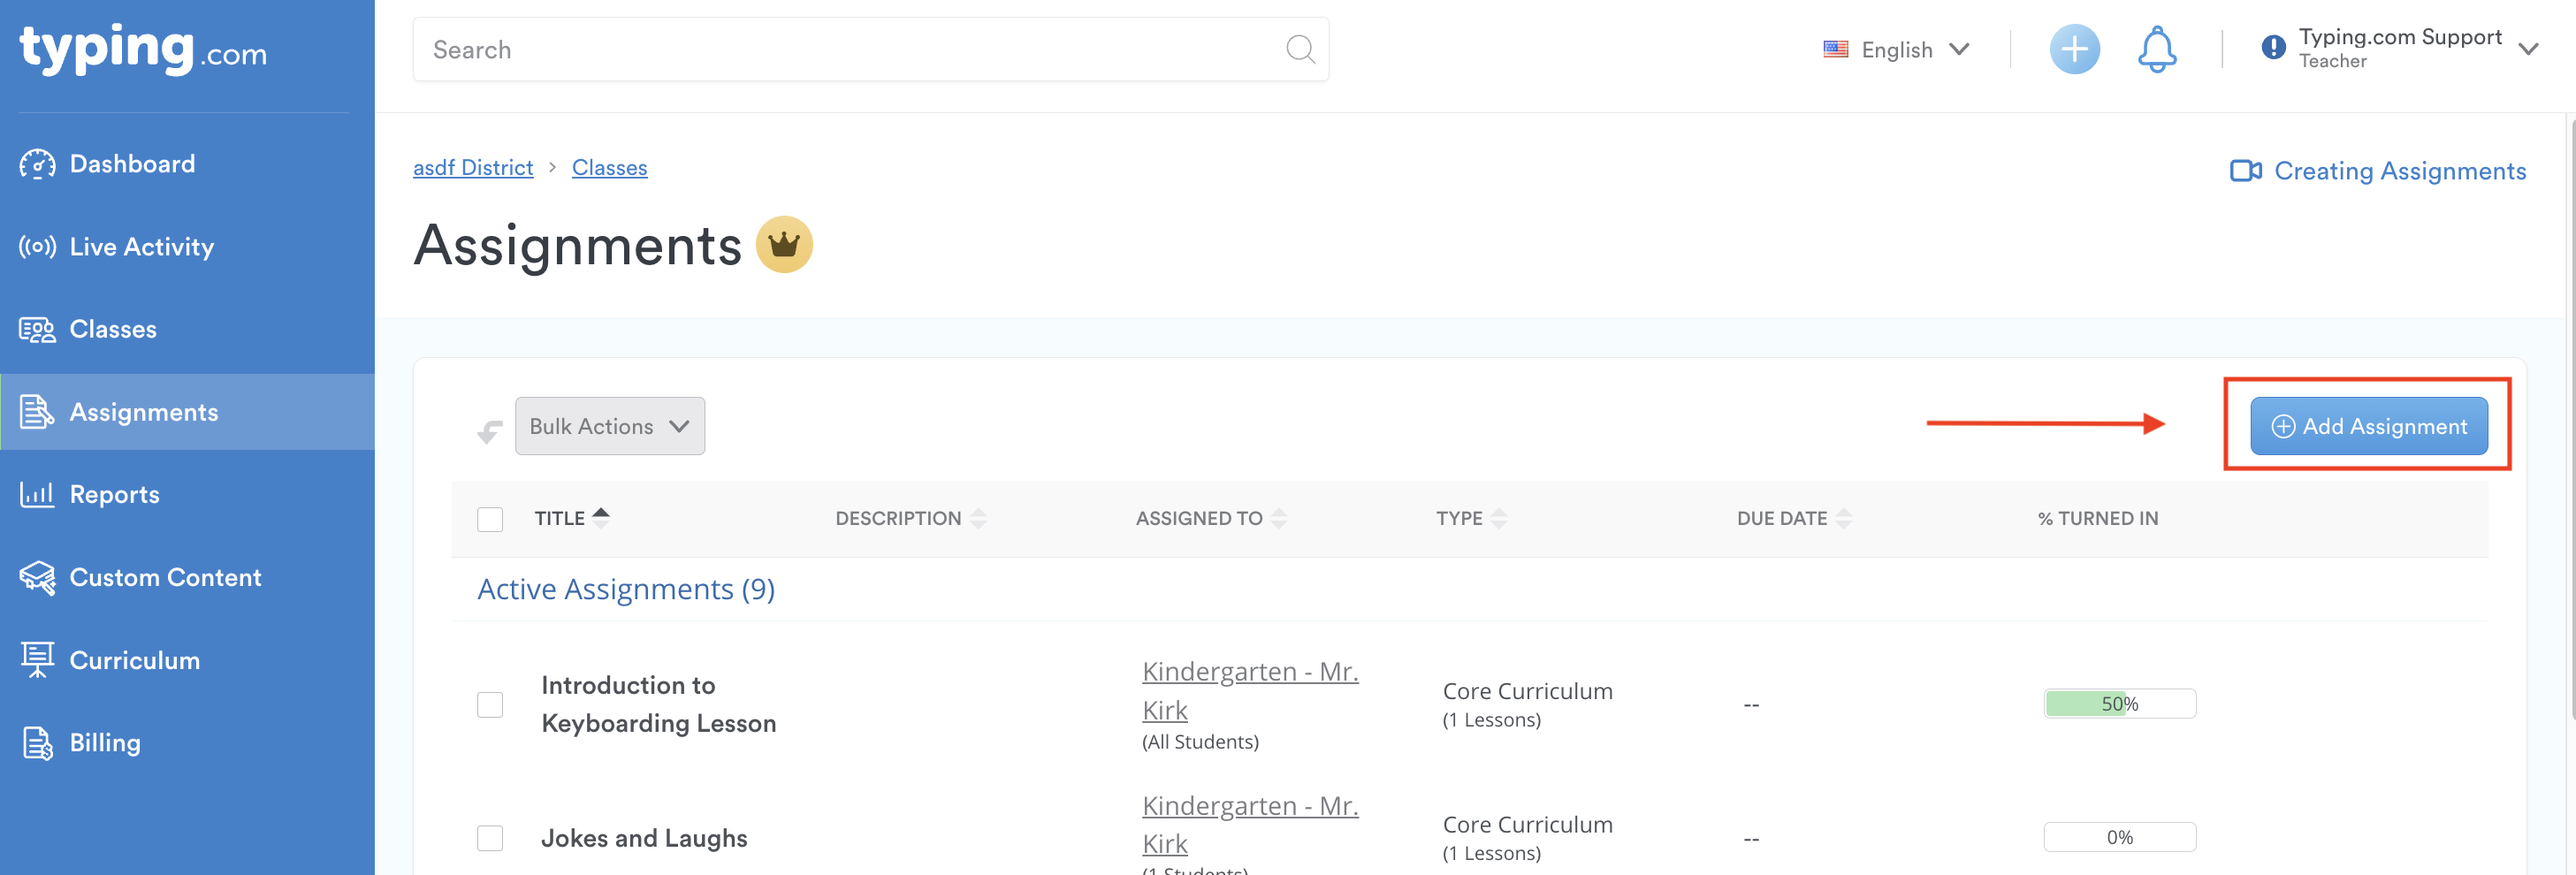
Step 3: Click the blue 'Add Assignment' button on the right-hand side. If no assignments have been created, the button will appear in the center of the page.
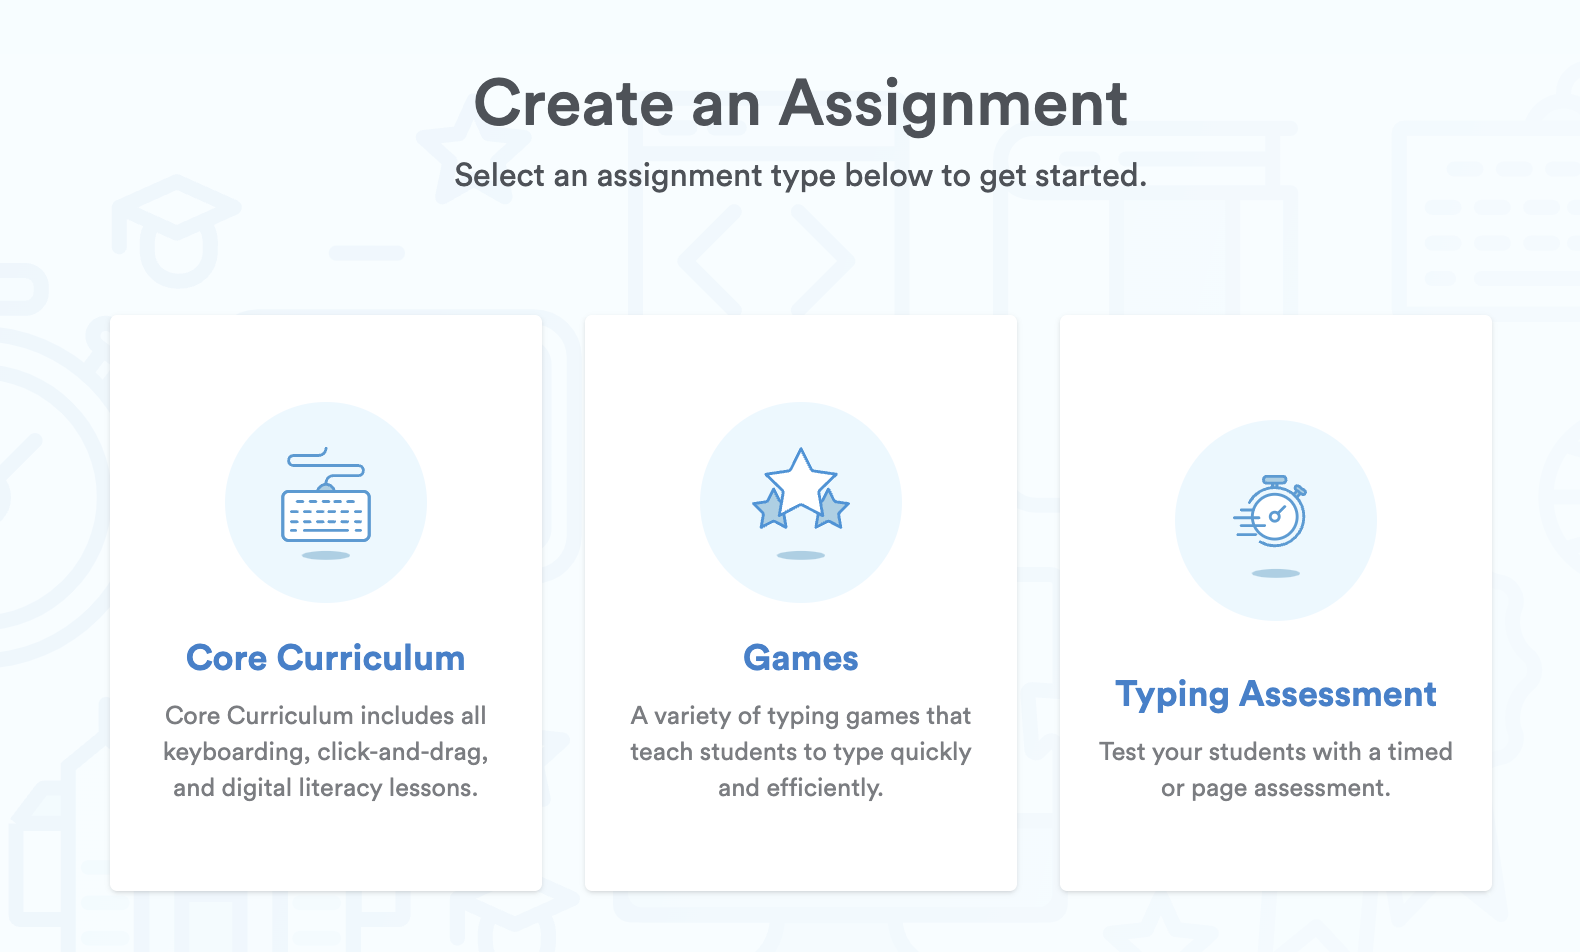
Step 4: Select the assignment type by clicking on one of the three options:
Core Curriculum: Includes all keyboarding, click-and-drag, digital literacy lessons, and custom lessons.
Games: A variety of typing games that teach students to type quickly and efficiently.
Typing Assessment: Test your students with a timed or page assessment. Includes Personalized Practice, and custom tests.
Step 5: Follow the screen prompts to complete your assignment setup, including curriculum selection, lesson selection, class selection, and assignment details (title, description, and due date).
Pro-Tip: Use the back button or click any of the circles to make edits during the assignment creation process. (See image below)

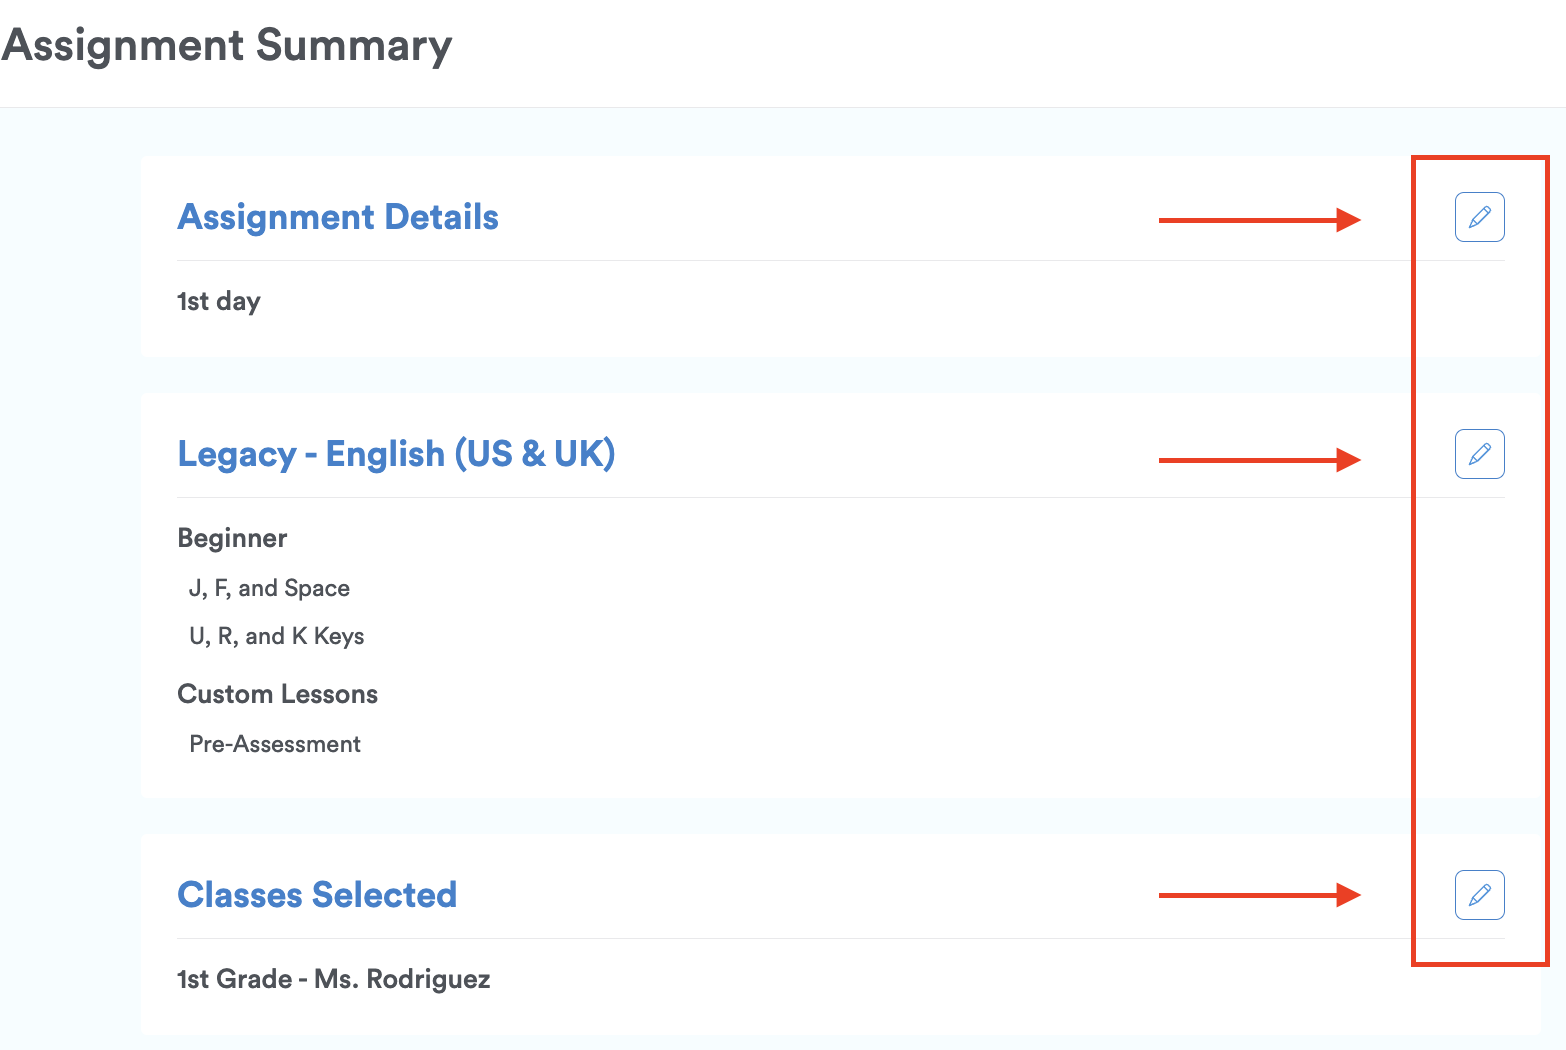
Step 6: Review your assignment in the Assignment Summary and click 'Create Assignment.'
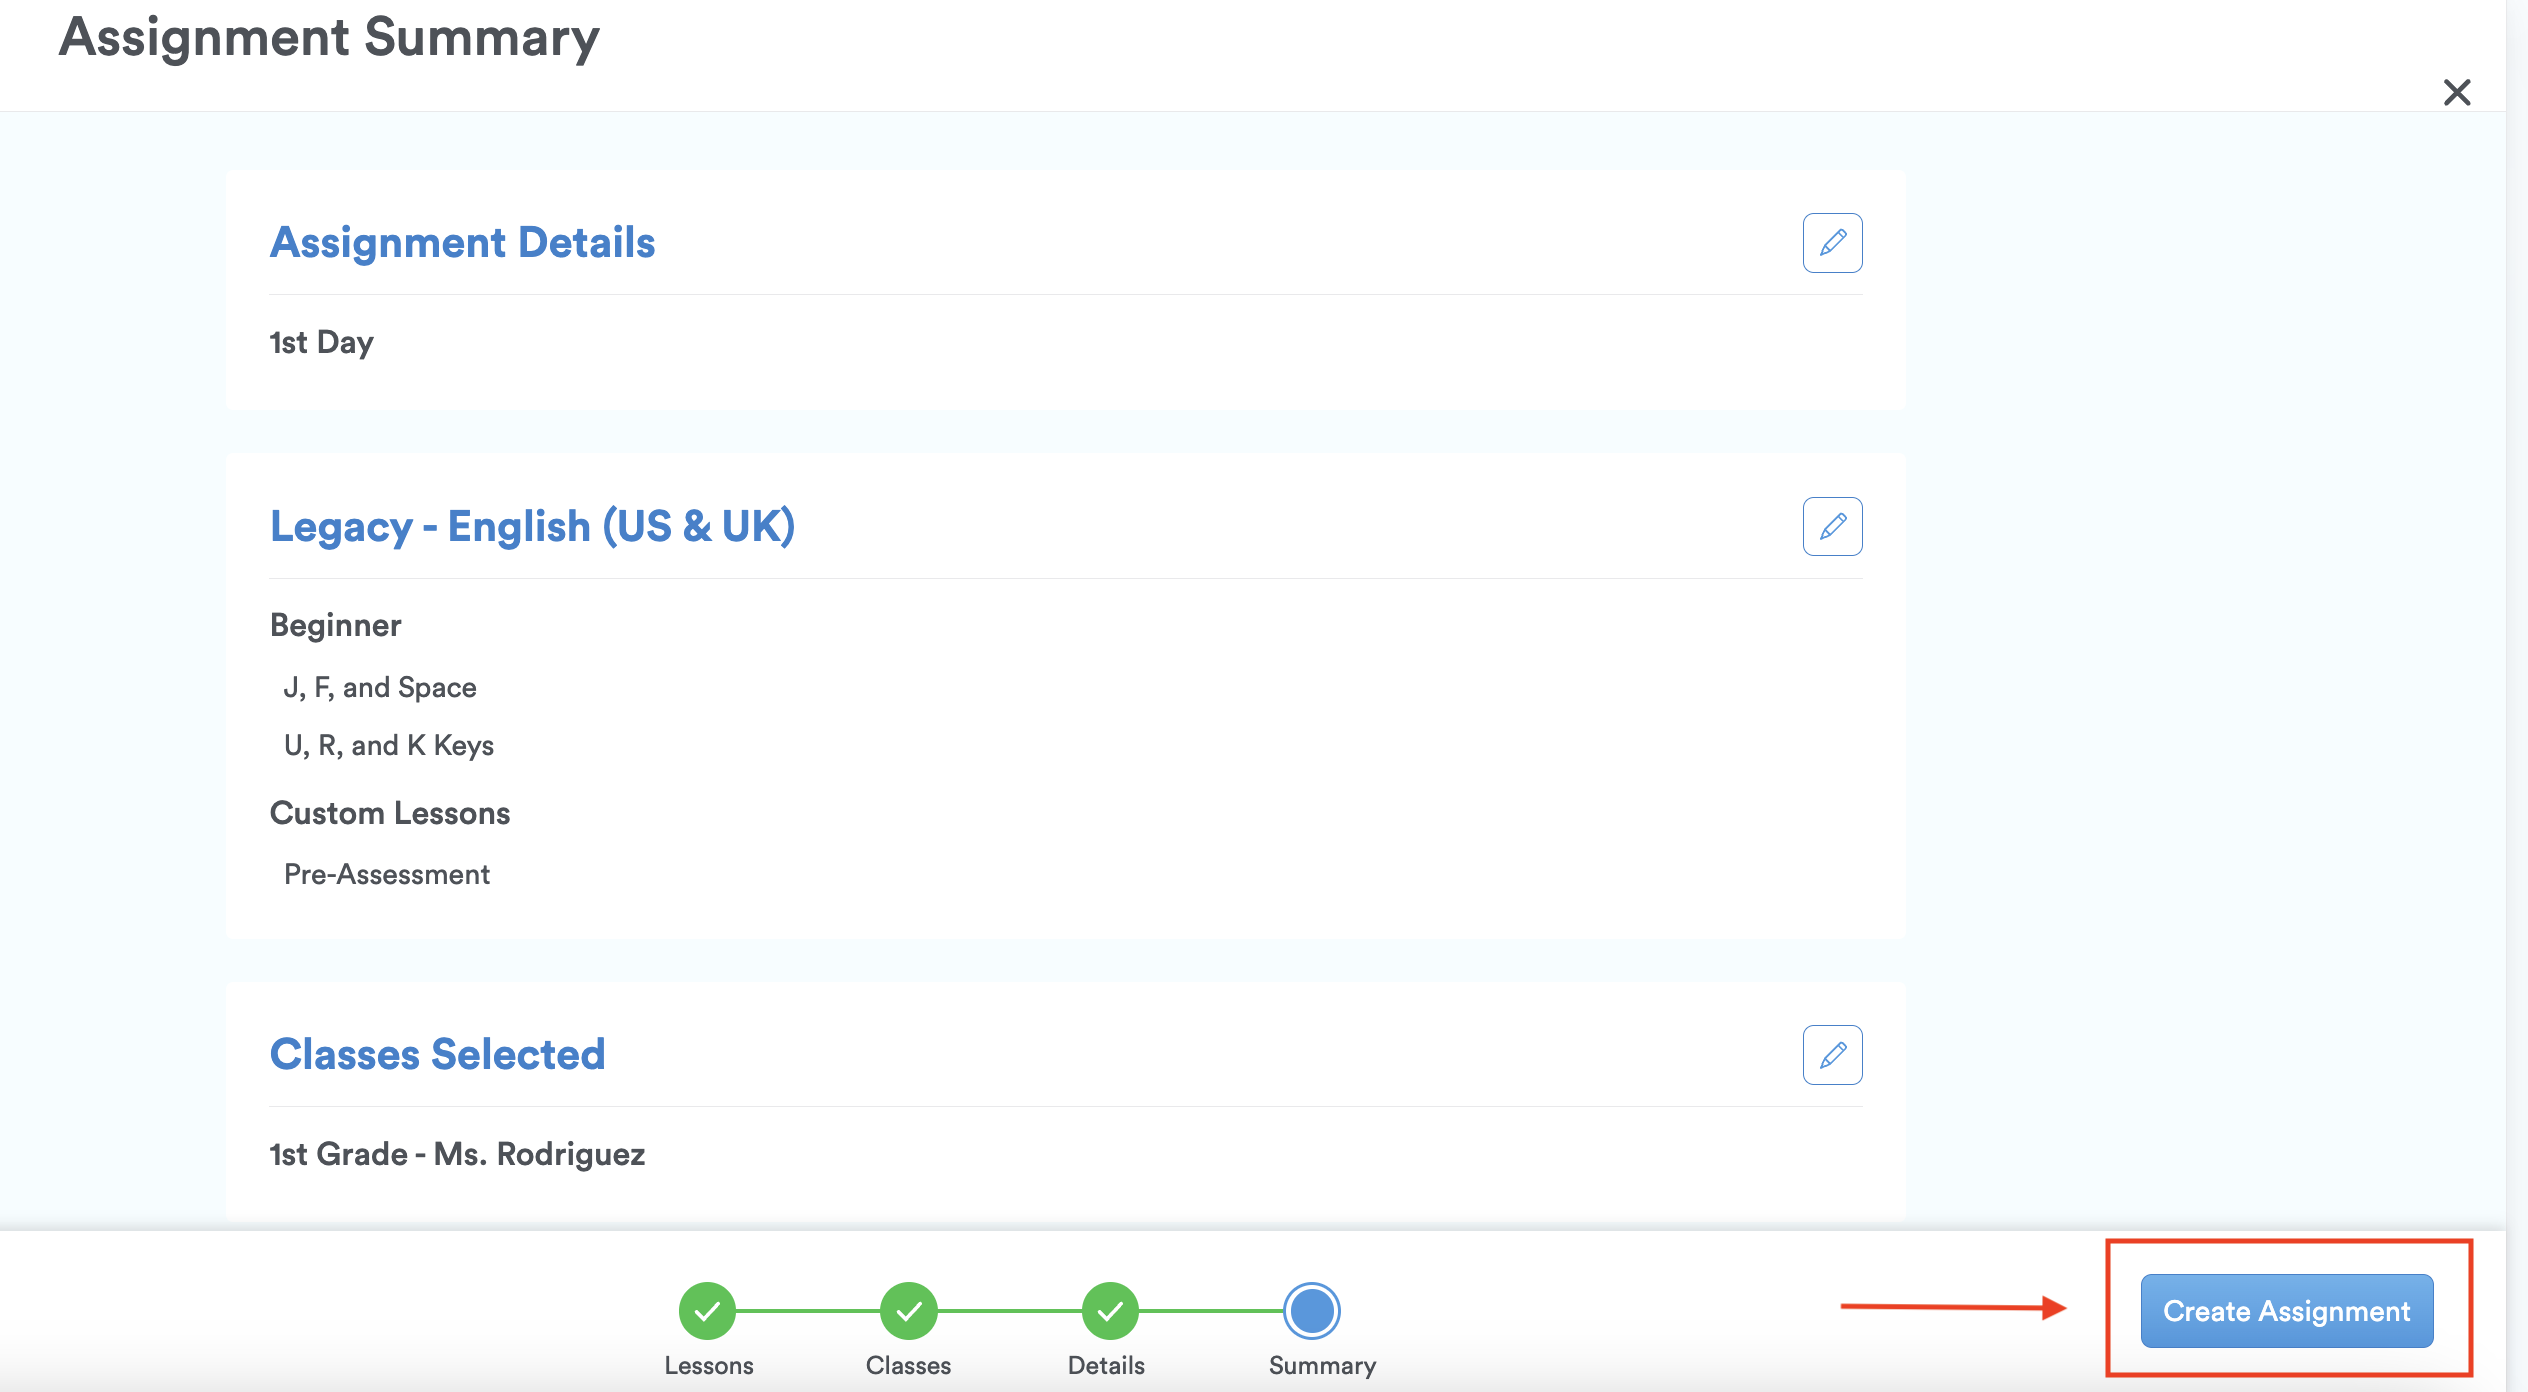
Pro-tip: Click on the pencil icon to make any final edits to your assignment.
Method 2: From the Classes Page
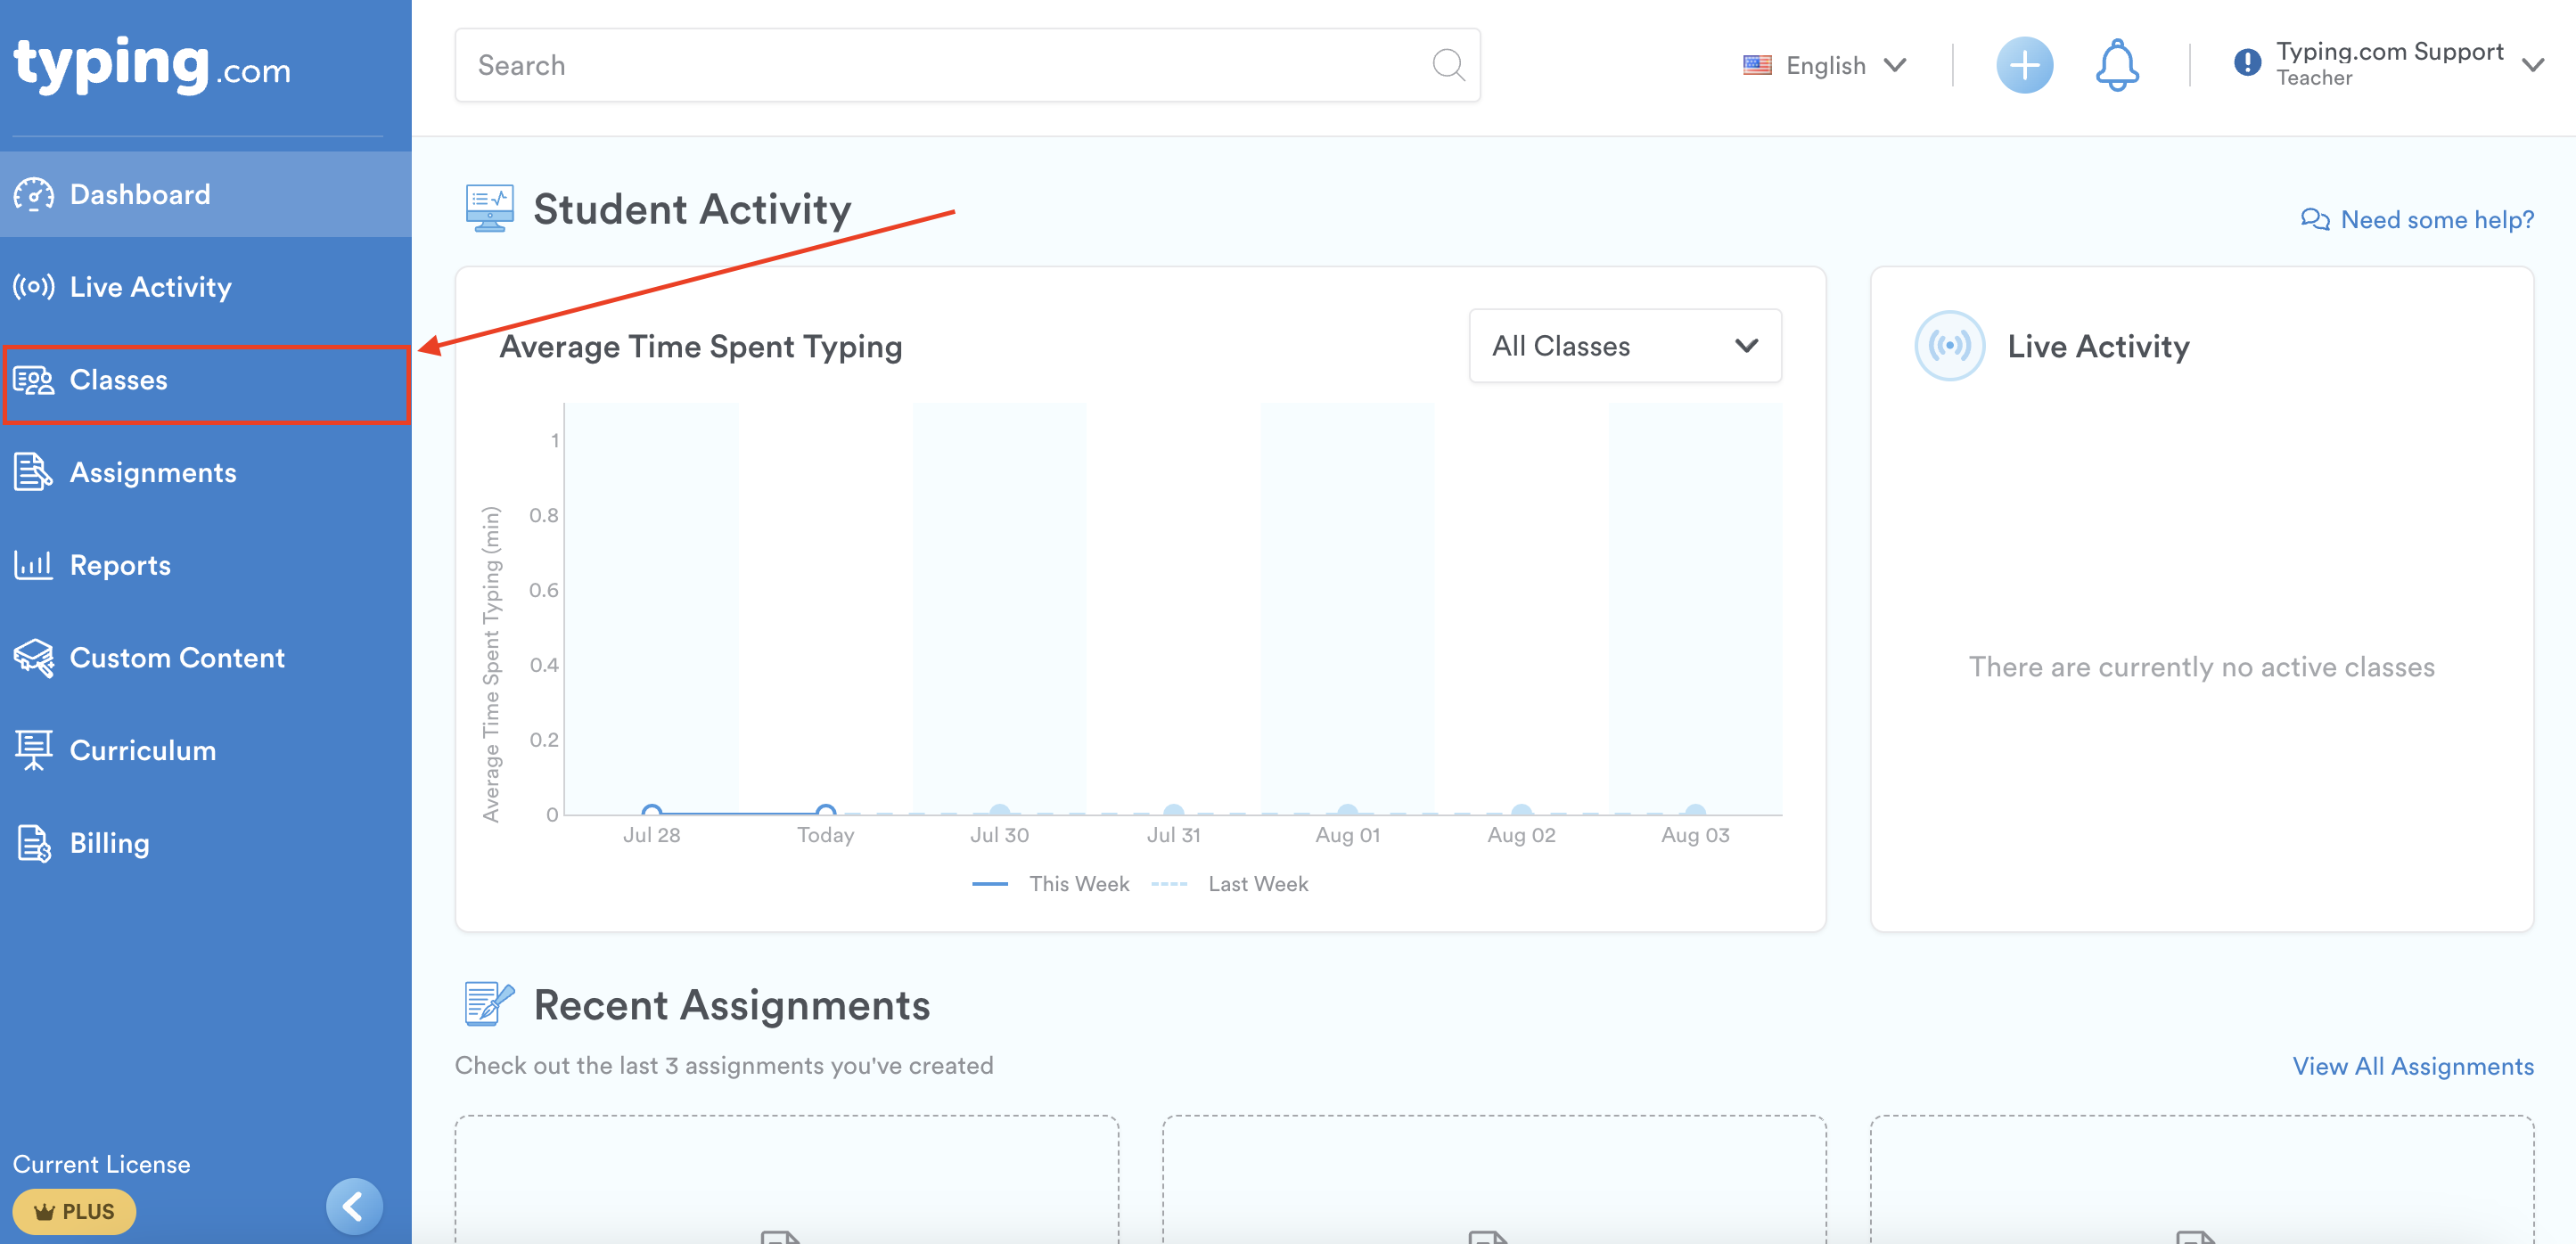
Step 1: Click on “Classes” on the left-hand side.
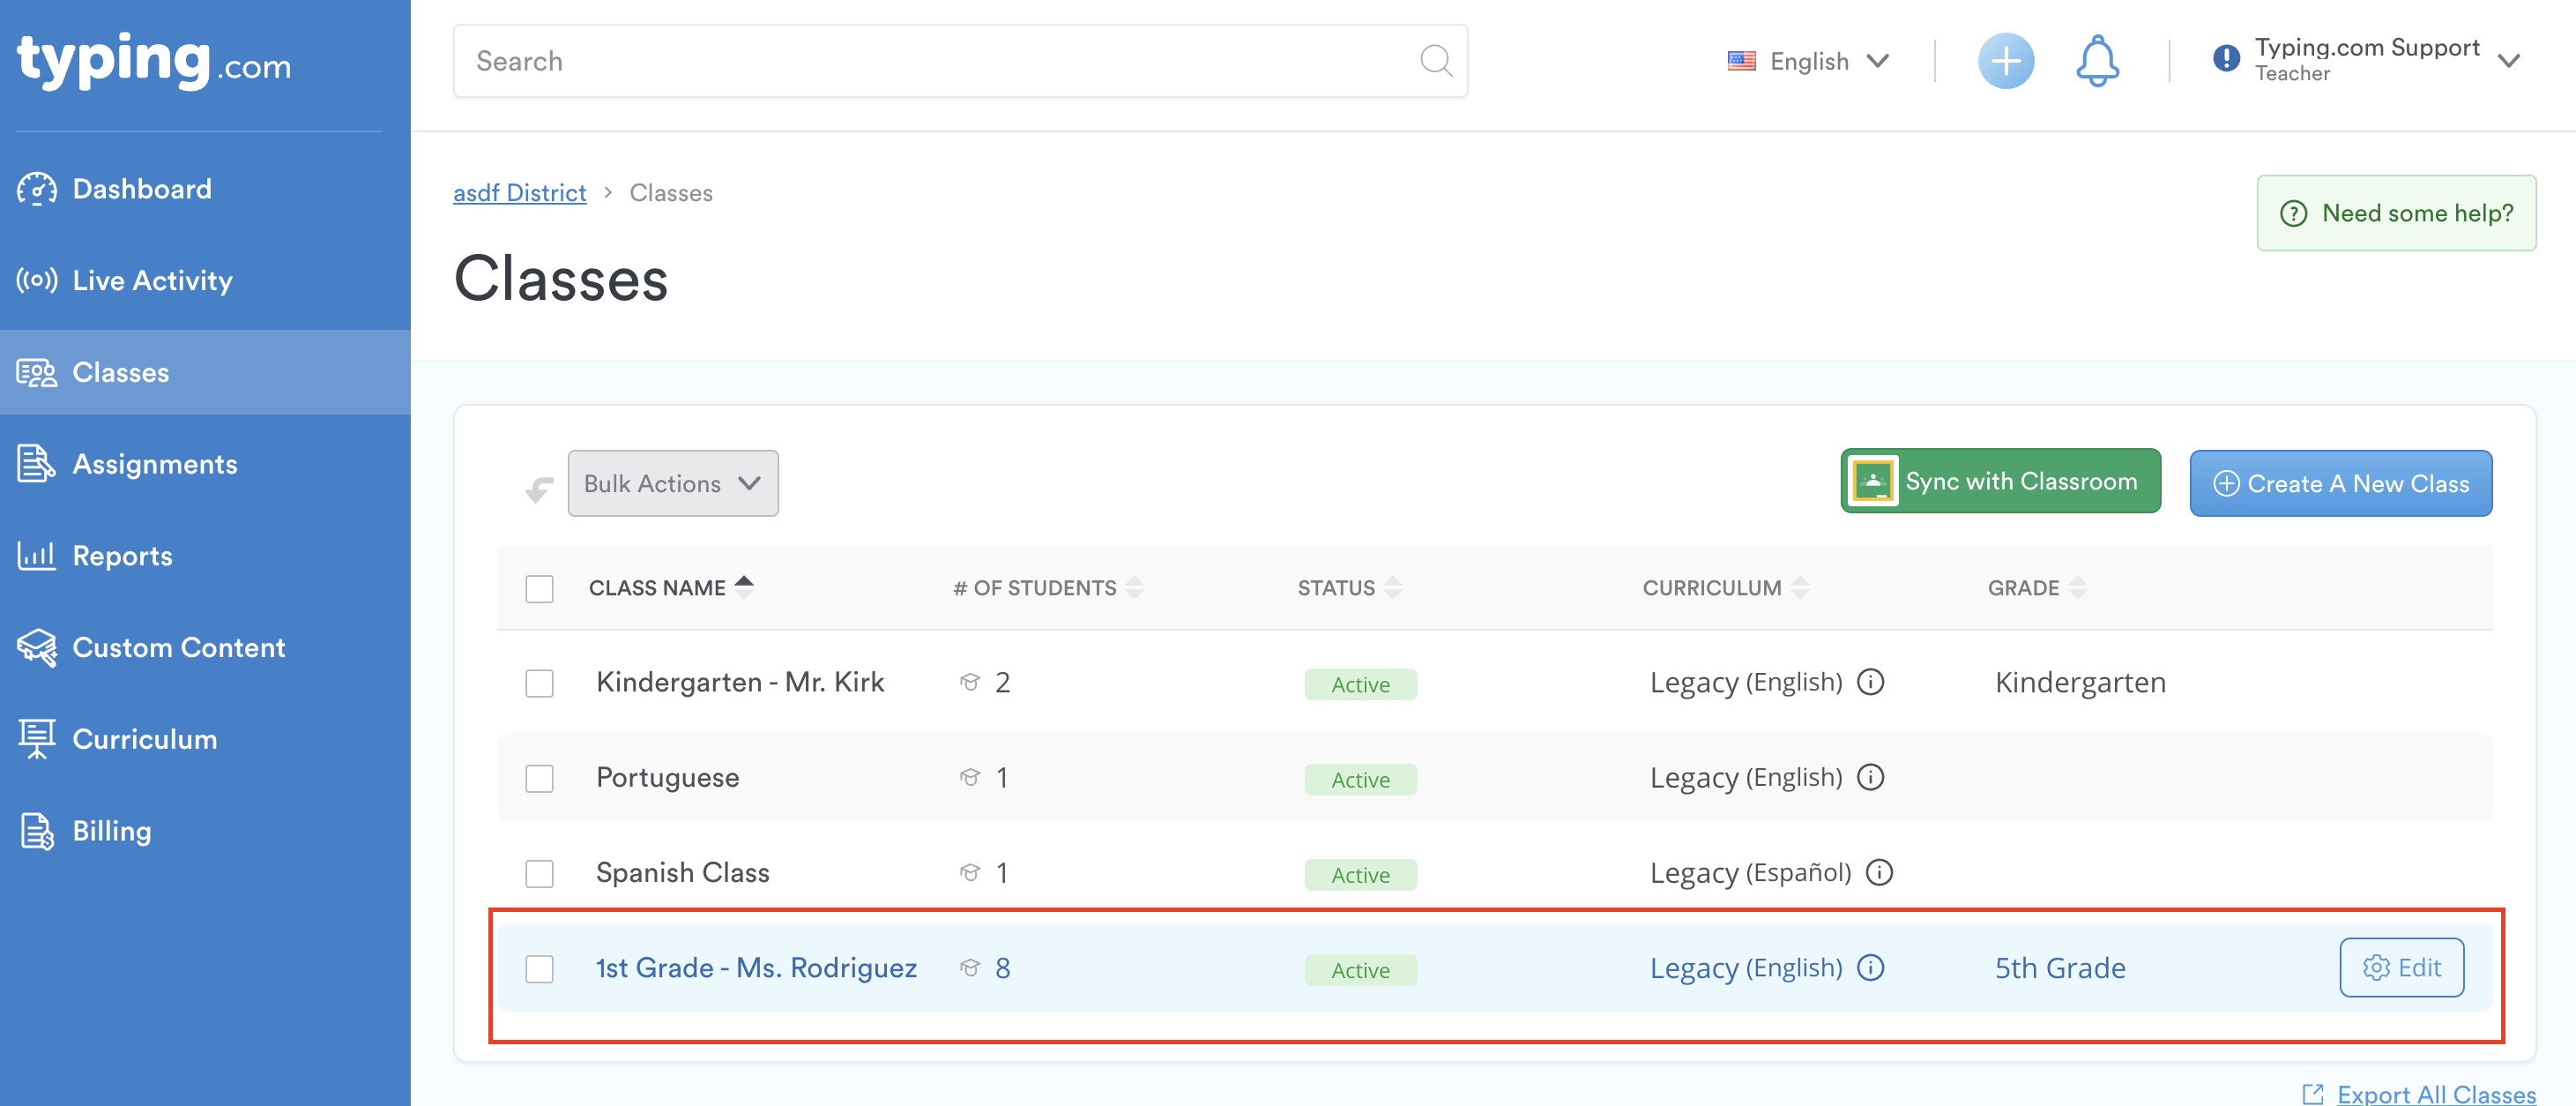
Step 2: Find and select the class you want to assign work to.
Step 3: Click on the “Assignments” tab within the class page.
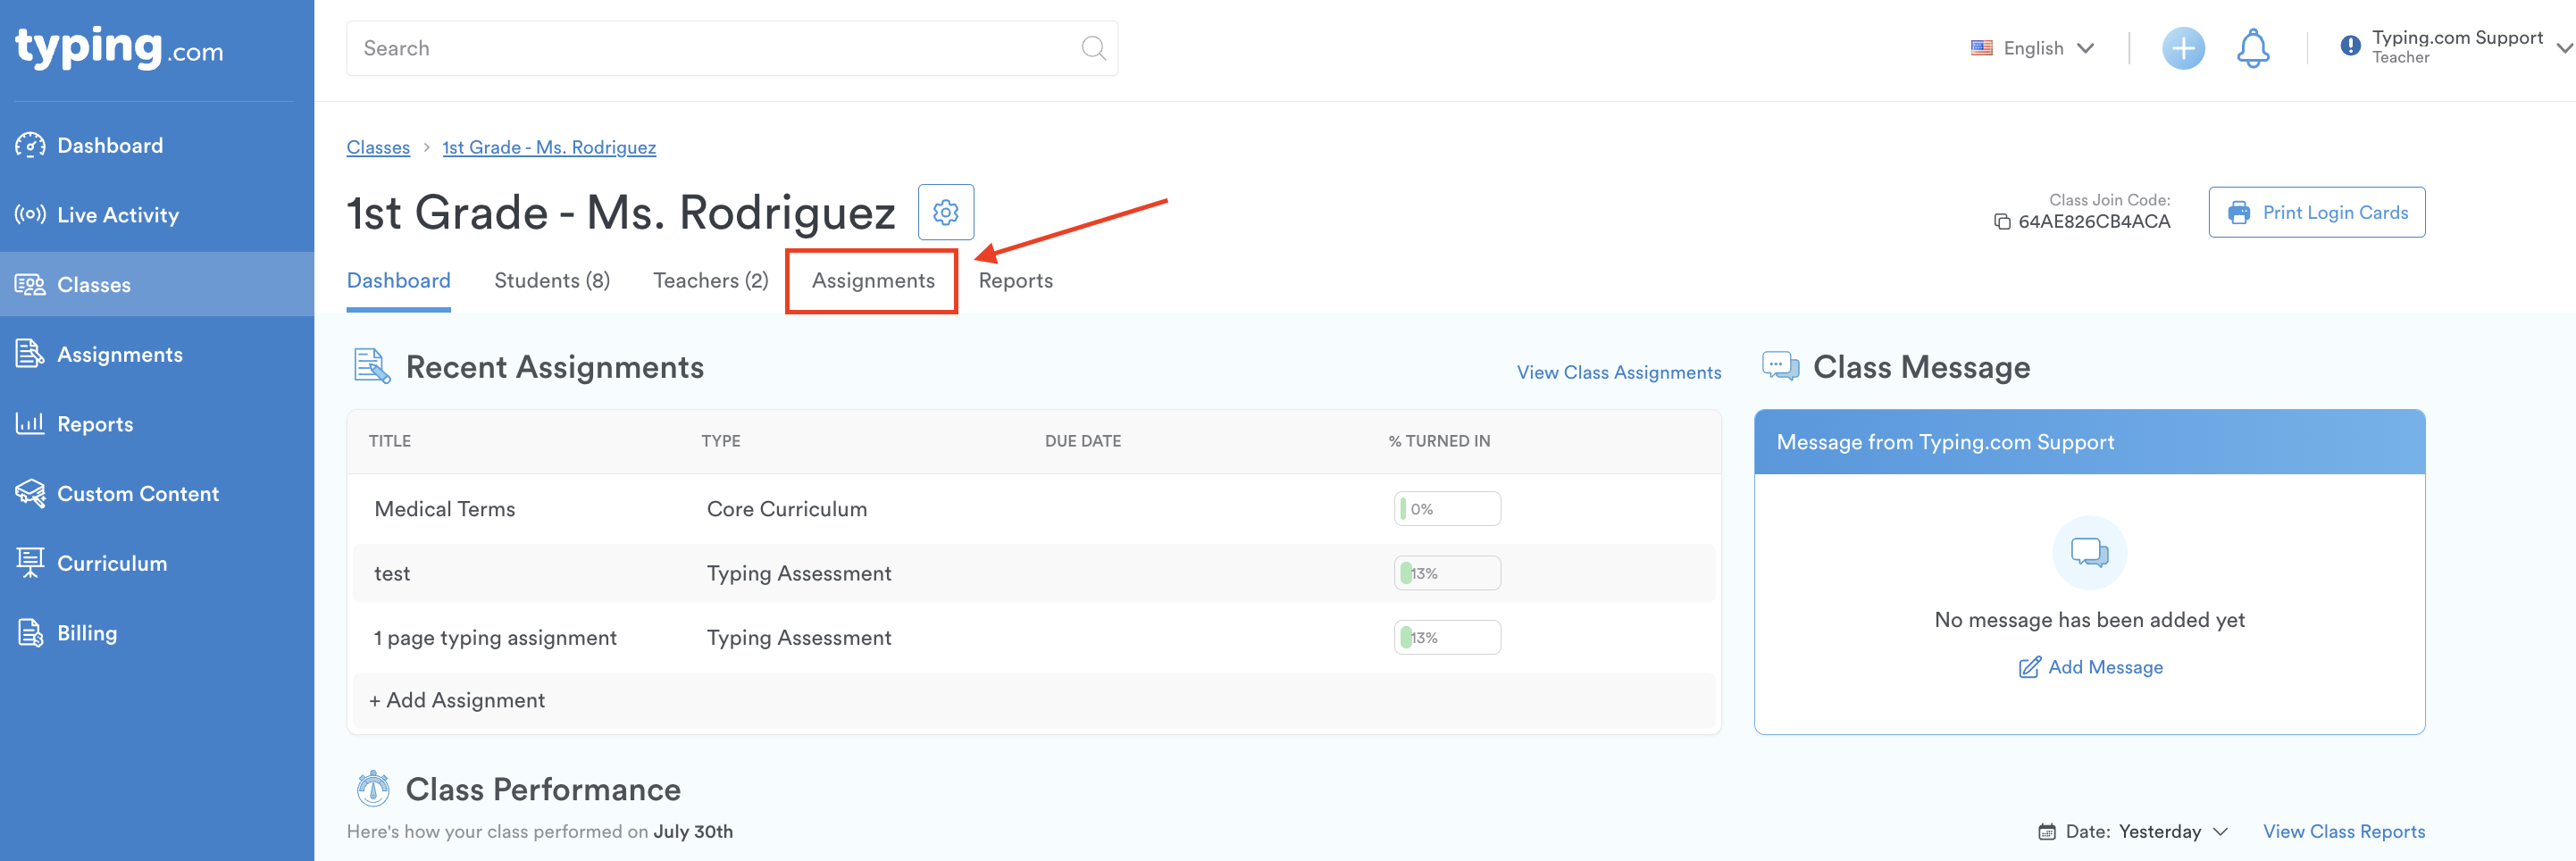
Step 4: Click the blue 'Add Assignment' button on the right-hand side.
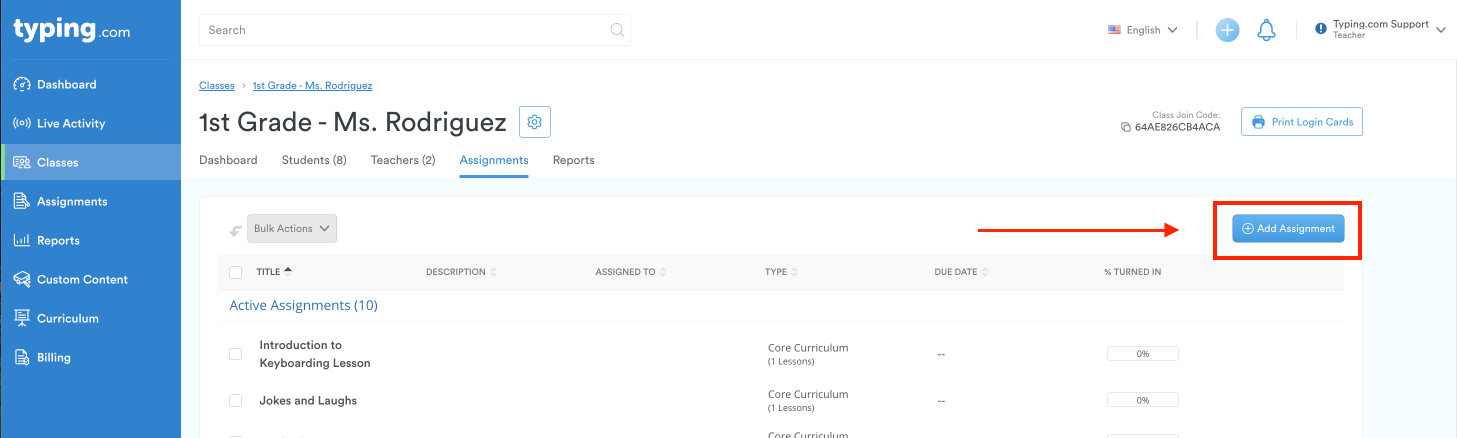
Step 5: Follow the steps 4 through 6 from Method 1 to create your assignment.
Quick Method
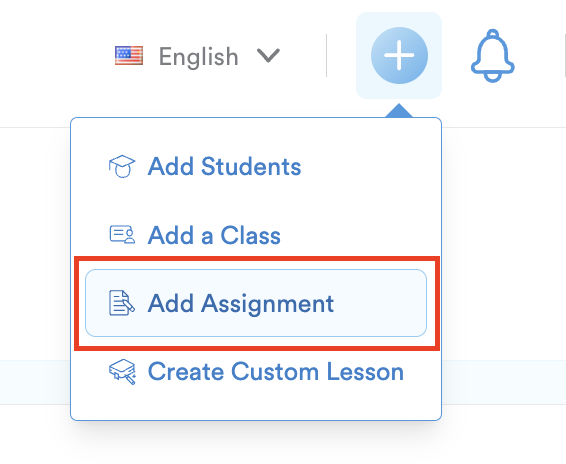
Want to access making an assignment quickly? Click on the big blue plus button next to the notifications bell icon at the top of the page, then select 'Add Assignment' from the dropdown menu. This allows you to create an assignment from any page at any moment.

That's it! You’ve successfully created an assignment. Your students will see it on their dashboards as soon as they log in. Happy teaching! 😊