
Hide Specific Content and Lessons (Teacher)
Welcome to your guide on managing content visibility on Typing.com! Whether you want to focus your class on specific lessons or hide certain content, we've got the steps to make it easy. Let’s dive in and customize your students' learning experience!
Pro-Tip: These steps will change settings for the whole class. To change settings for individual students, a PLUS membership is required. Adjust student-level settings by clicking the gear icon next to the student's name.
Pro-Tip: Ensure at least one lesson is selected. If all lessons are disabled, students will see a white screen with no content displayed.
Step 1: Log in to your Teacher Portal HERE.
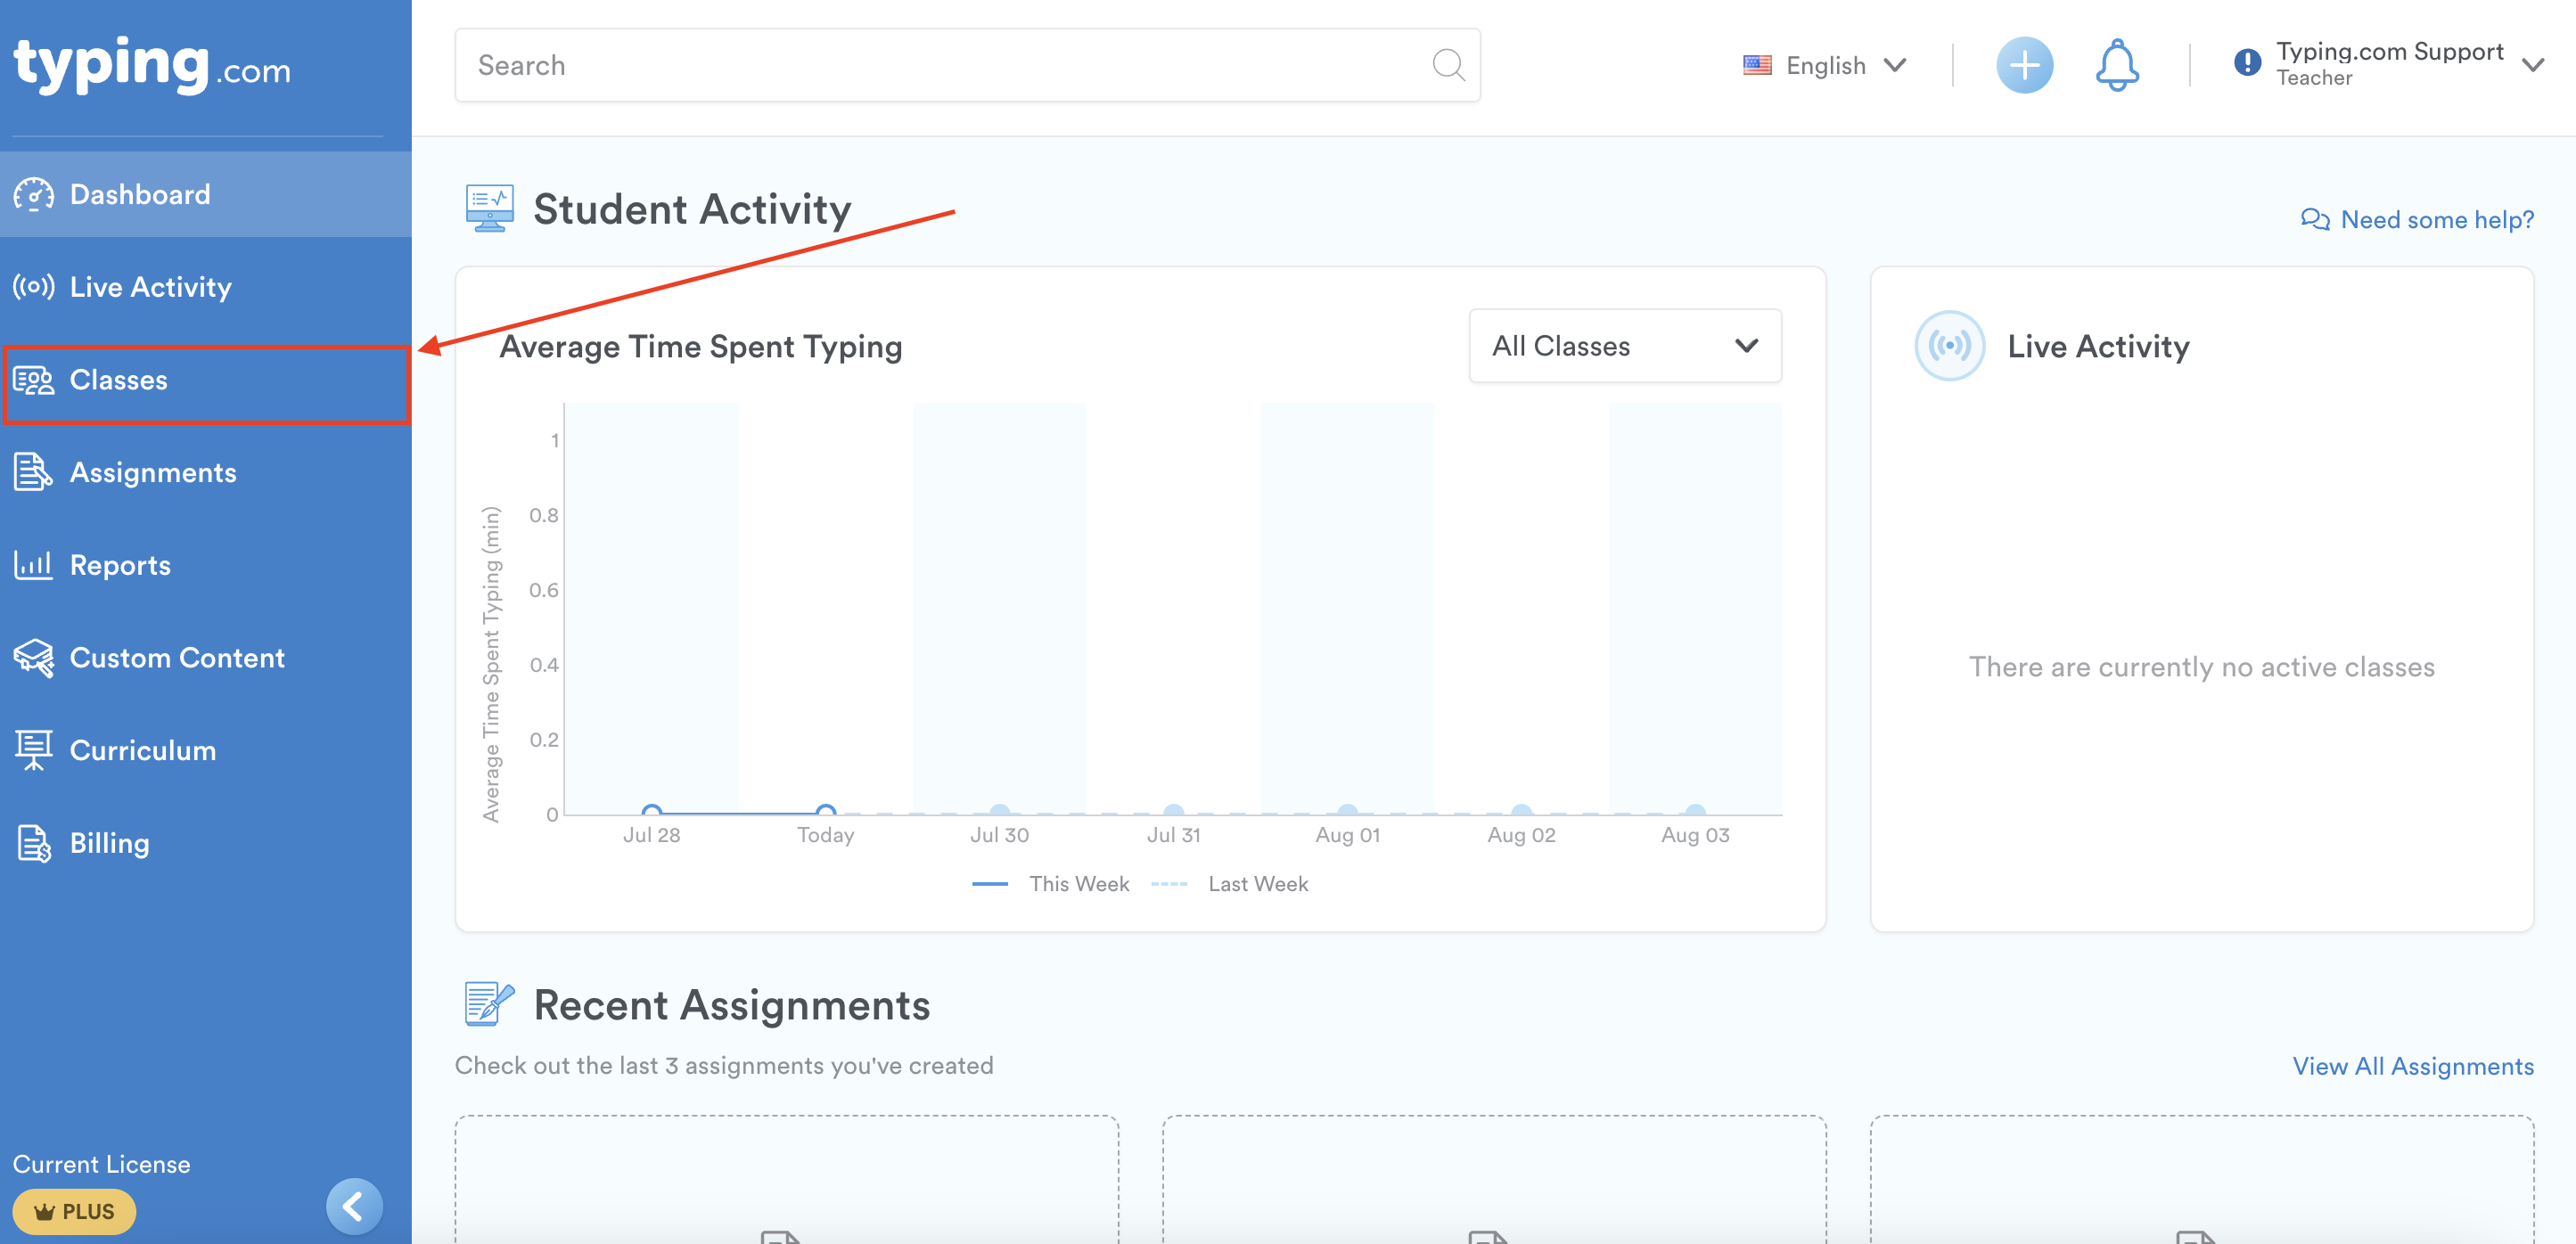
Step 2: Click on "Classes"
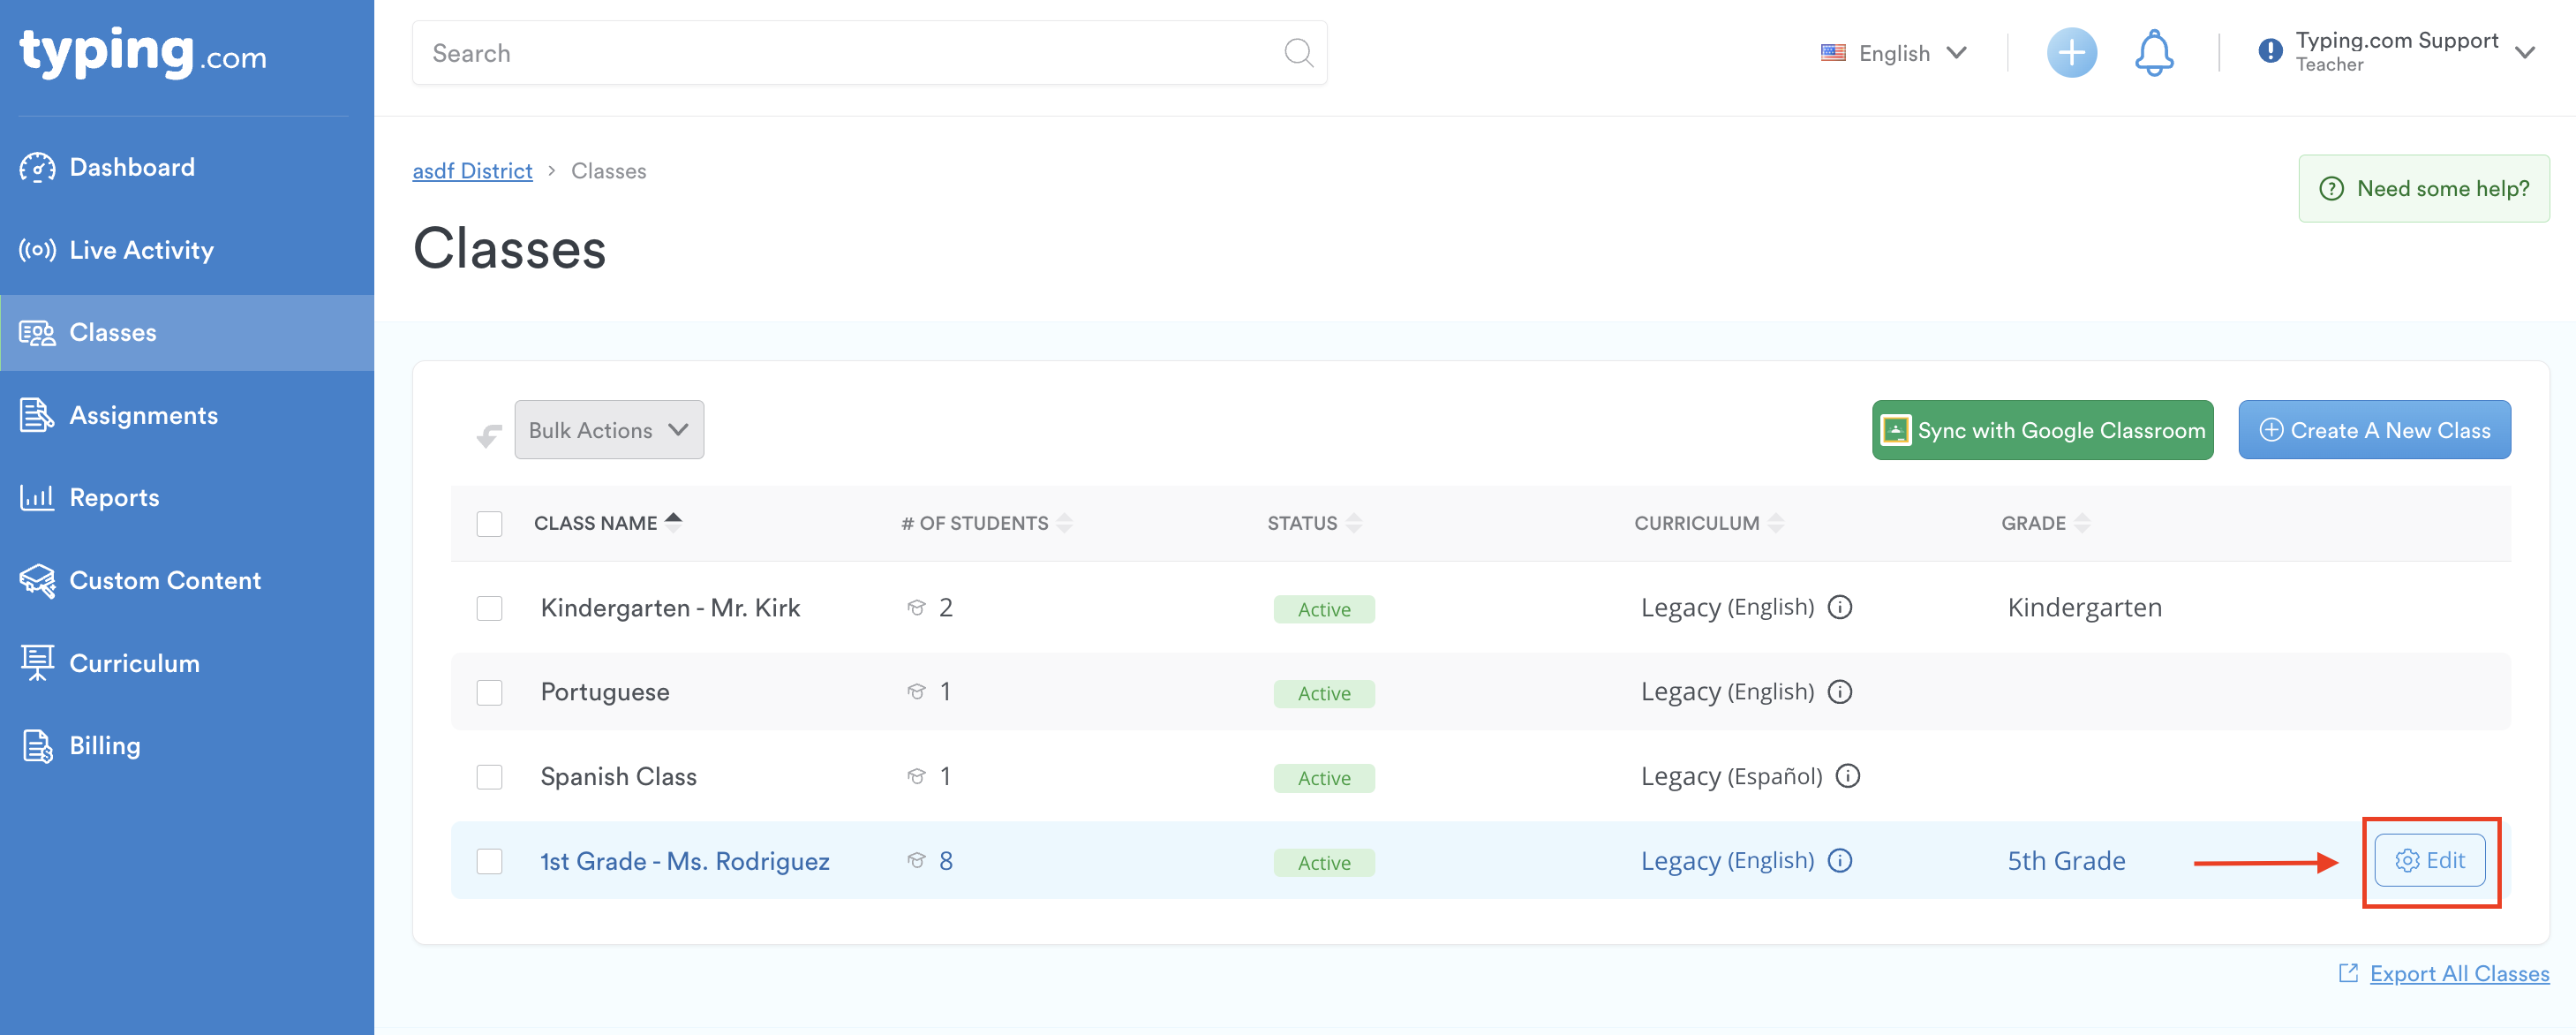
Step 3: Locate the name of the class you want to edit and click "Edit."
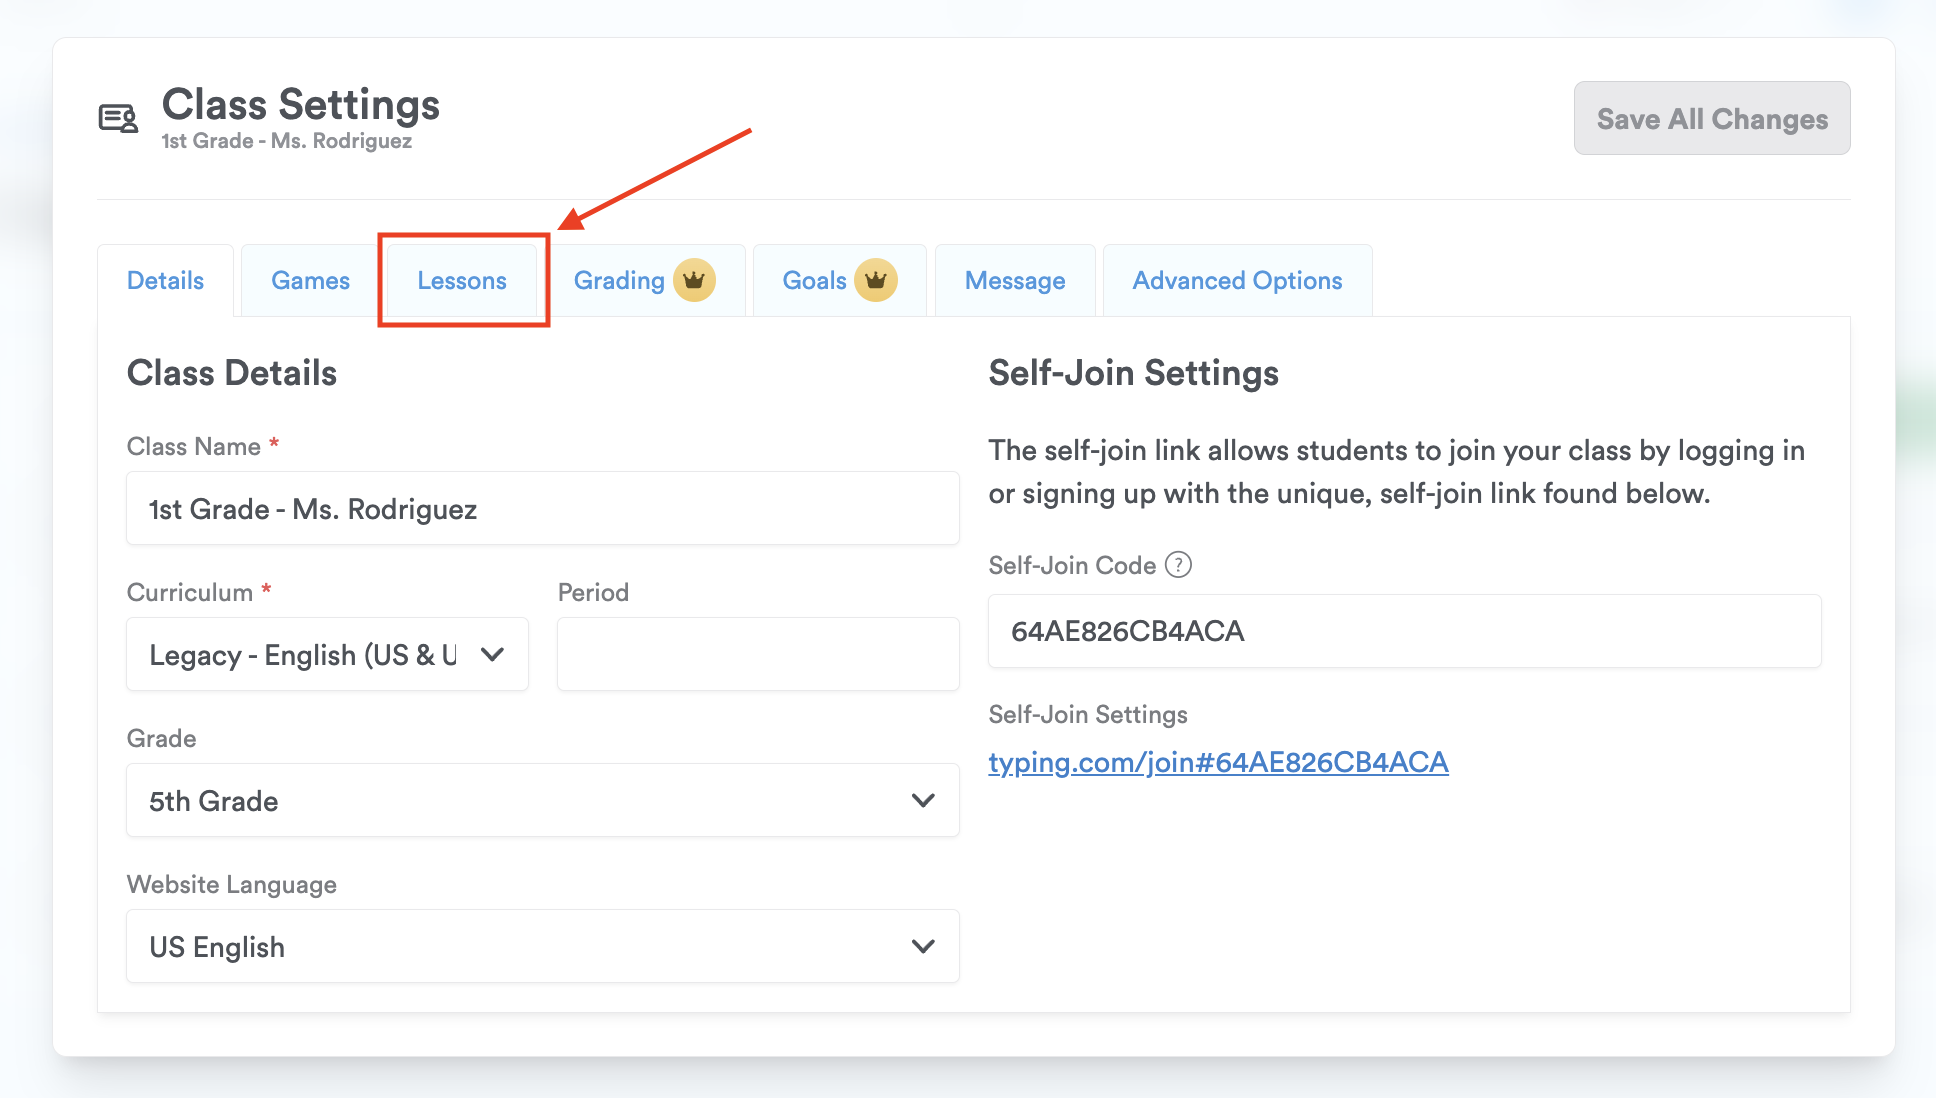
Step 4: Click the "Lessons" tab.
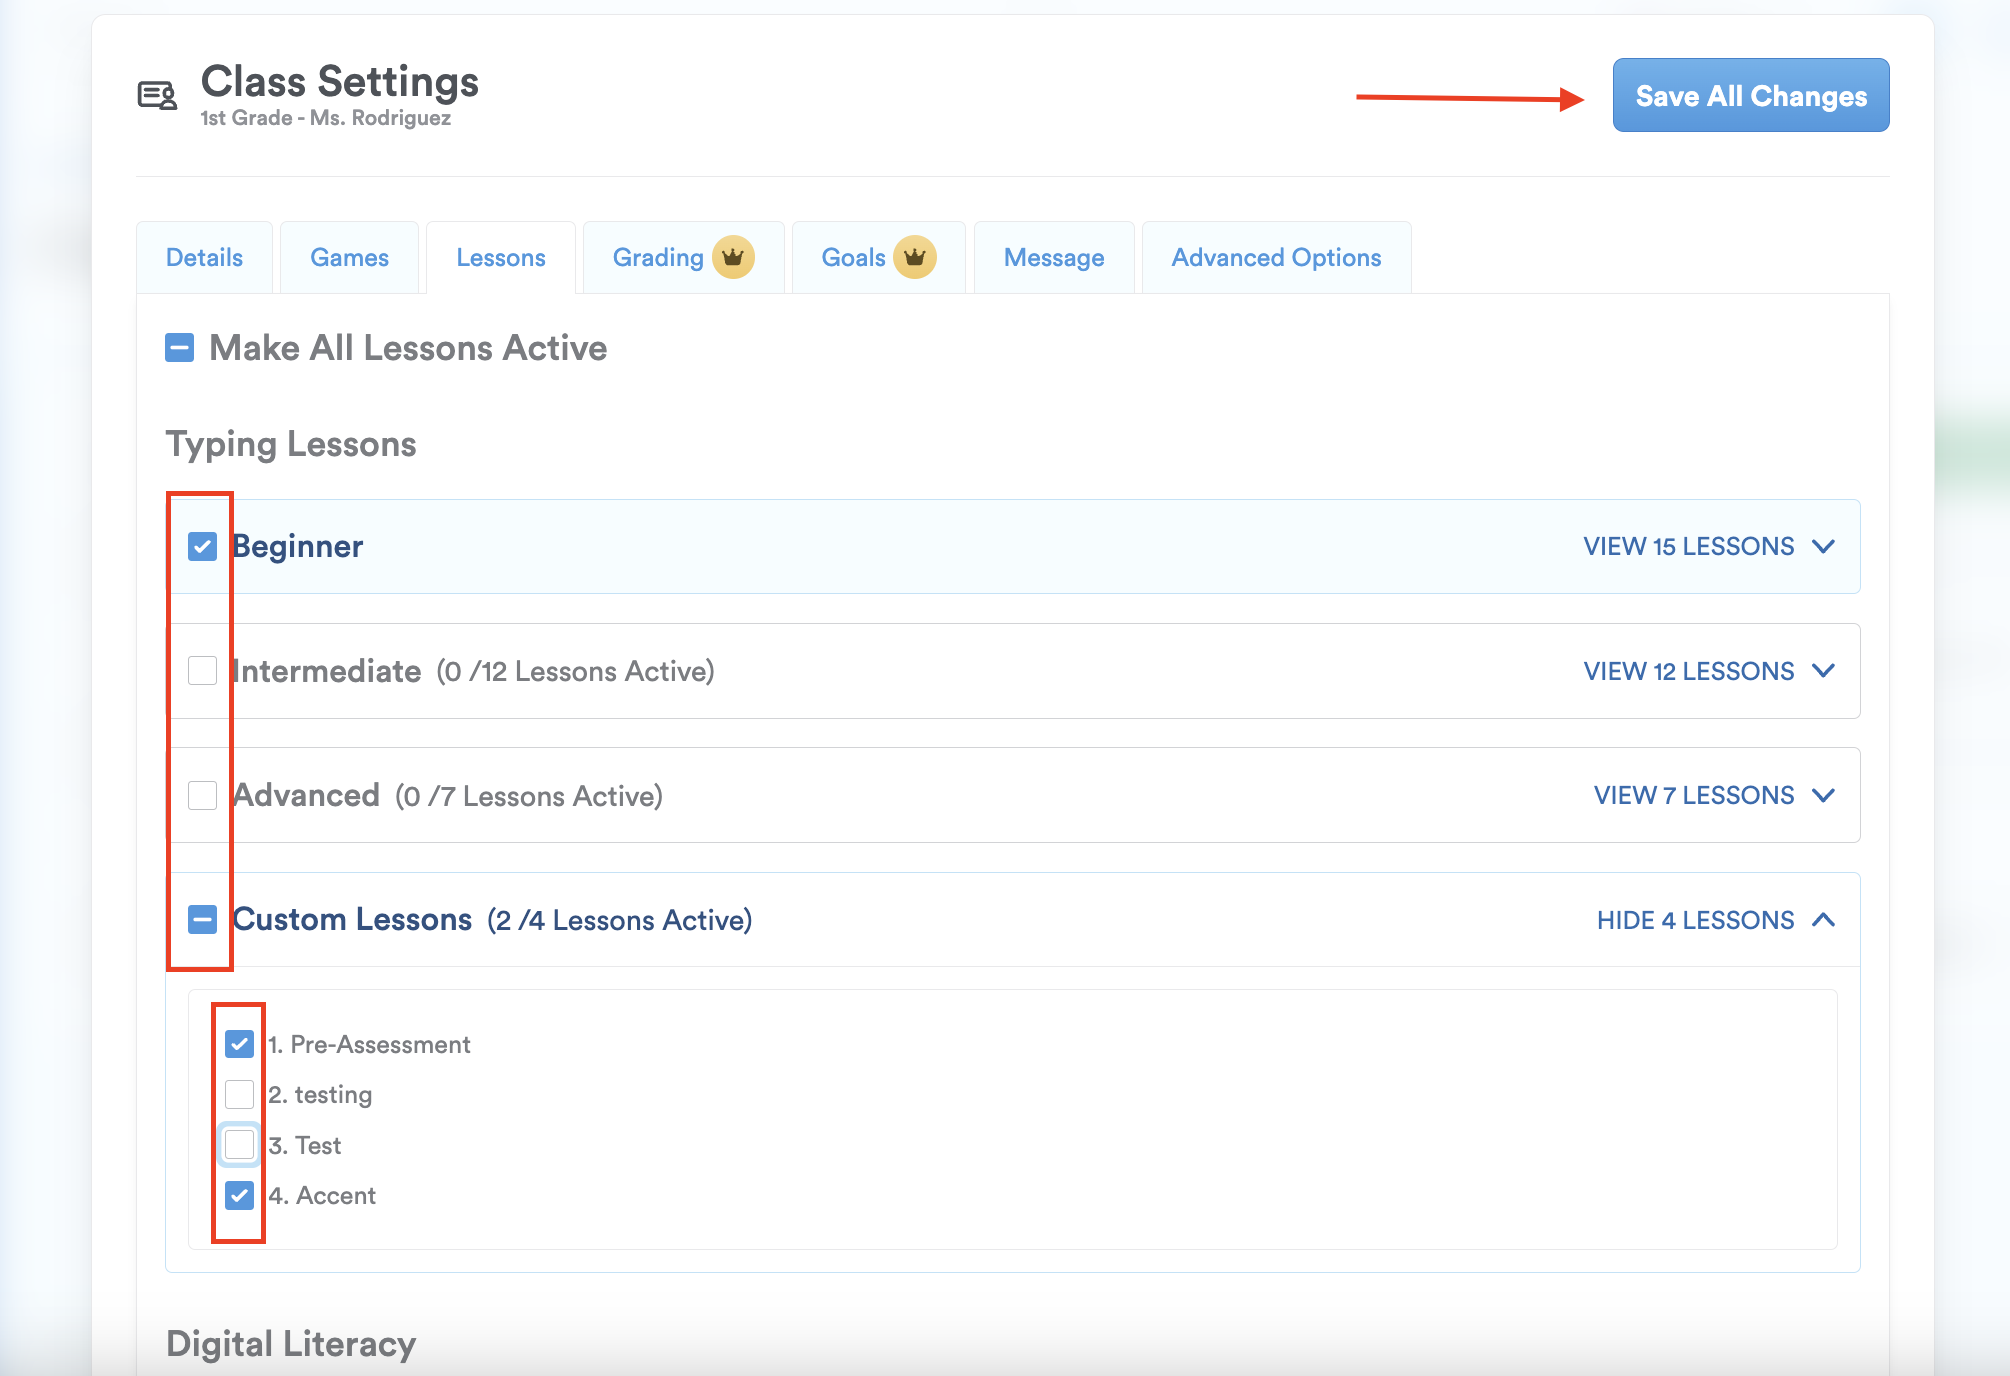
Step 5: Select which Units and Lessons are active. Check the boxes to display or uncheck to hide lessons, sections, or individual lessons. Finally, click "Save All Changes."
That's it! Now you know how to enable or disable lessons to tailor your teaching experience. 😊