
Use the Student Self-Join Link (Teacher)
Need to add students to your class quickly and effortlessly? The Student Self-Join Link is your best friend. It’s simple, saves time, and works like a charm. Here’s how to make the most of it:
Effortlessly Add Students: The self-join link allows students with existing accounts to join your class or move from one class to another. It’s efficient and user-friendly. Pro-Tip: Students can use the self-join link to join your class by creating a new account or using an existing one.
Syncing with Google Classroom or Microsoft Teams: If your classes are synced through these platforms, they won’t have a join code. As a workaround, create a new class in your teacher portal and share the join link with your students. They can join using their own accounts.
Clever or ClassLink Users: The self-join link is not available if you’re rostering through Clever or ClassLink.
Let’s Get Started:
Step 1: Log in to your Teacher Portal HERE.
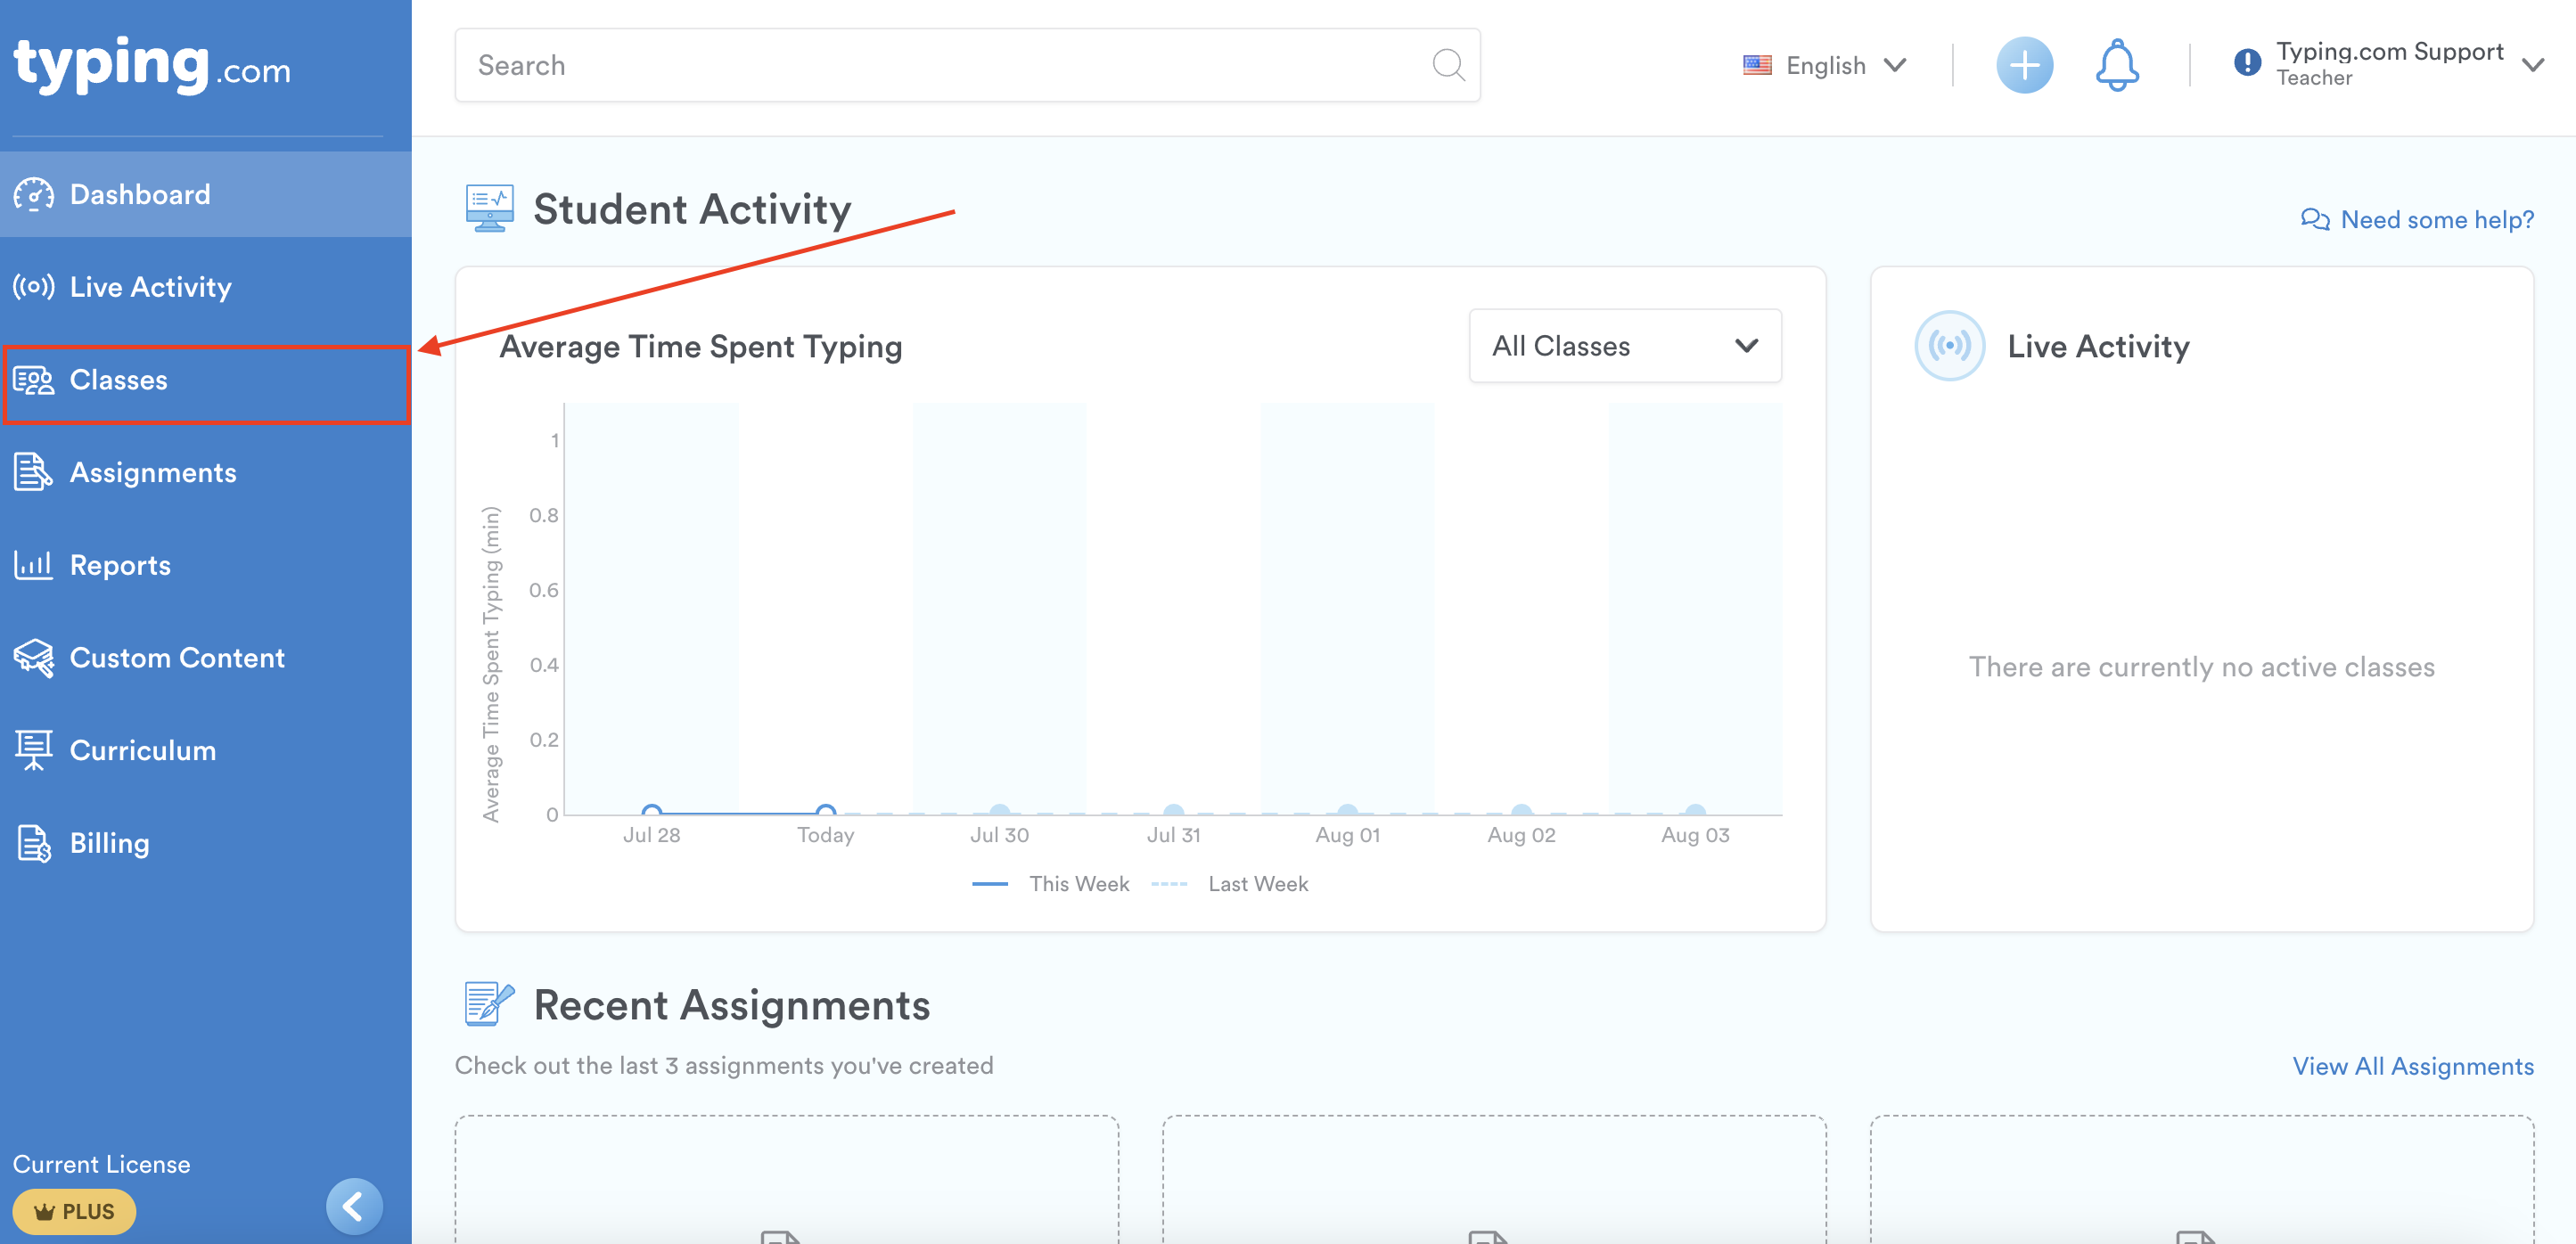
Step 2: Click on “Classes”
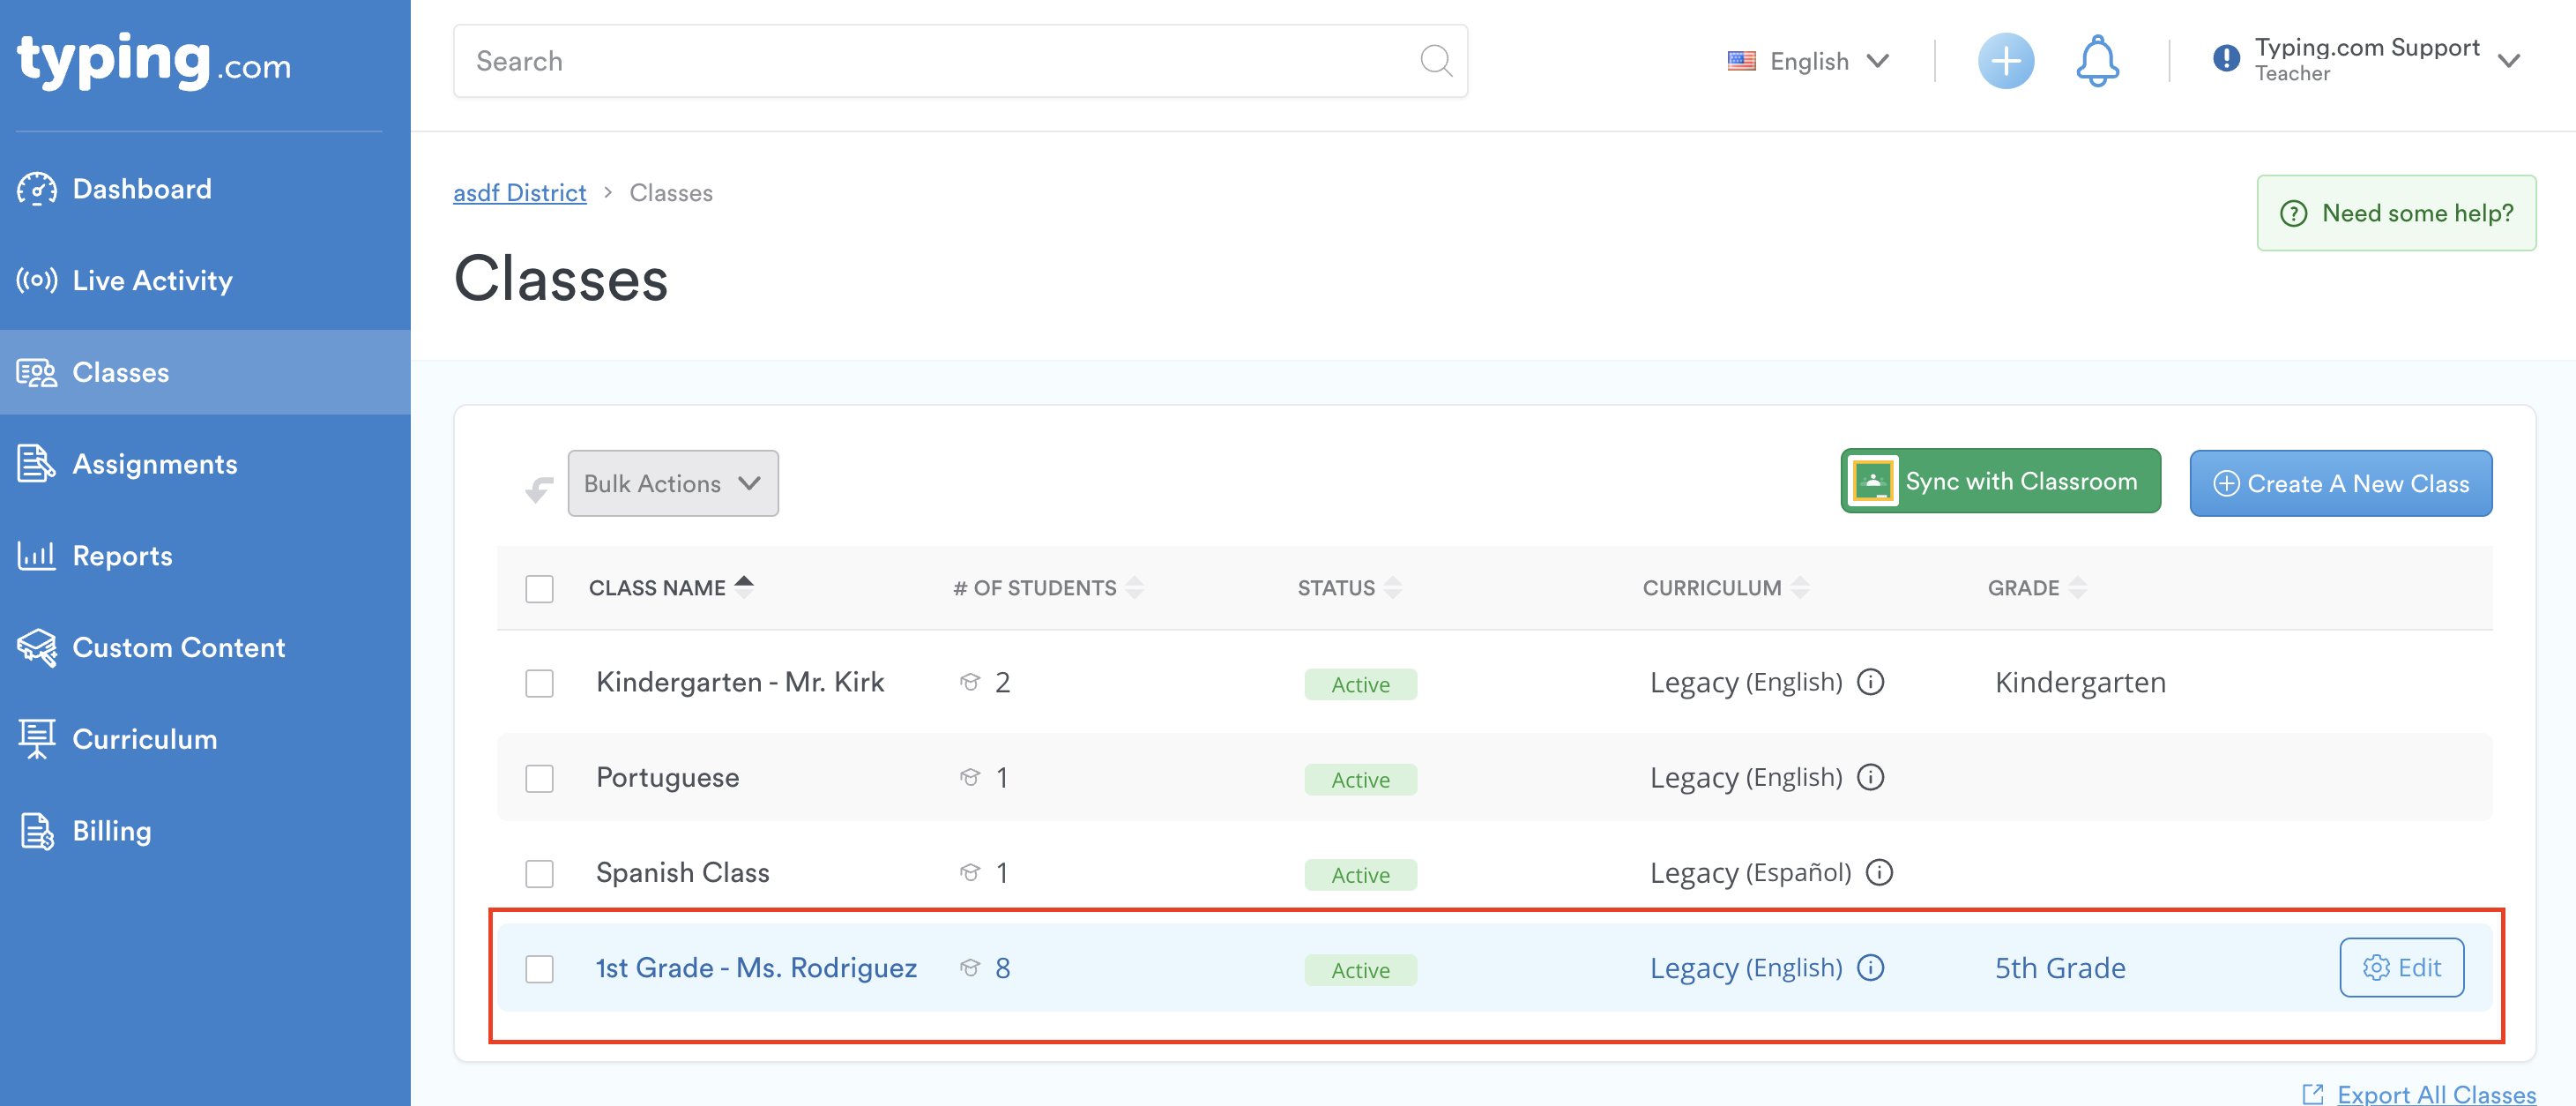
Step 3: From your class list, select the class you need to get the join code for by clicking on it.
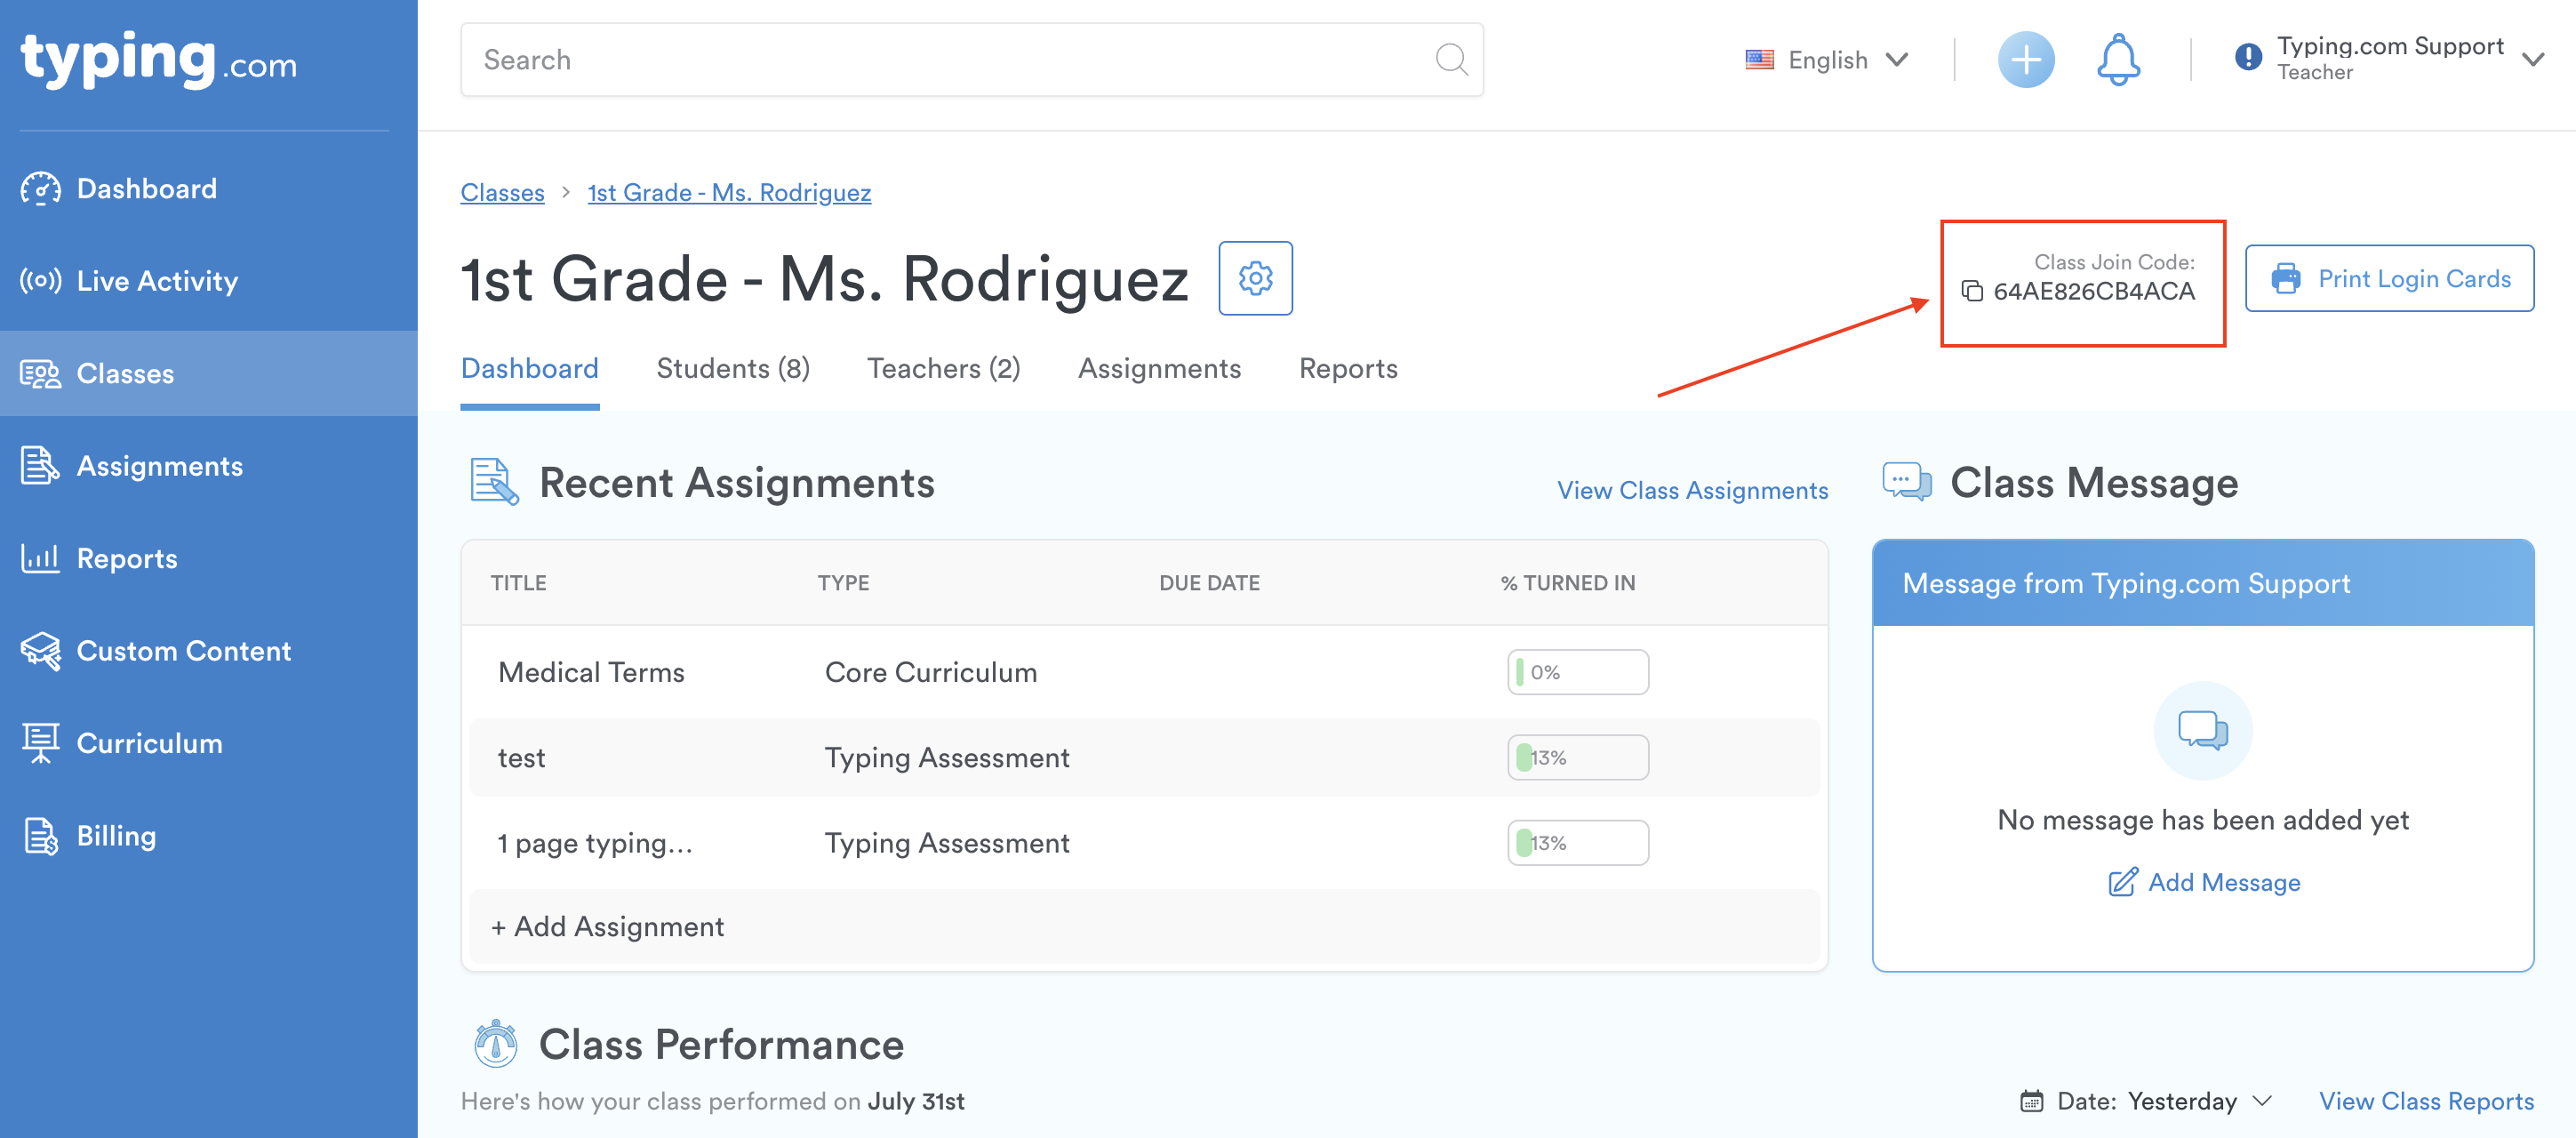
Step 4: Copy the Class Join Code located on the top right corner by clicking on it and share it with your students. (Note: You must create a class first if you don’t have one.)
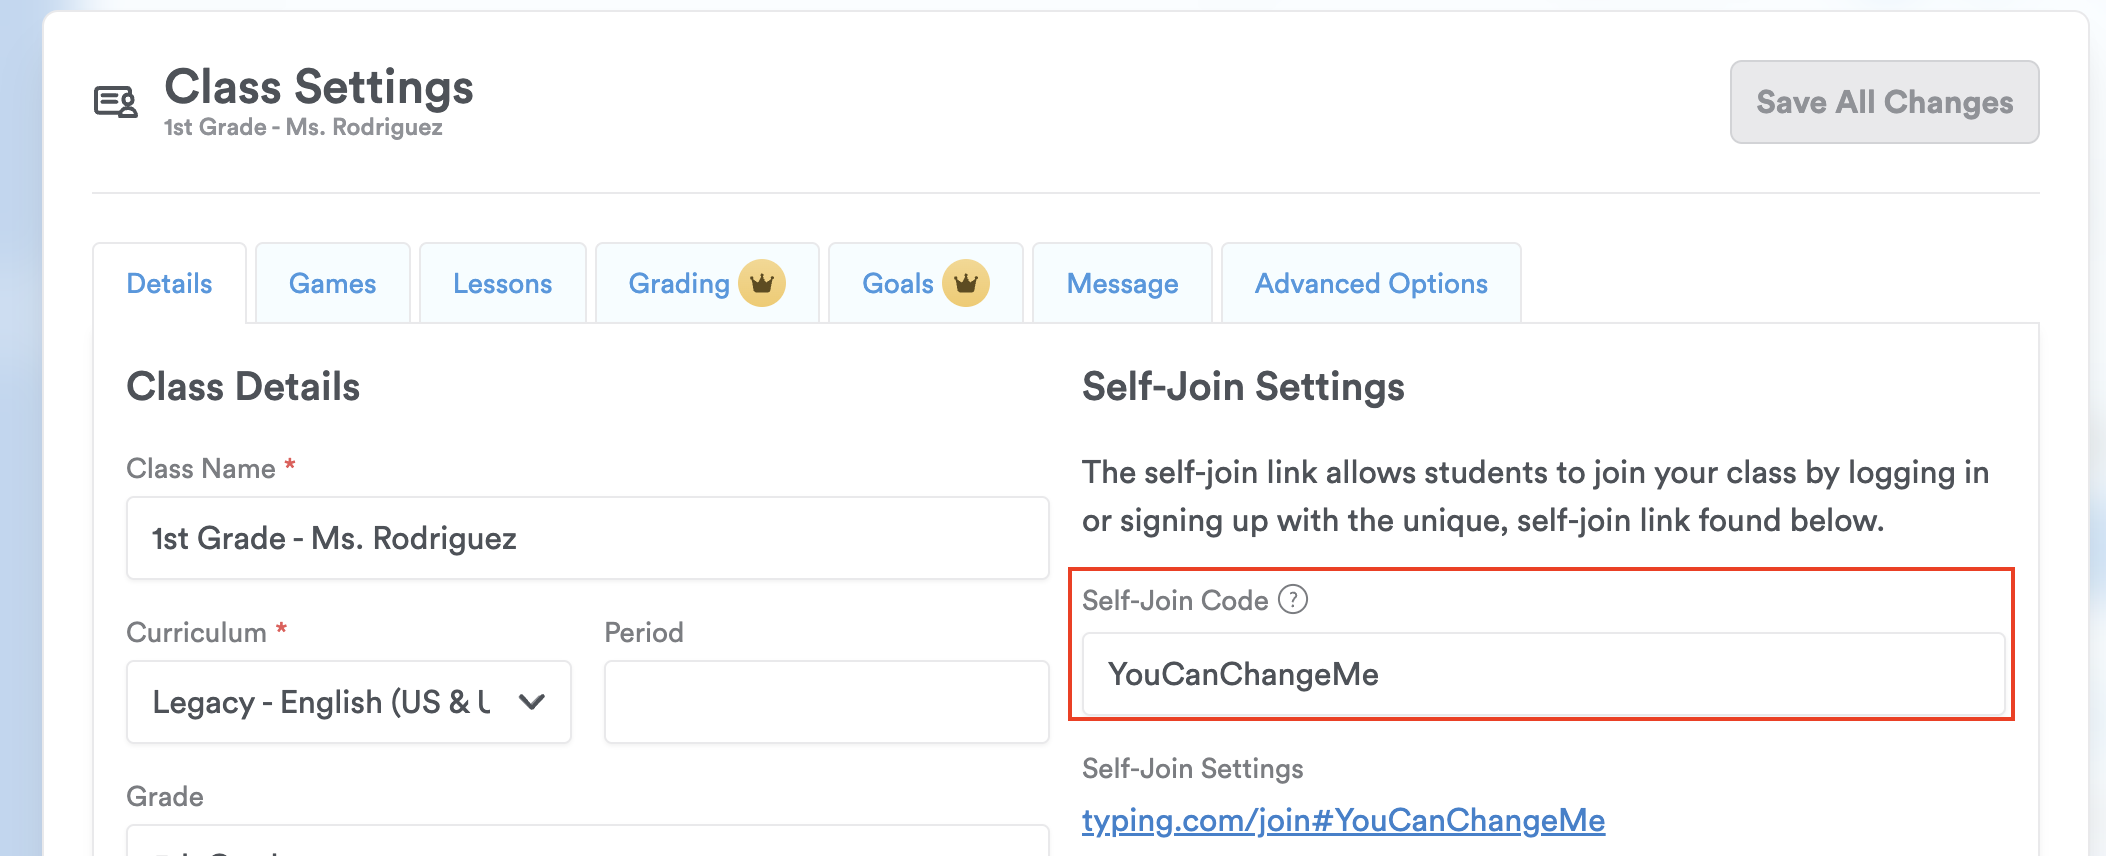
Pro-Tip 3: You can edit the self-join code (the alphanumeric code at the end of the link) to make it simpler (ie: typing.com/join#YouCanChangeMe) by visiting your Class Settings > Details tab.

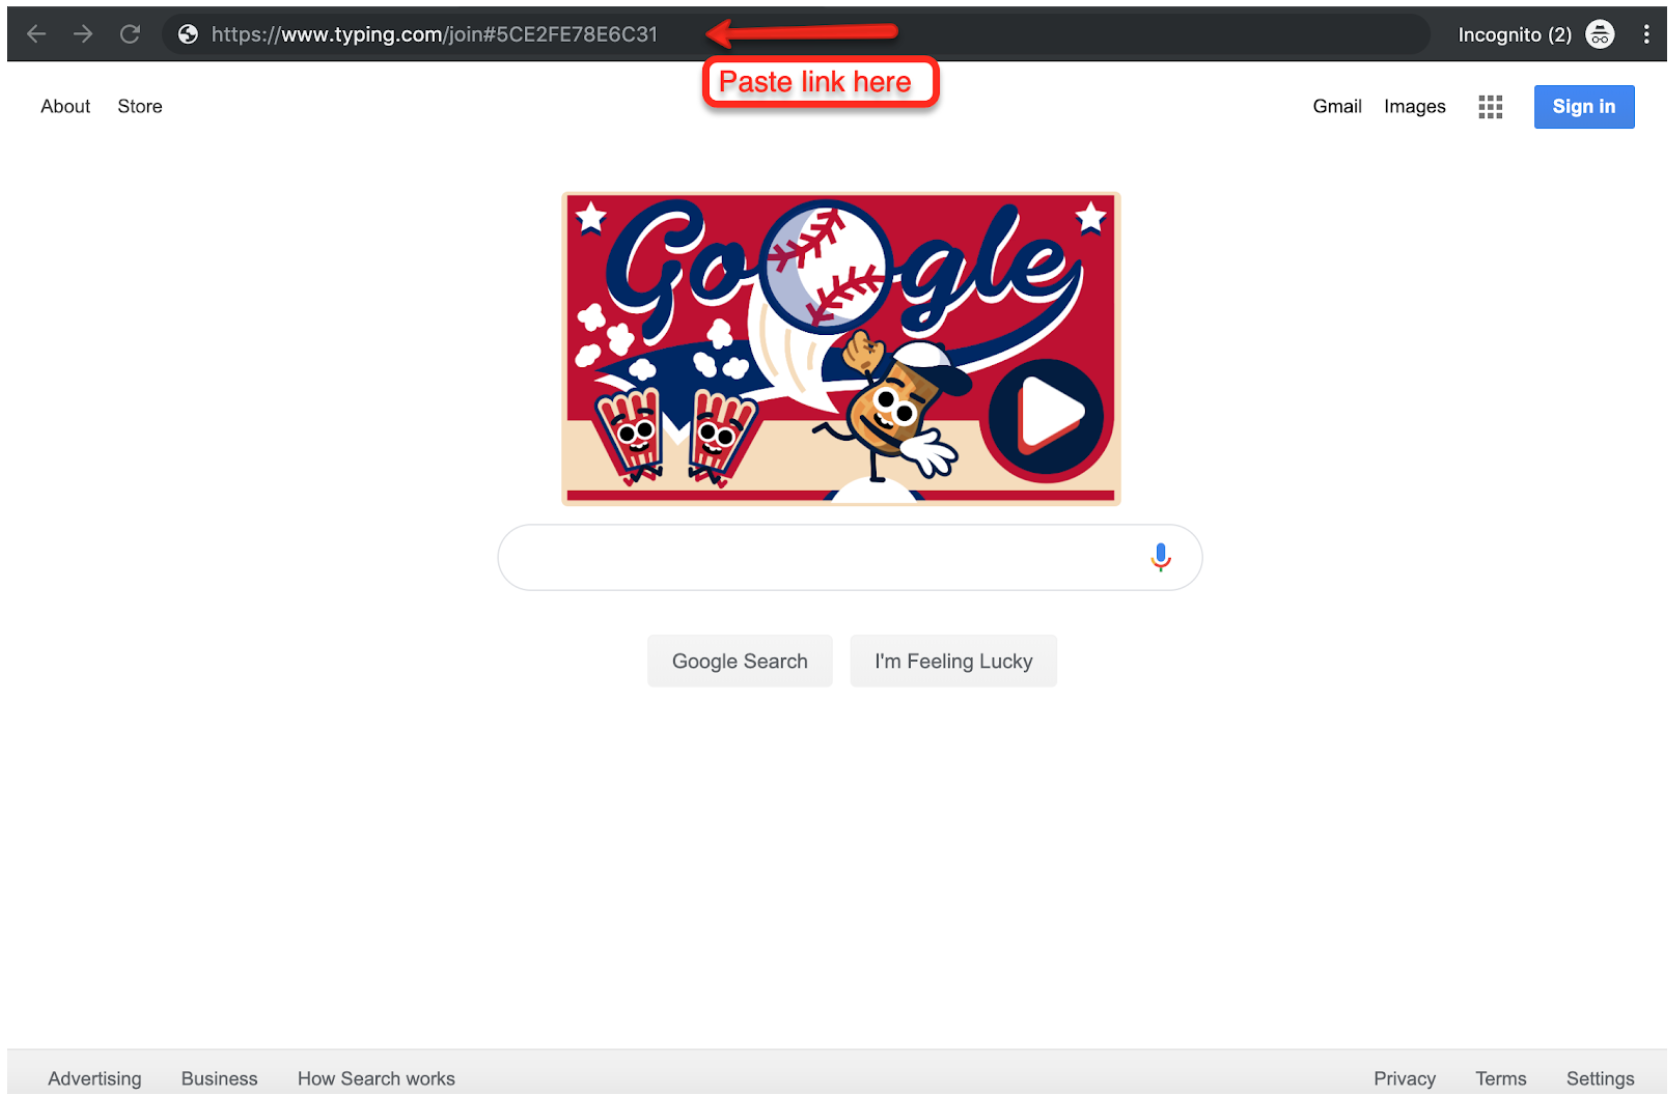
Step 5: Have your students open a new browser window, paste the provided link into the URL bar, and press “Enter.”
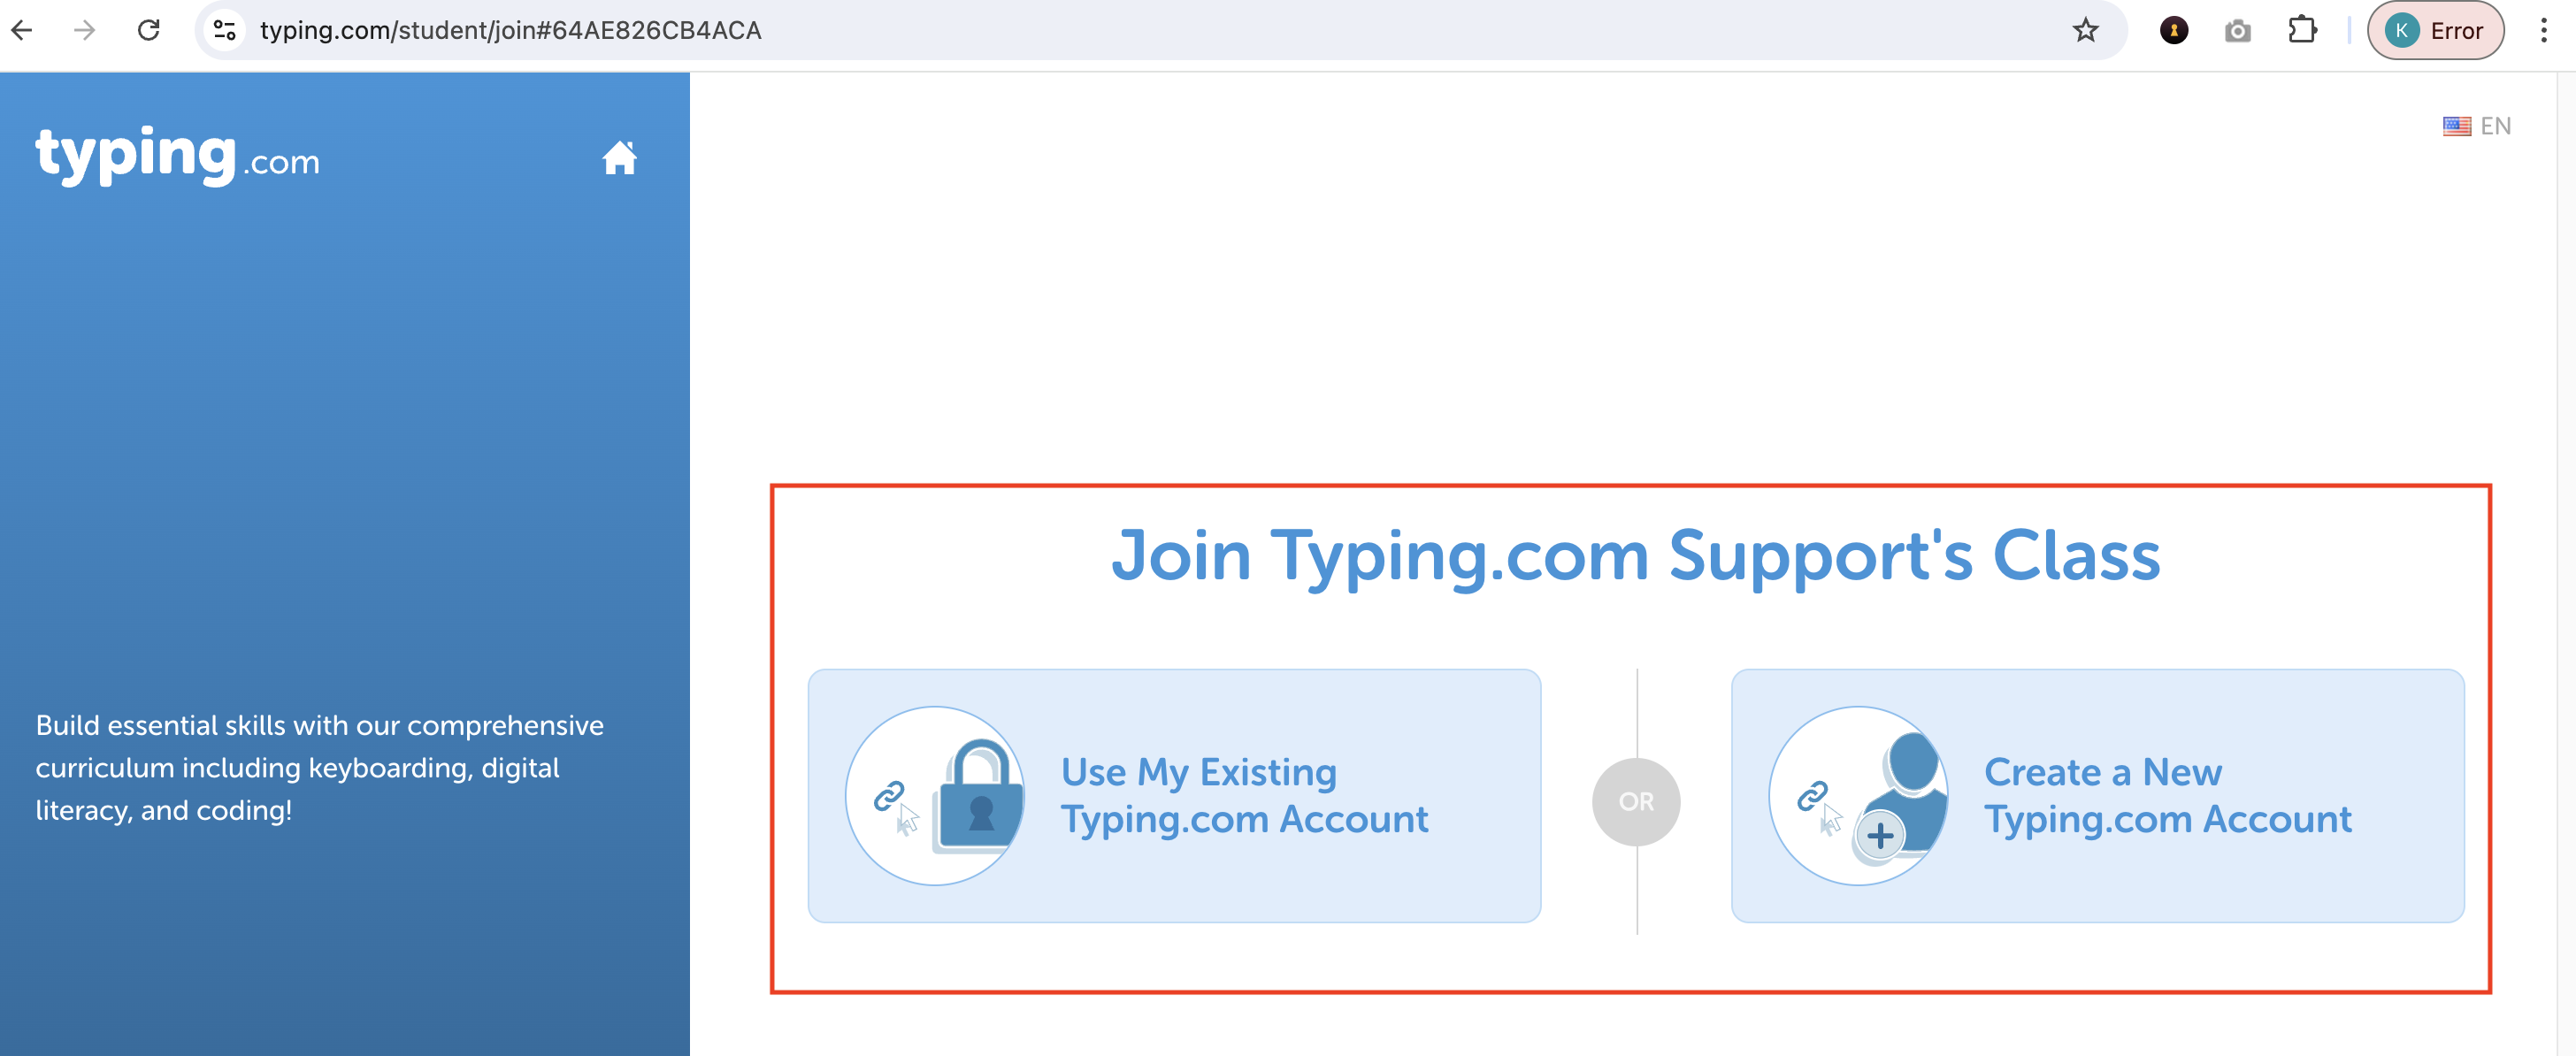
Step 6: Students will be directed to a page where they can choose to join the class by creating a new account or using an existing one. They will select an option and proceed.
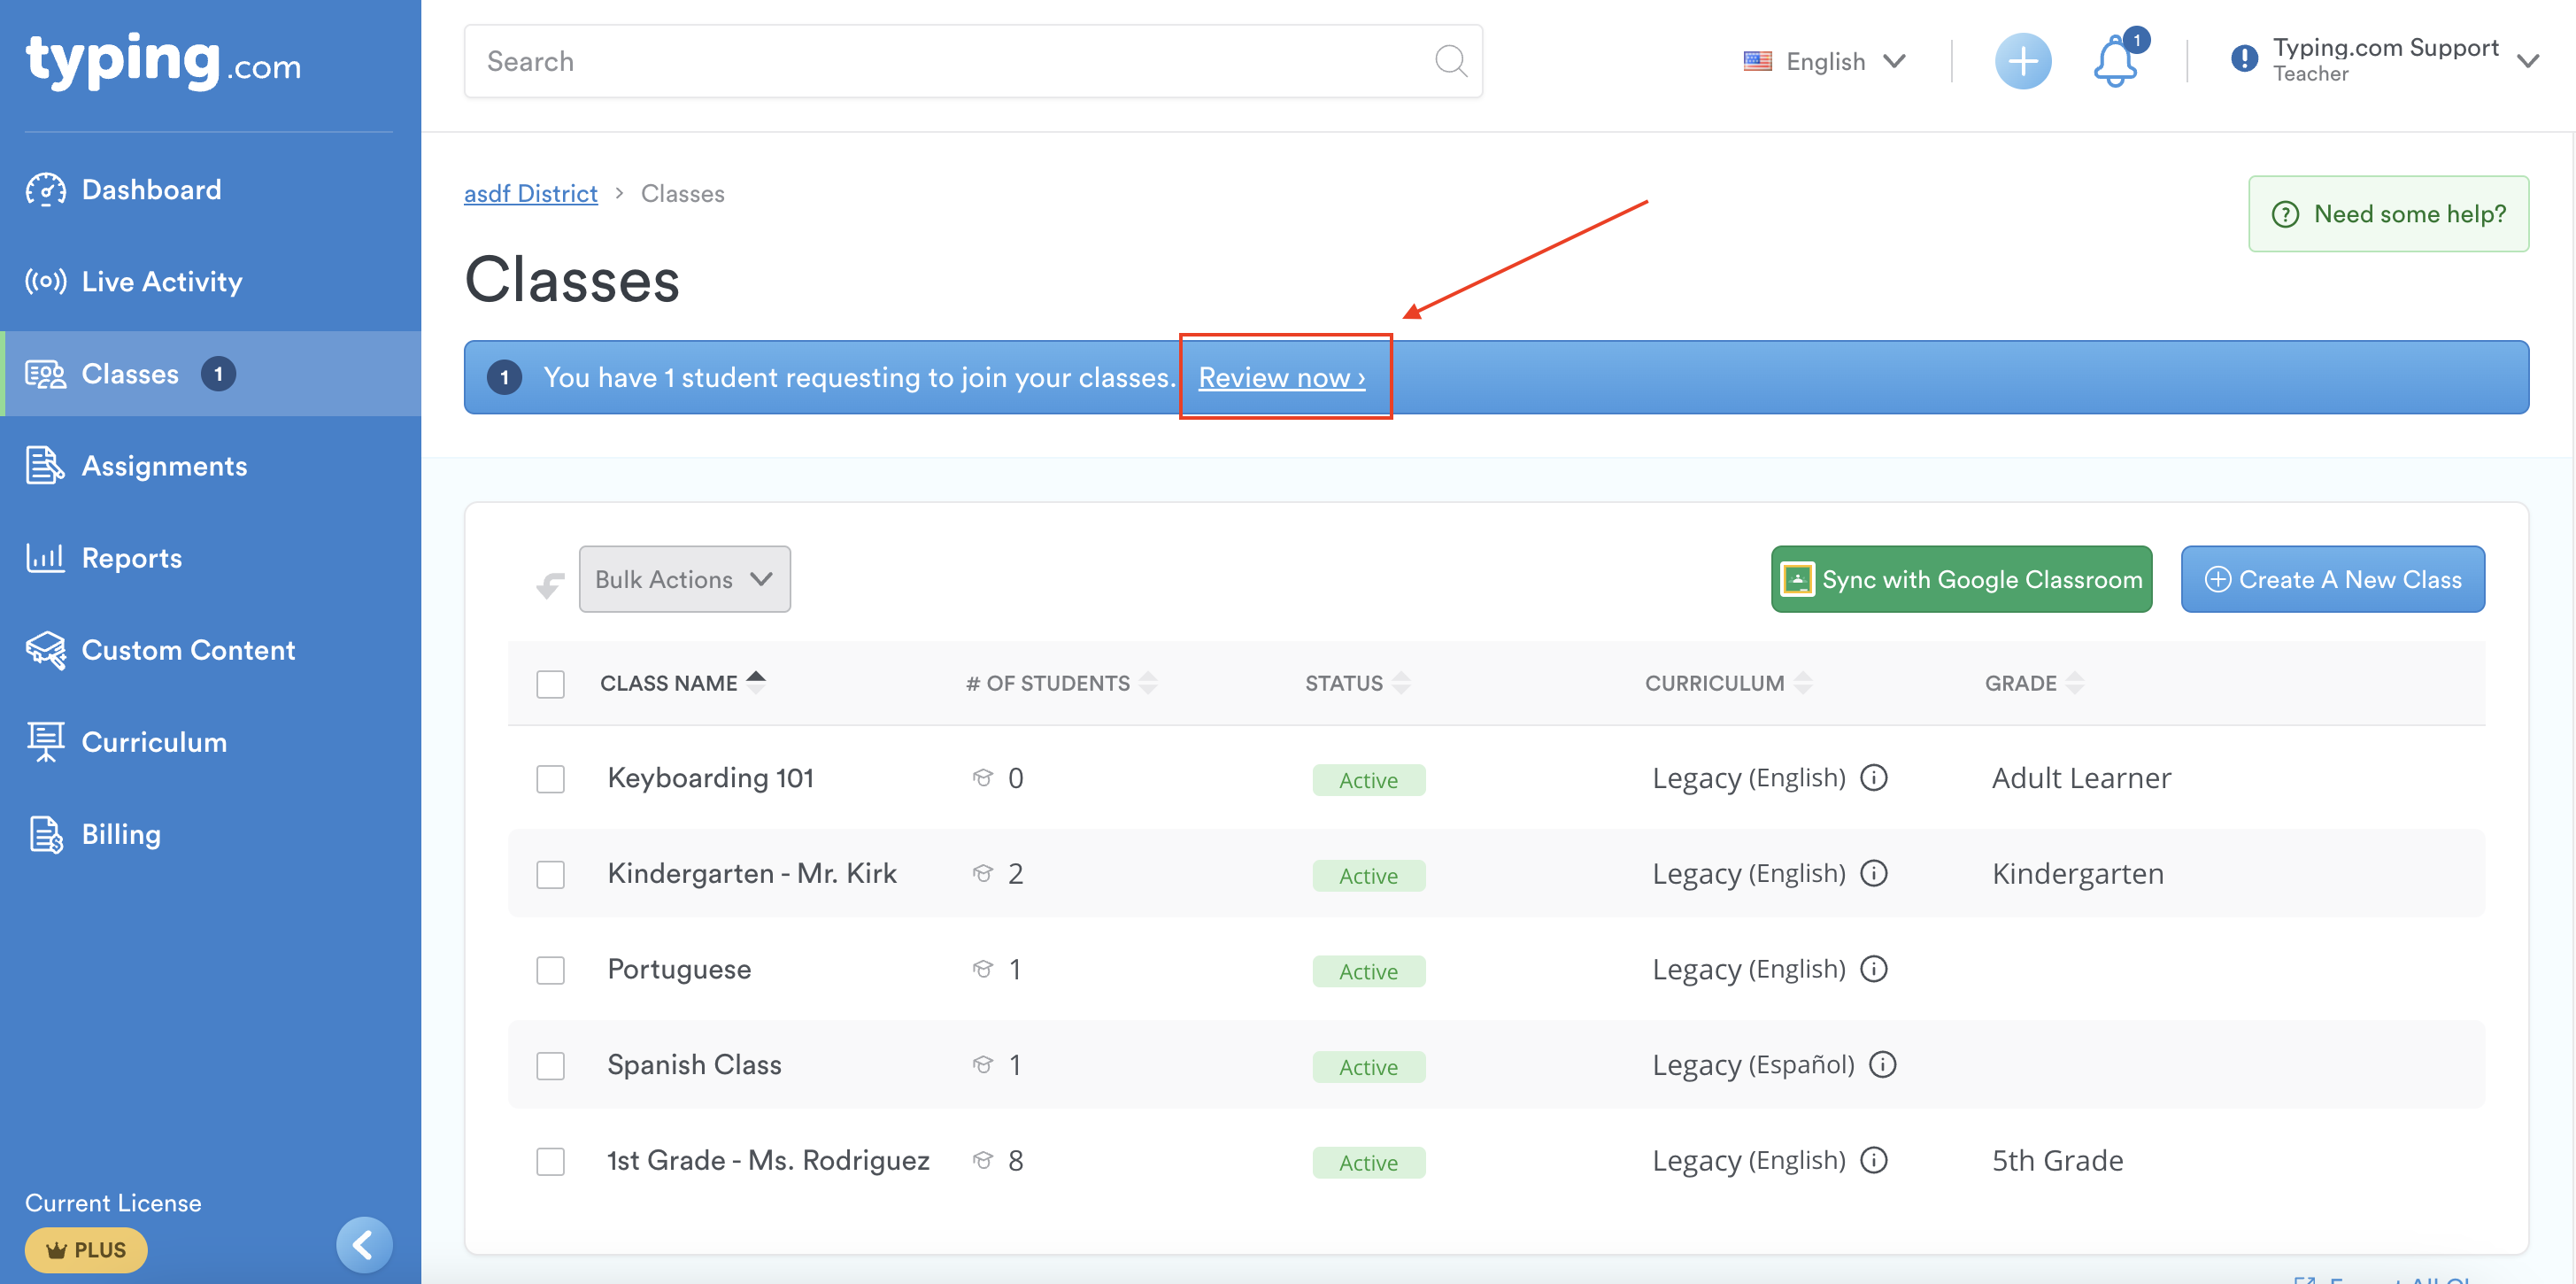
Step 7: After students follow the steps above, go to your Teacher Portal to accept (or reject) each student's request to join your class. These requests will appear on your “Classes” page. Click 'Review now.'
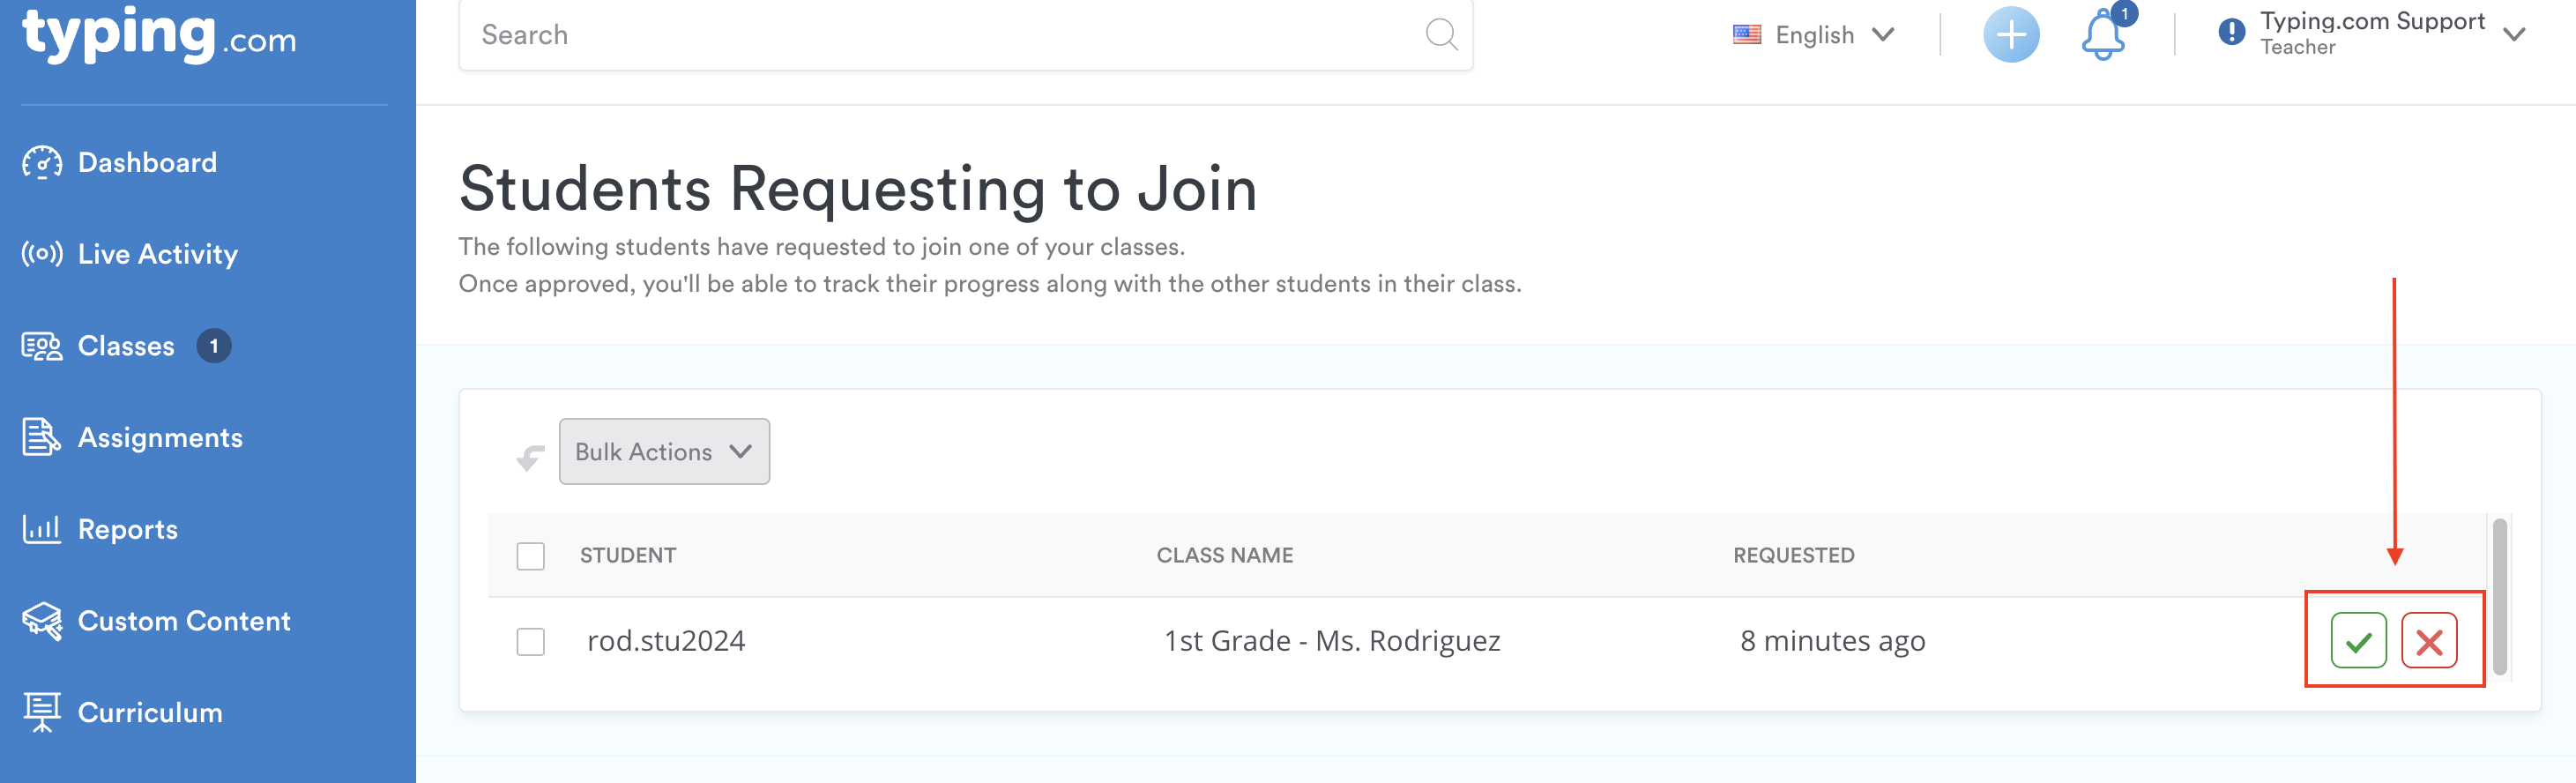
Step 8: Click on the green checkmark to accept the student's request or the red X to reject it.
Pro-Tip: For a quick way to see student join requests, check the bell icon at the top of the page. Click on it to accept or reject requests.

That’s it! Once you refresh the page and return to the class, you’ll find the students are now part of your class. If you need any further assistance, our support team is always here to help. Happy typing!