
How to Create a Written Prompt
The written prompt feature is a fantastic PLUS feature you can use to create custom lessons. Written prompts are an excellent way for students to work on creative writing, learn more about themselves, and express their opinions while honing their typing skills. They can also supplement your school's curriculum by incorporating questions about recent lessons, reading comprehension questions, or preparation for standardized testing. Plus, grading is a breeze with our report feature! Read on to learn how to create a written prompt.
Step 1: Click HERE to log into your teacher portal account.
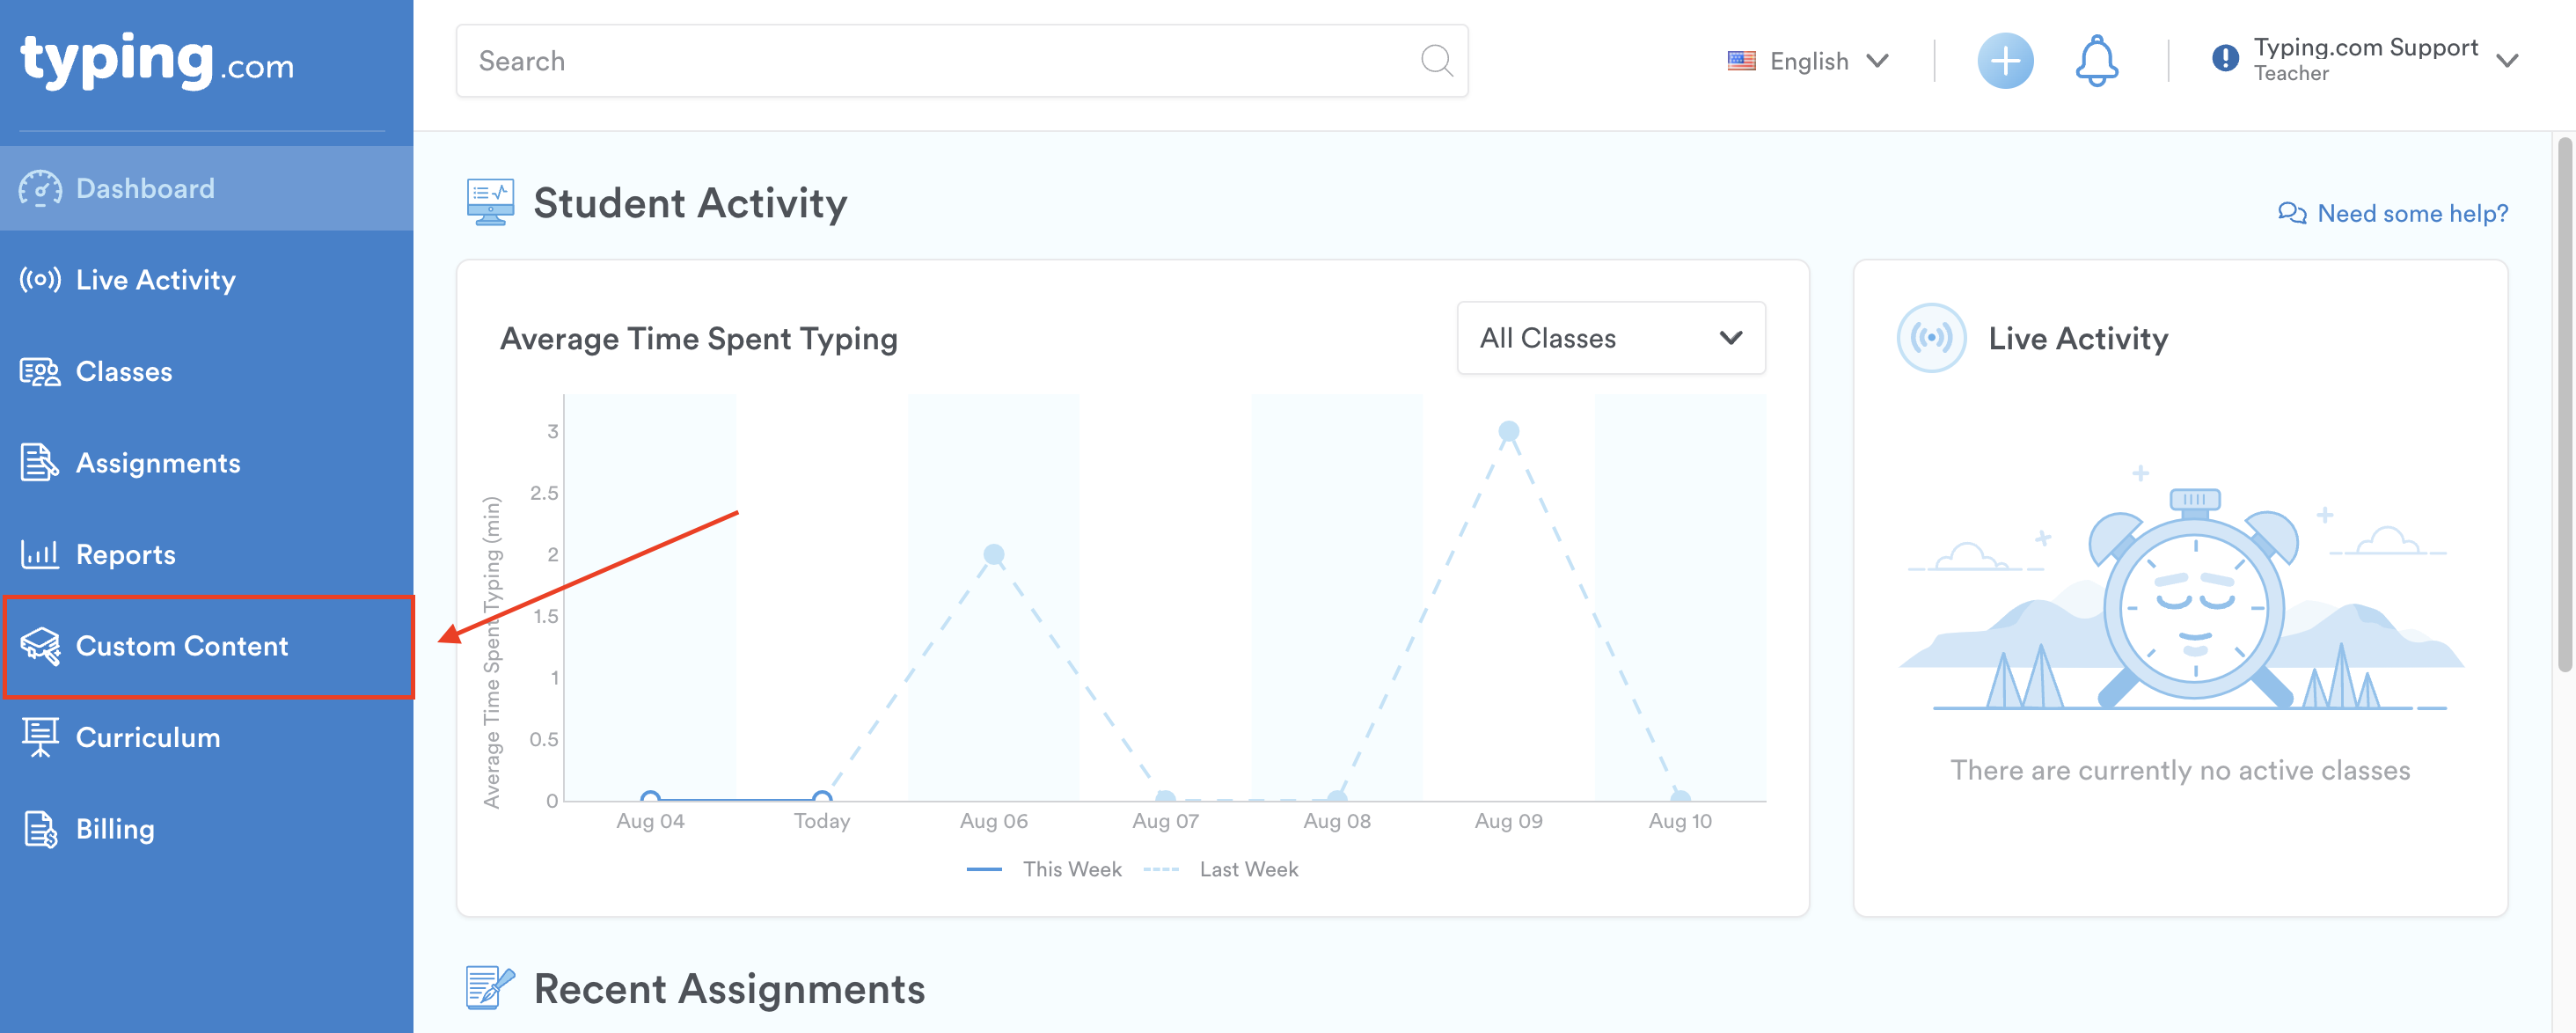
Step 2: Click on "Custom Content" on the left-hand side.
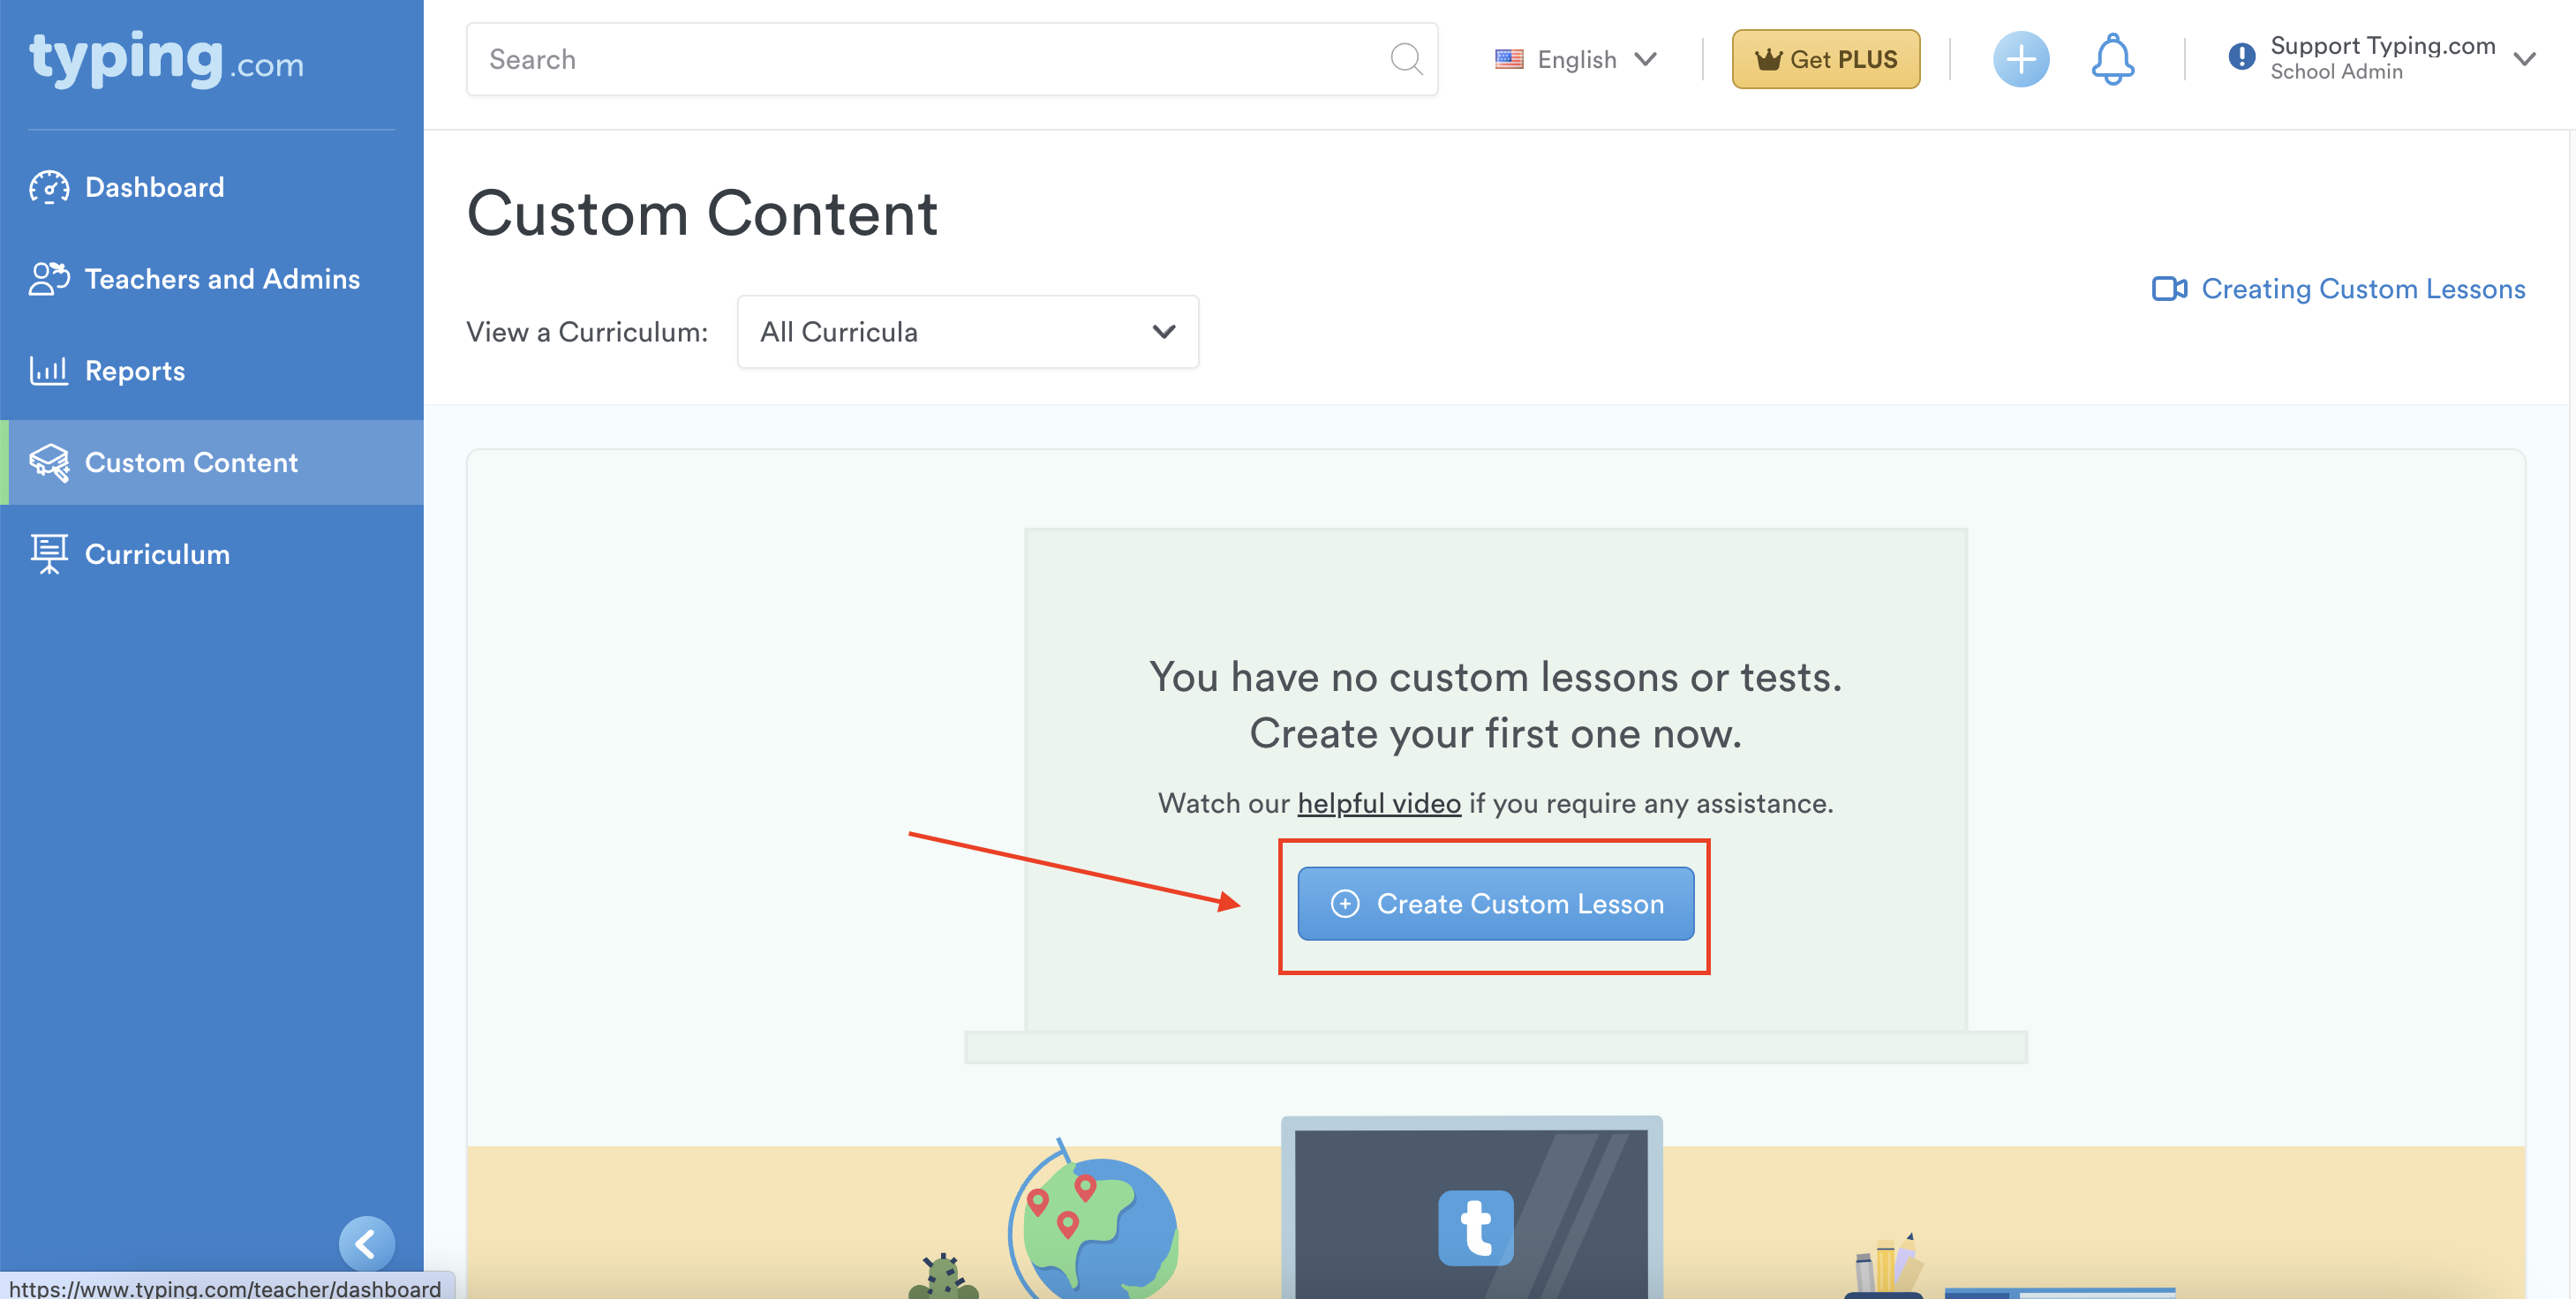
Step 3: Click "Create Custom Lesson."
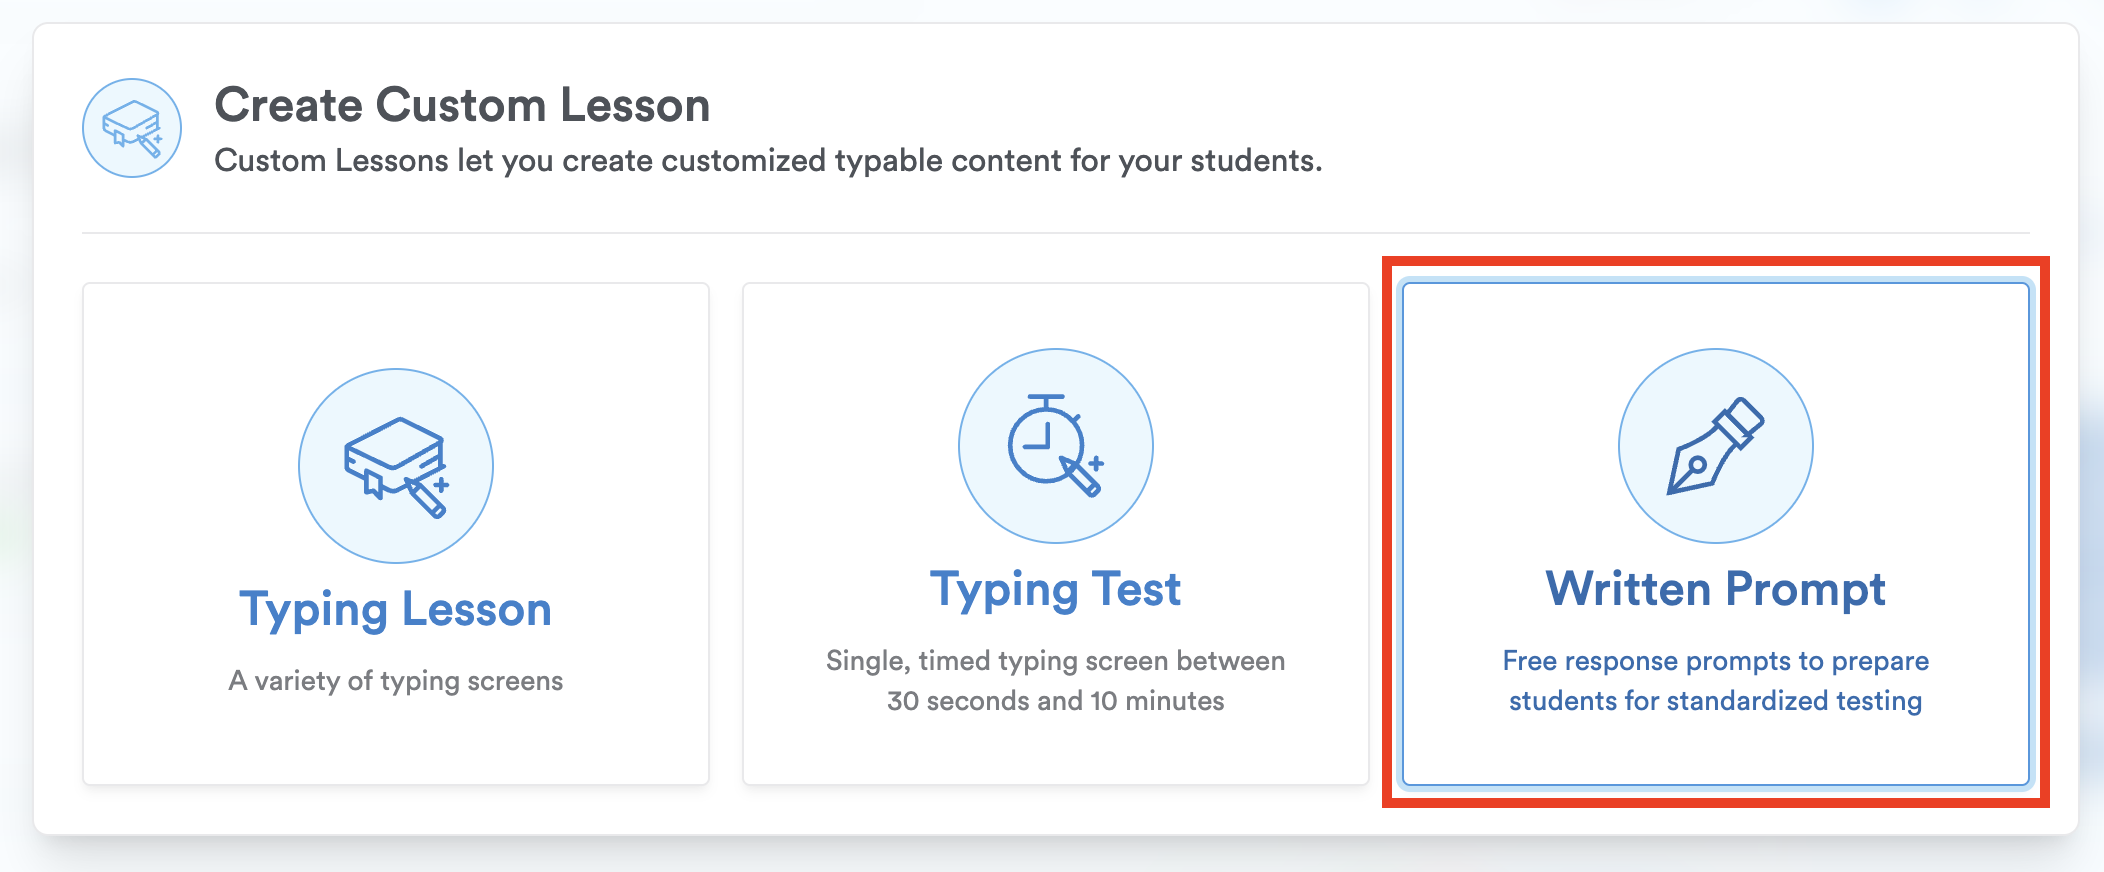
Step 4: Select "Written Prompt."
Step 5: Enter the required information such as lesson title, Save As (Published or Draft), the curriculum (optional), the word count (how many words need to be typed to complete the prompt), time limit (optional), and your written prompt.
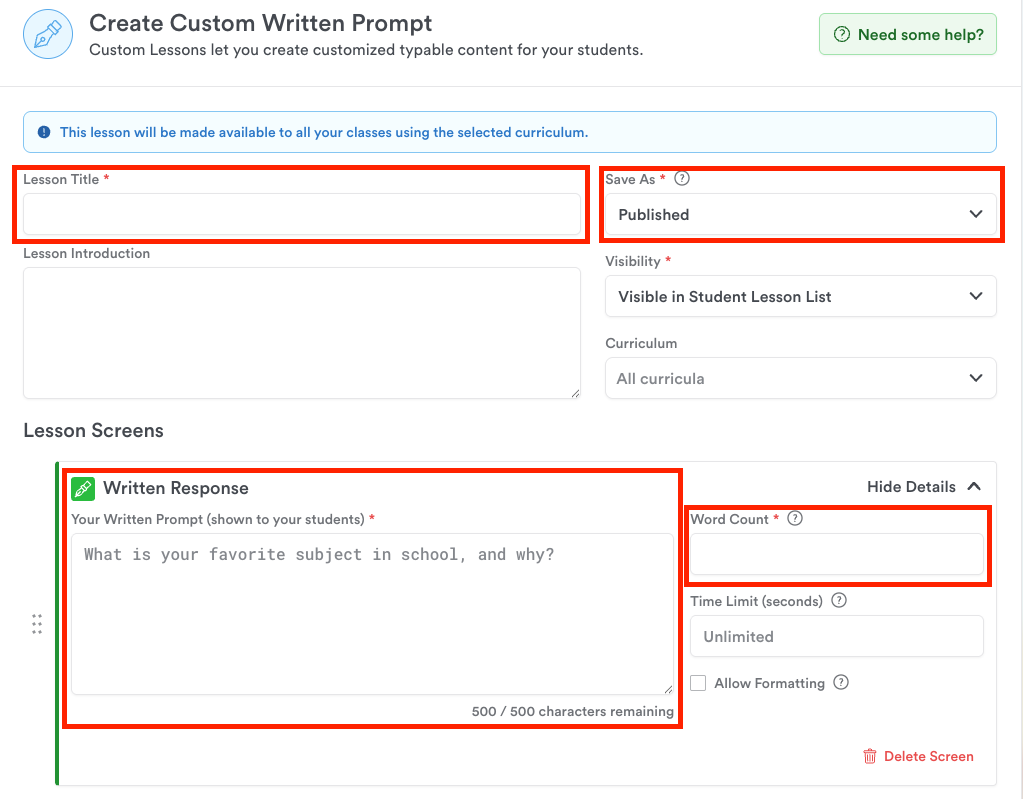
Pro-Tip: Allow students to format their responses (bold, italics, lists, etc.) by checking the 'Allow Formatting' box.
Step 6: Create additional screens by clicking the white "Create Custom Written Prompt" button with the plus sign, or finalize the lesson by clicking the blue "Create Custom Written Prompt."
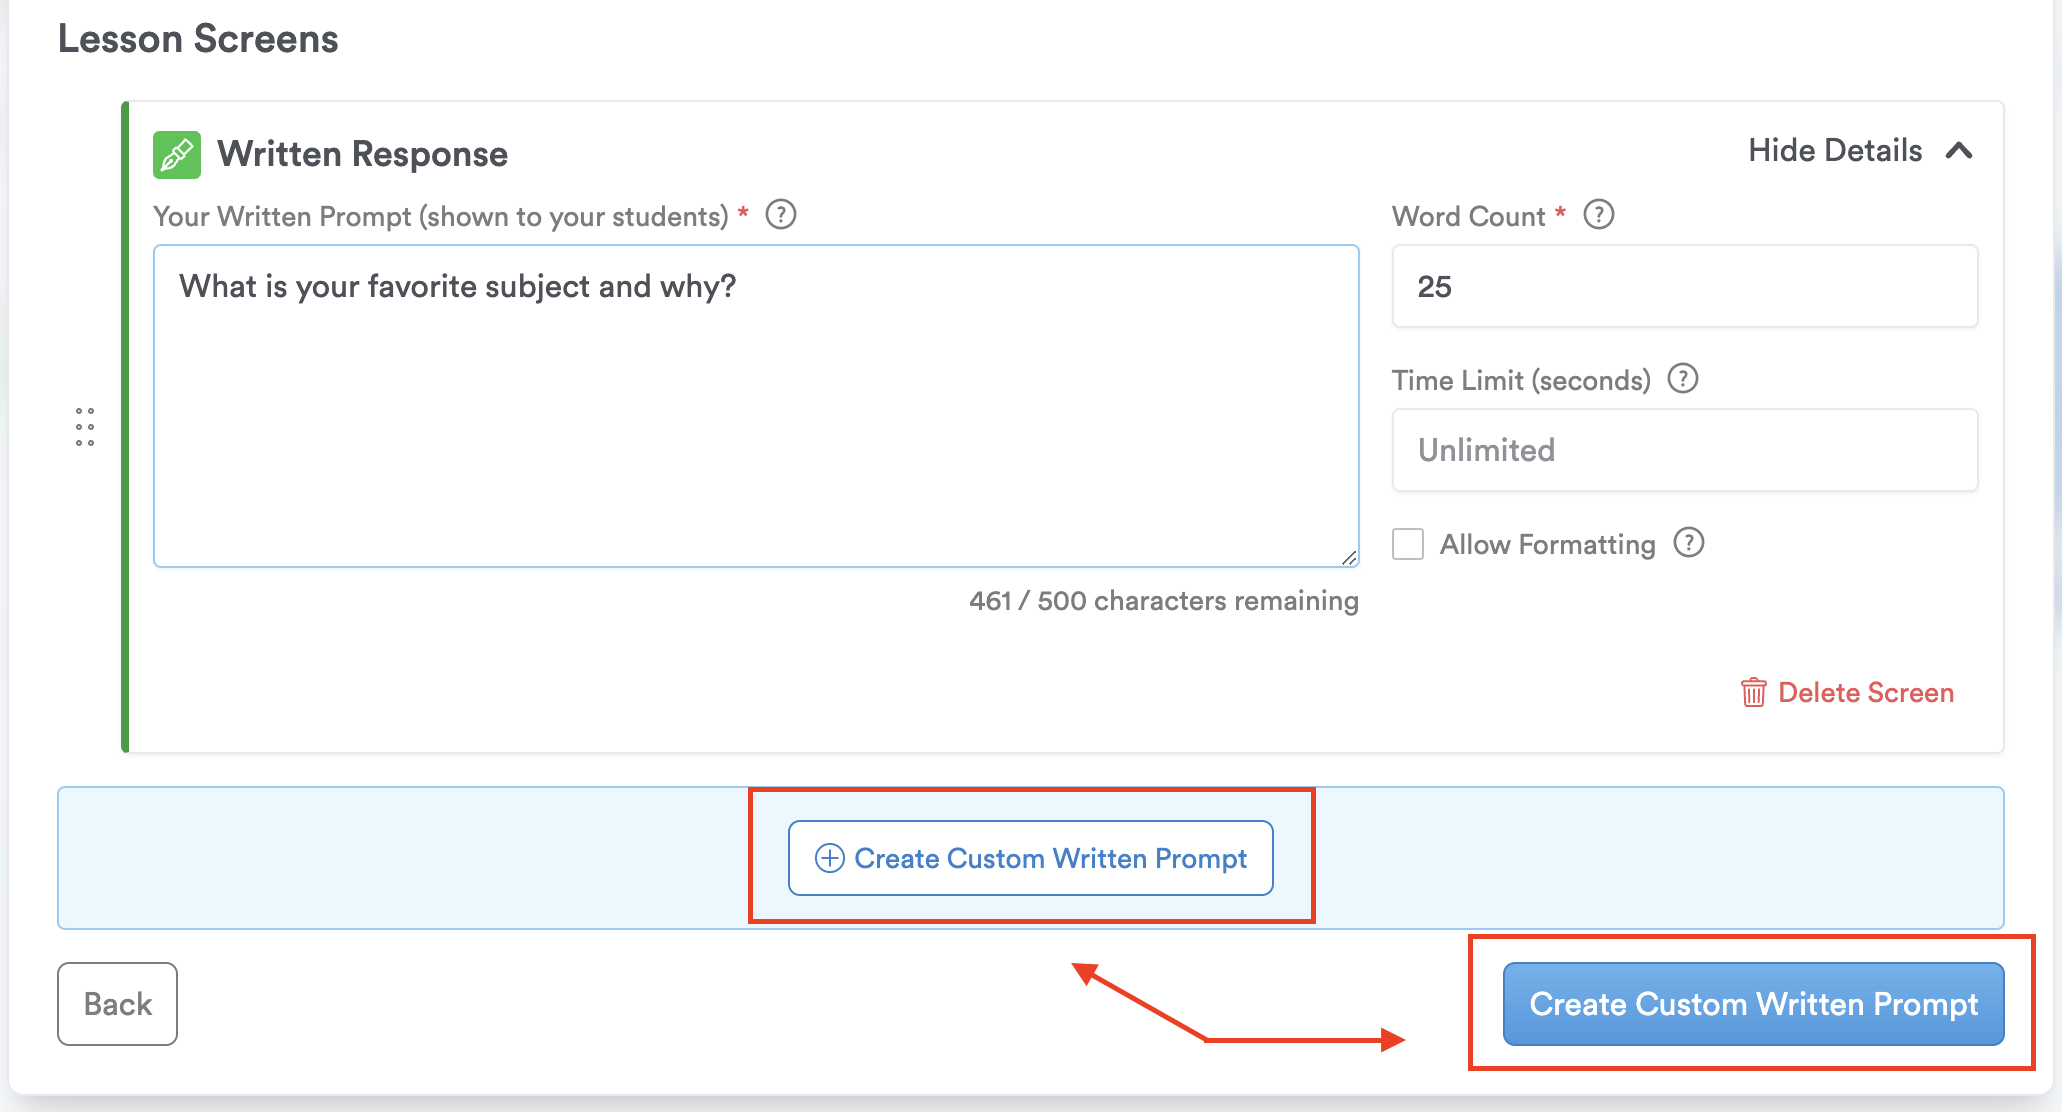
Pro-Tip: Reorder multiple lesson screens by dragging and dropping them.
Viewing Student Responses with the Reports Feature
For multiple Classes:
Step 1: After logging into your account, click on "Reports" from the left-hand side.
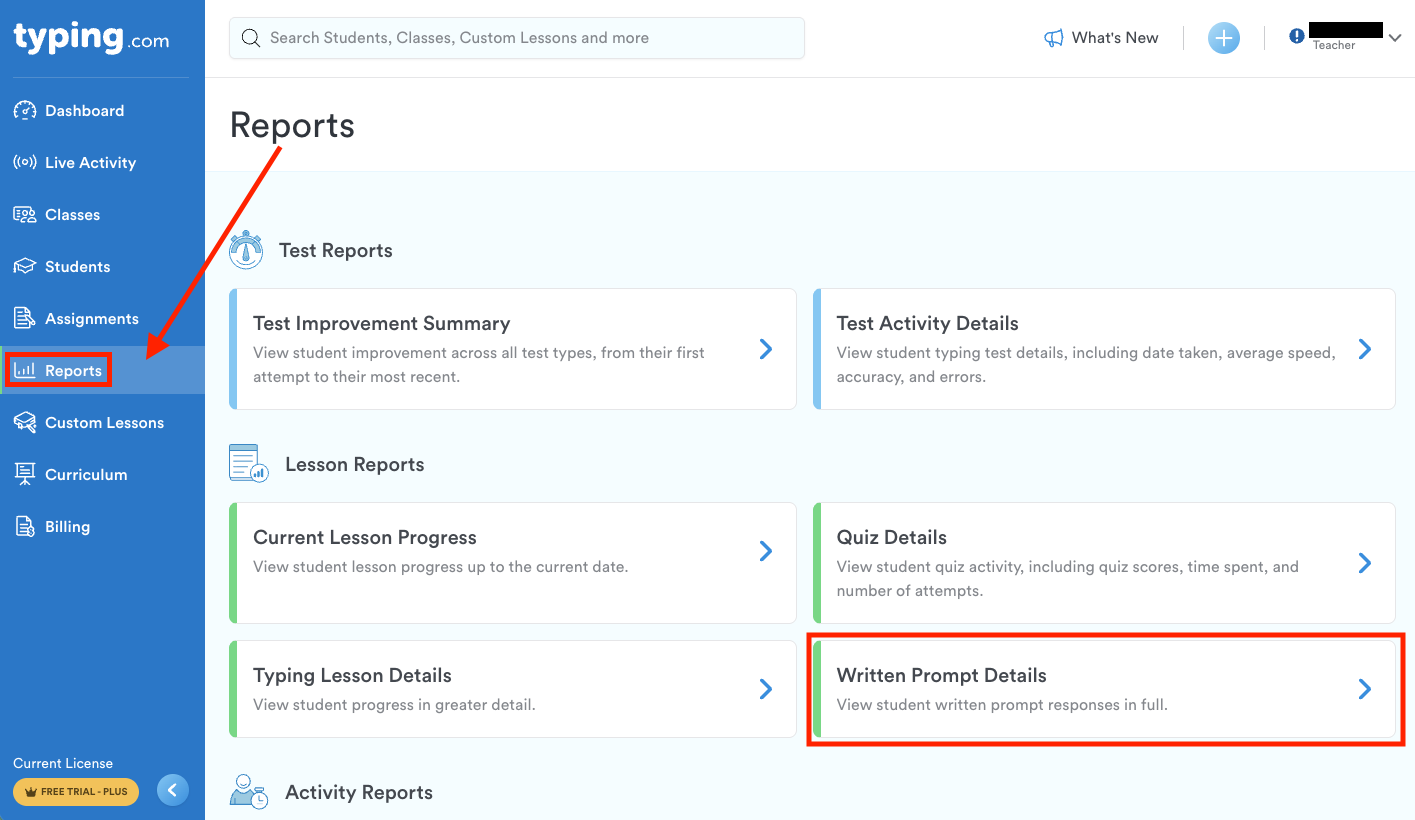
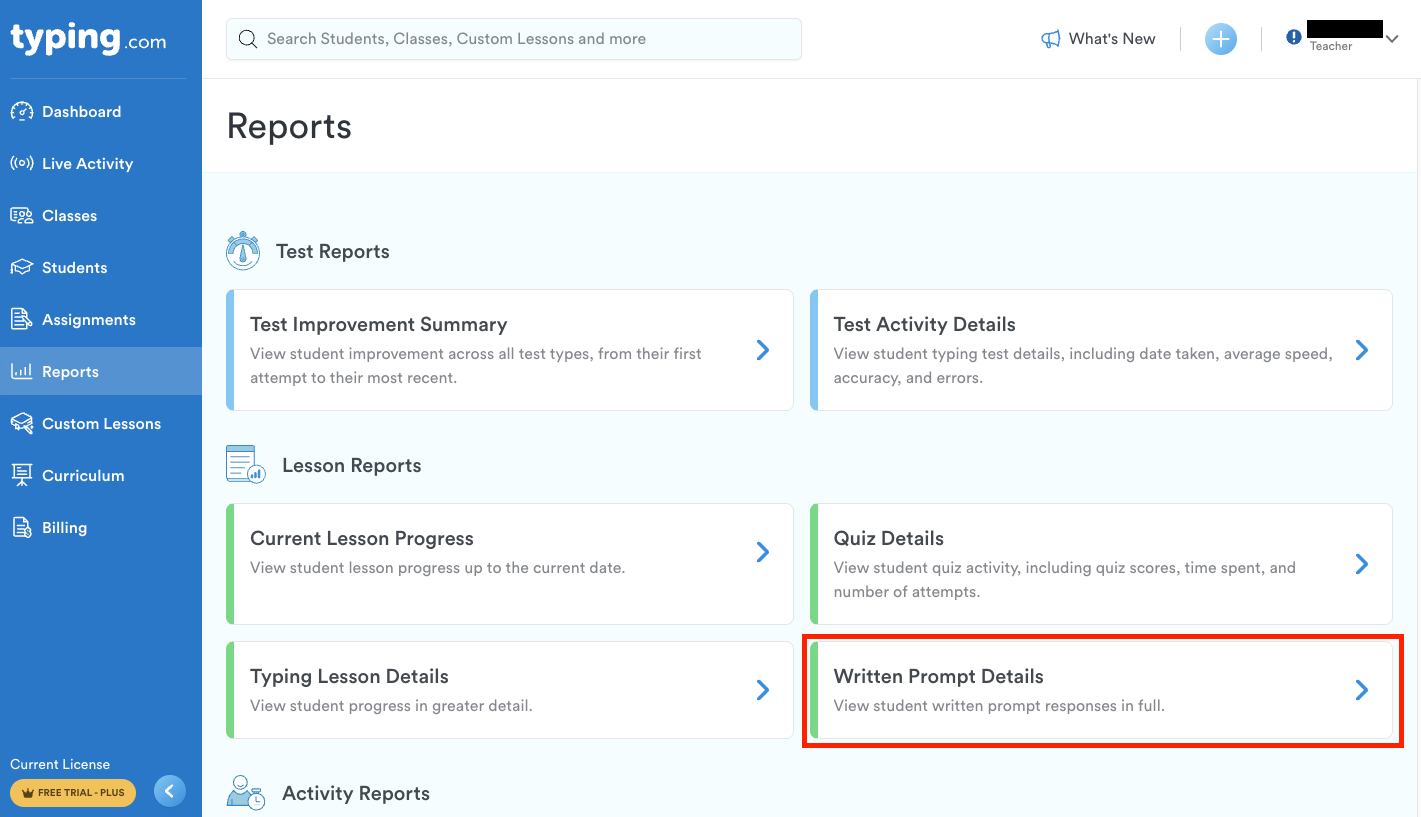
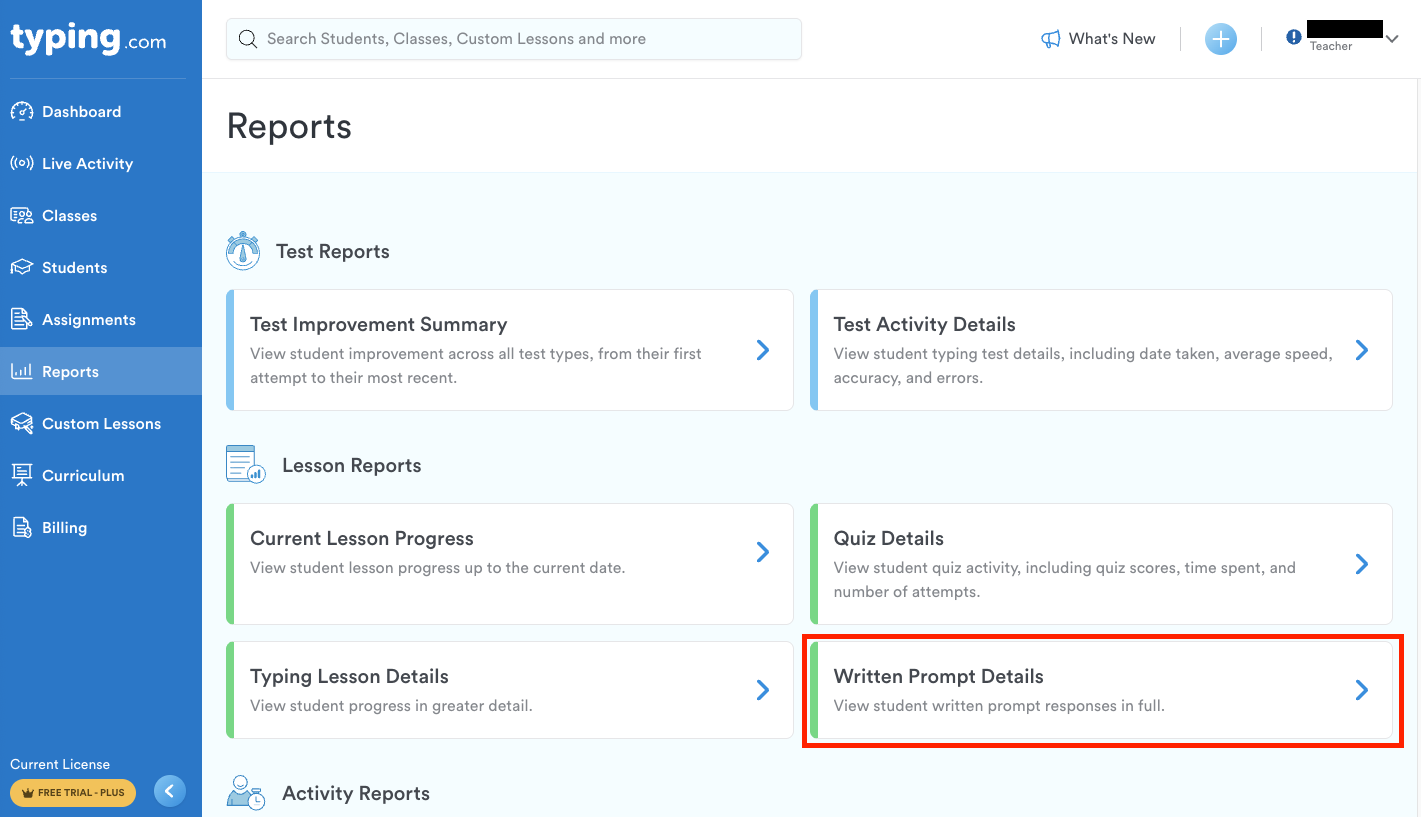
Step 2: Click "Box" for "Written Prompt Responses."
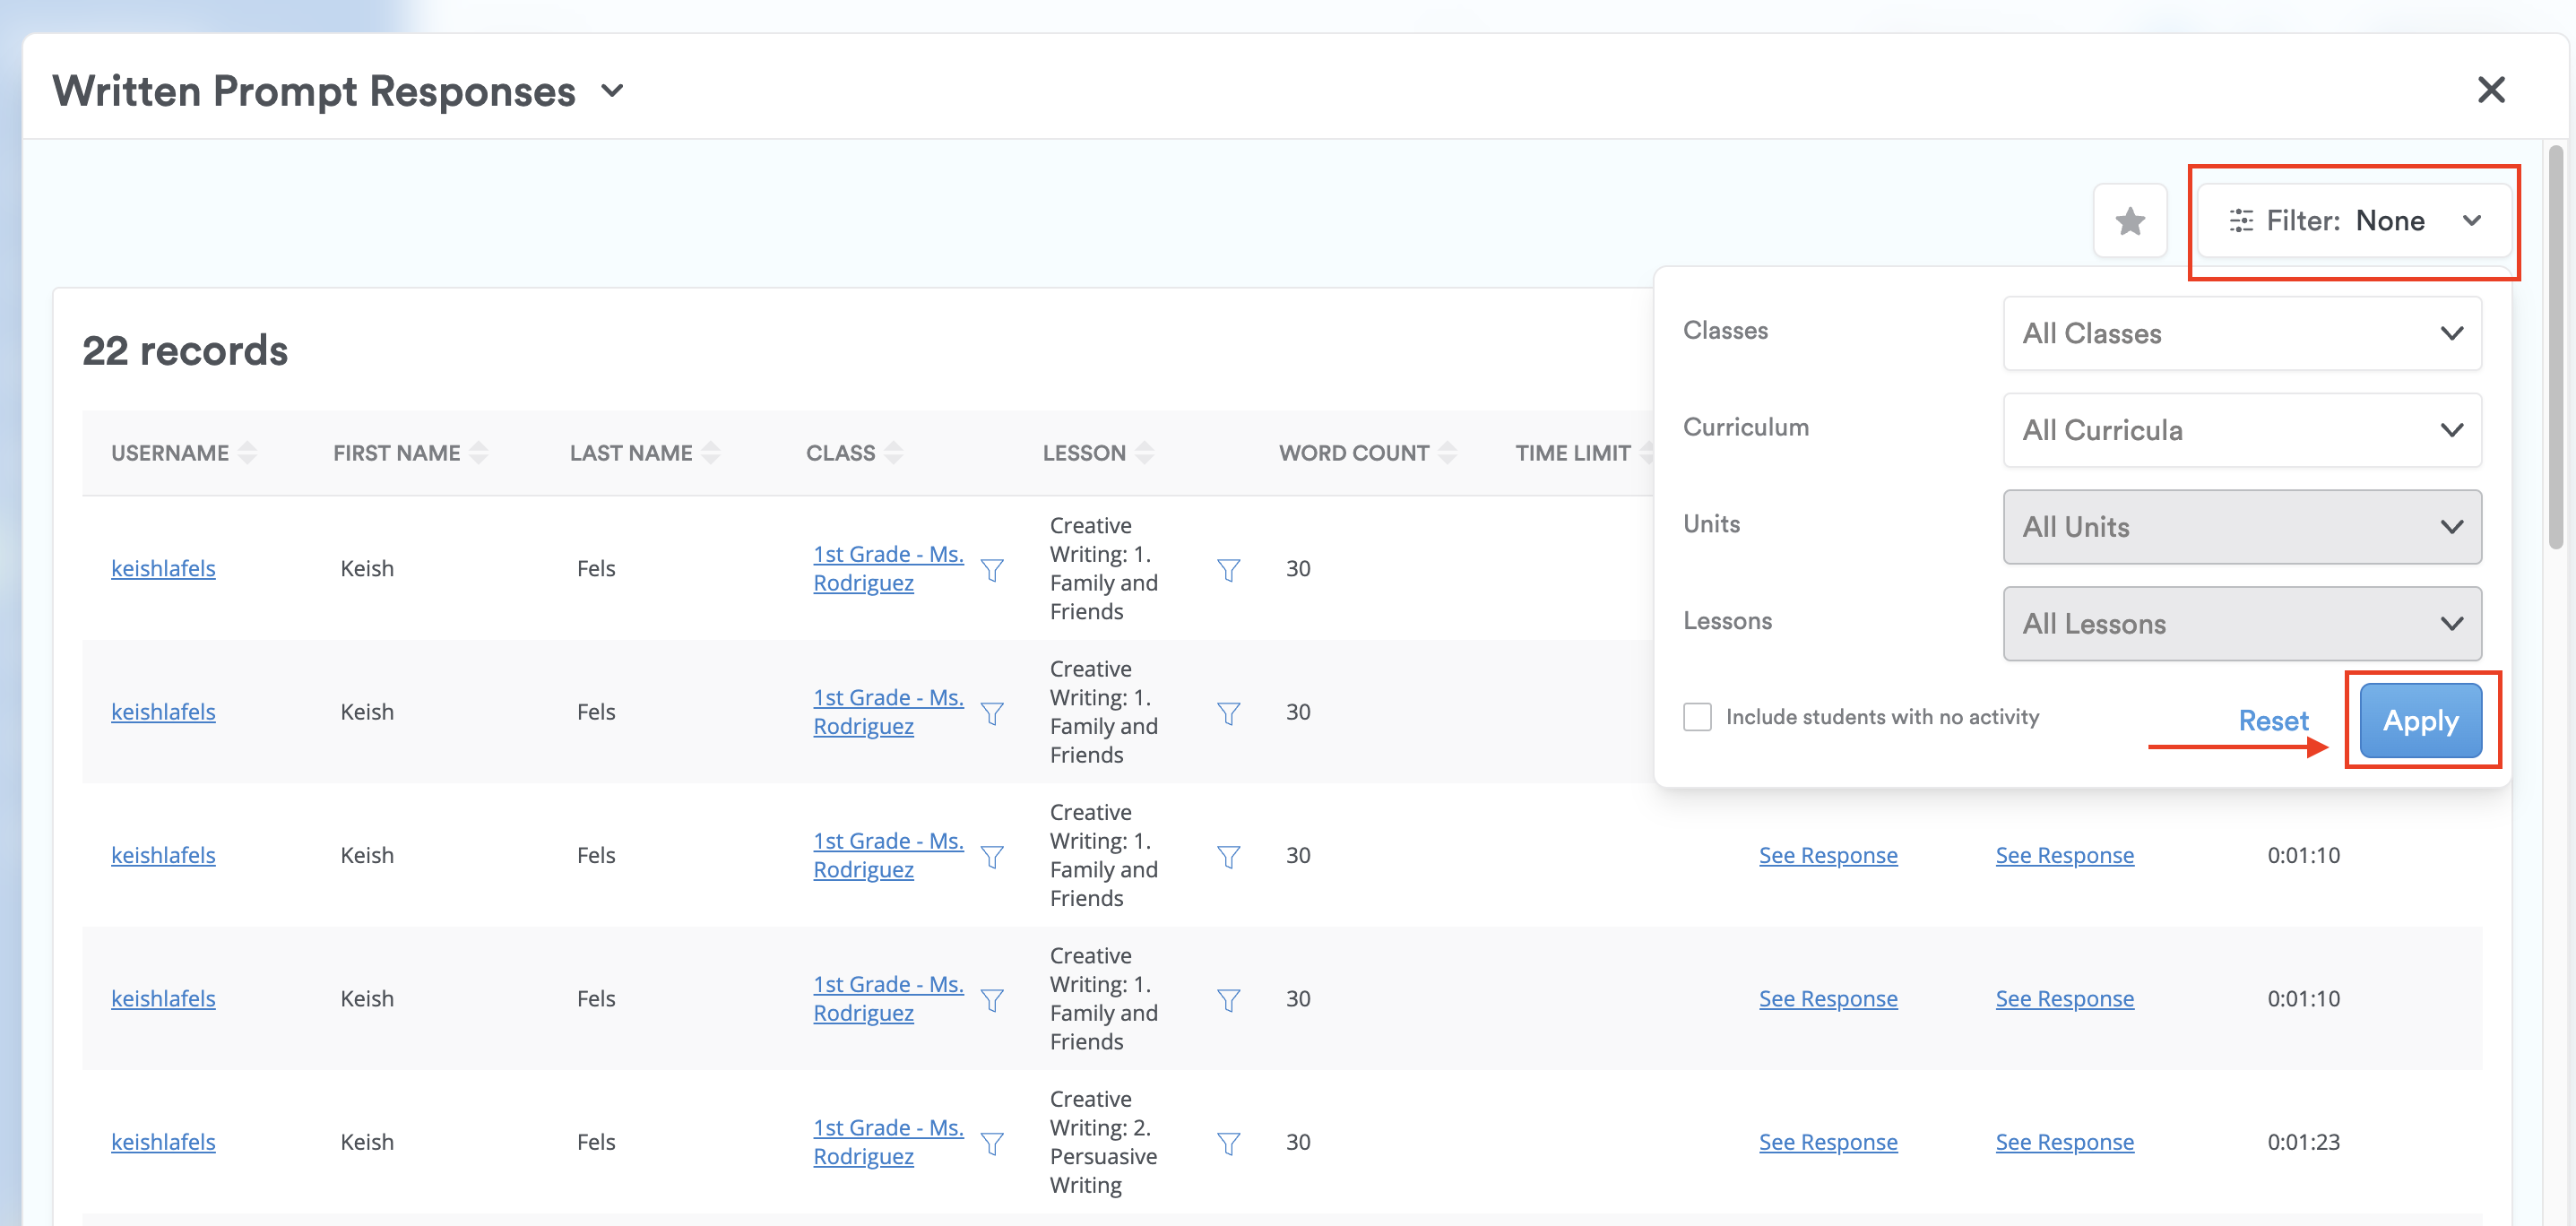
Step 4: Apply any filters.
Pro-Tip: Save filter settings for a report by clicking the star icon next to the filter menu.
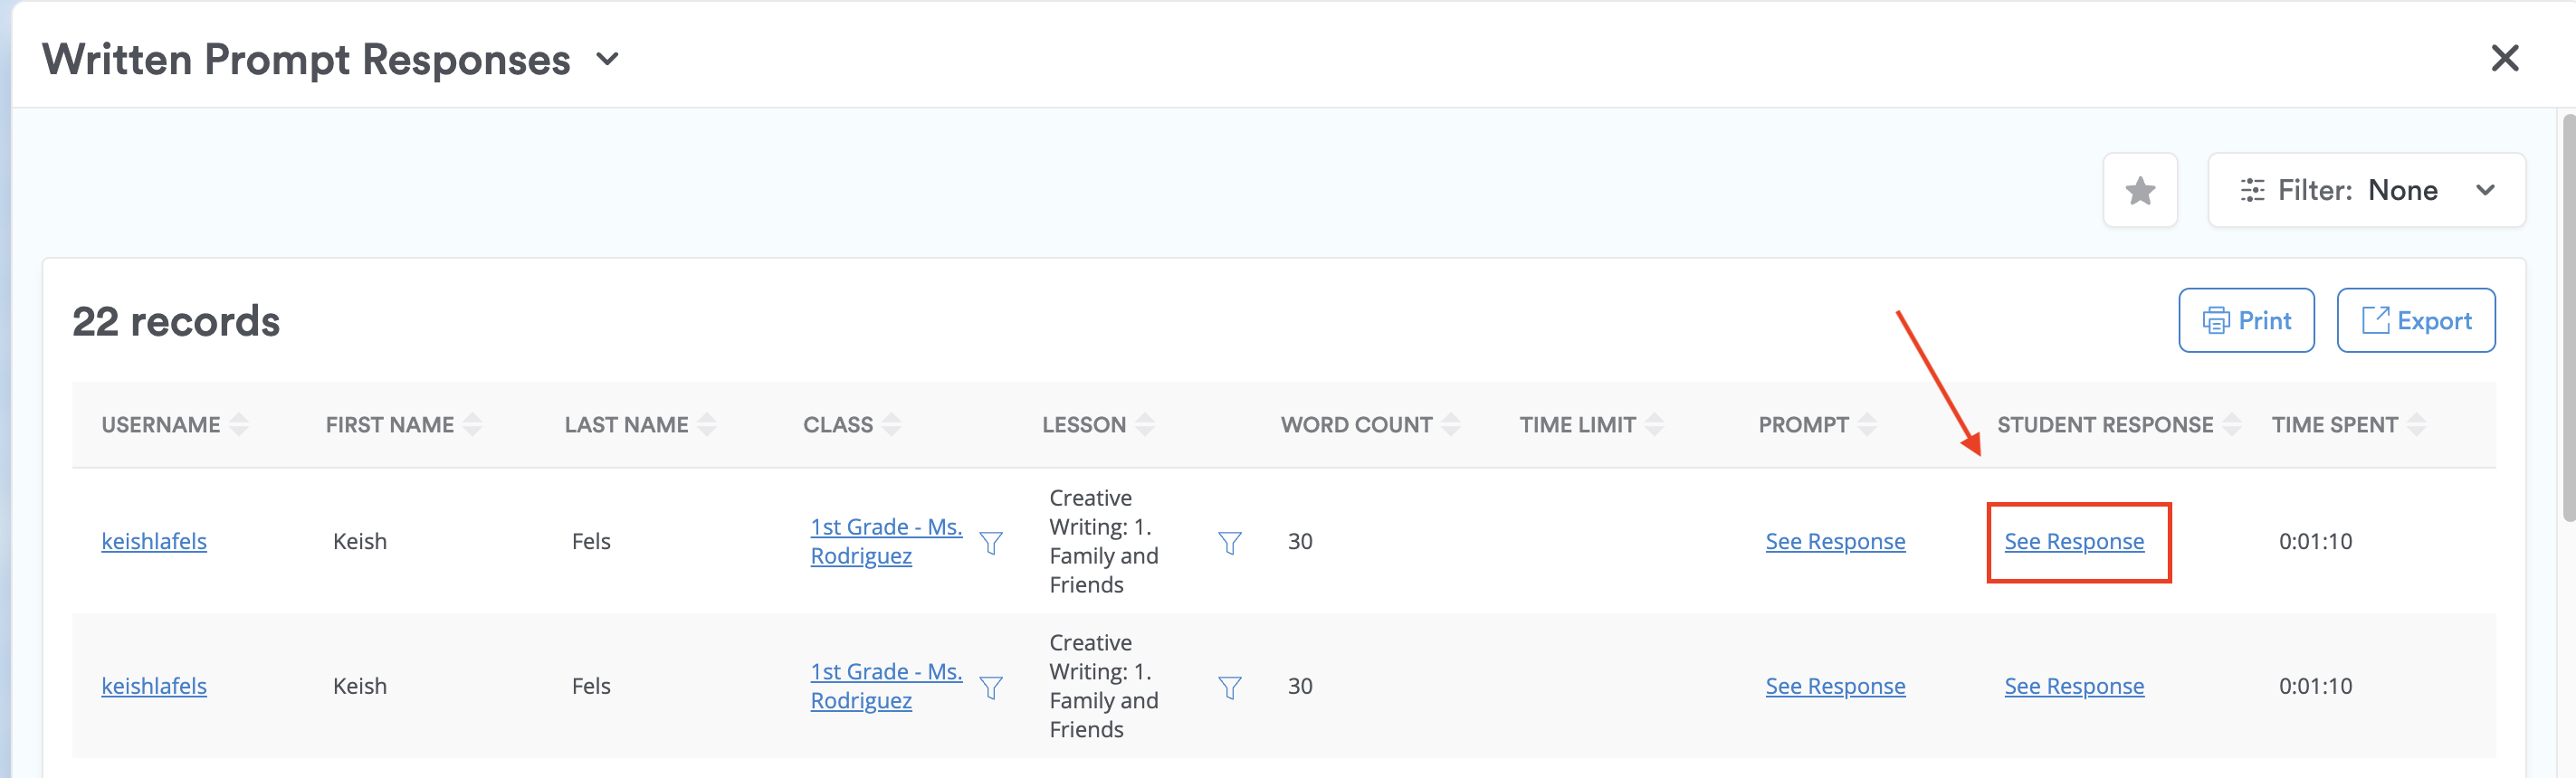
Step 5: Click "See Response" from any student in any class.
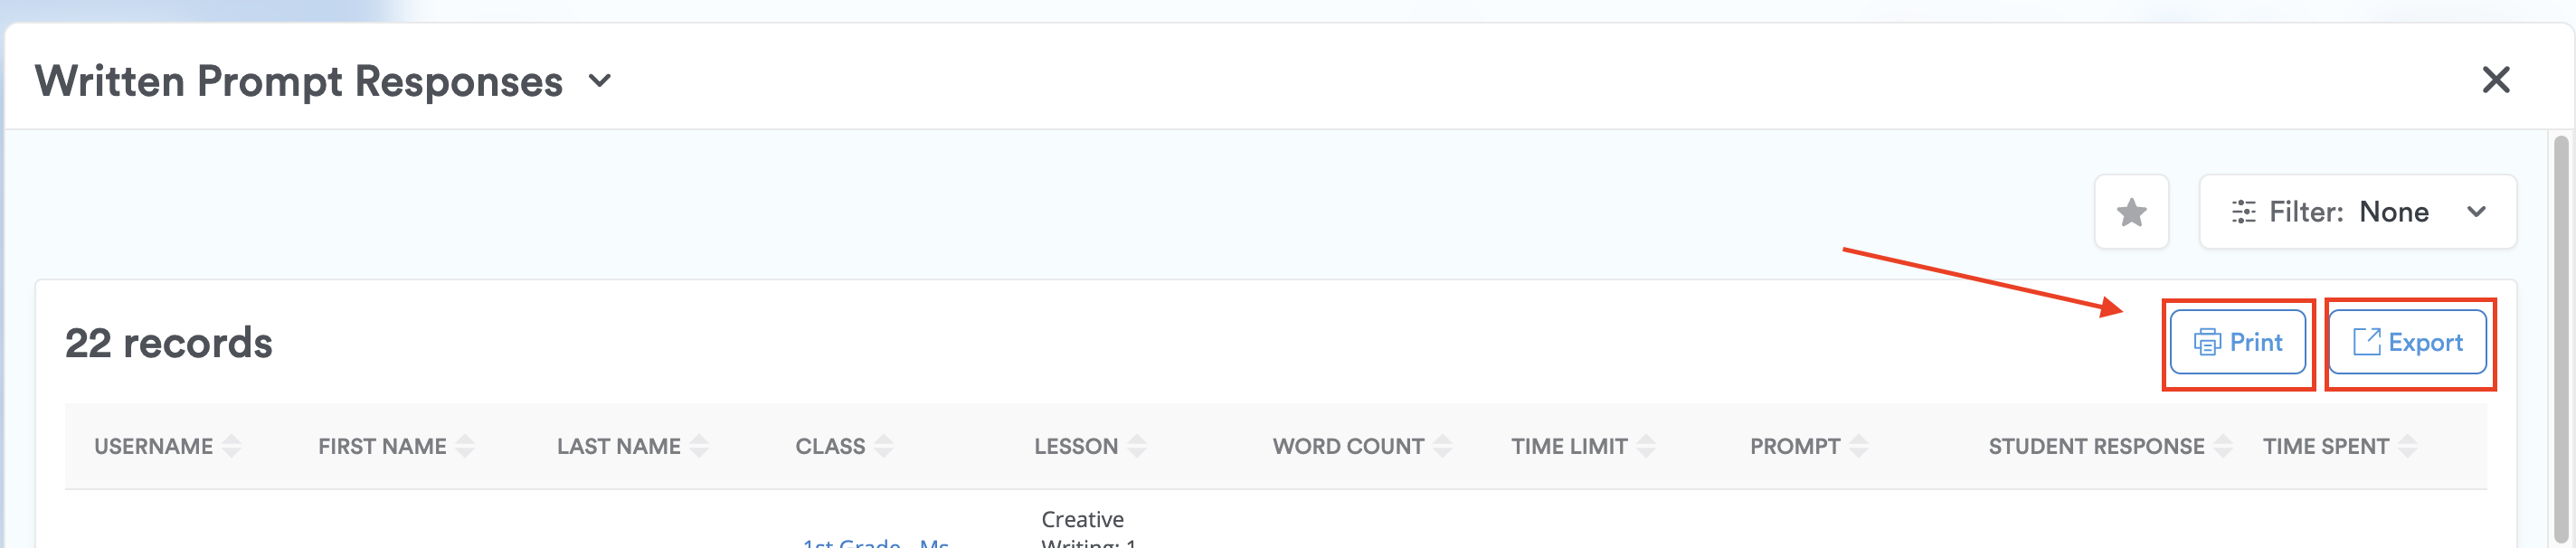
Step 6: Print or export the report by clicking on the "Print" or "Export" icon.
For a class:
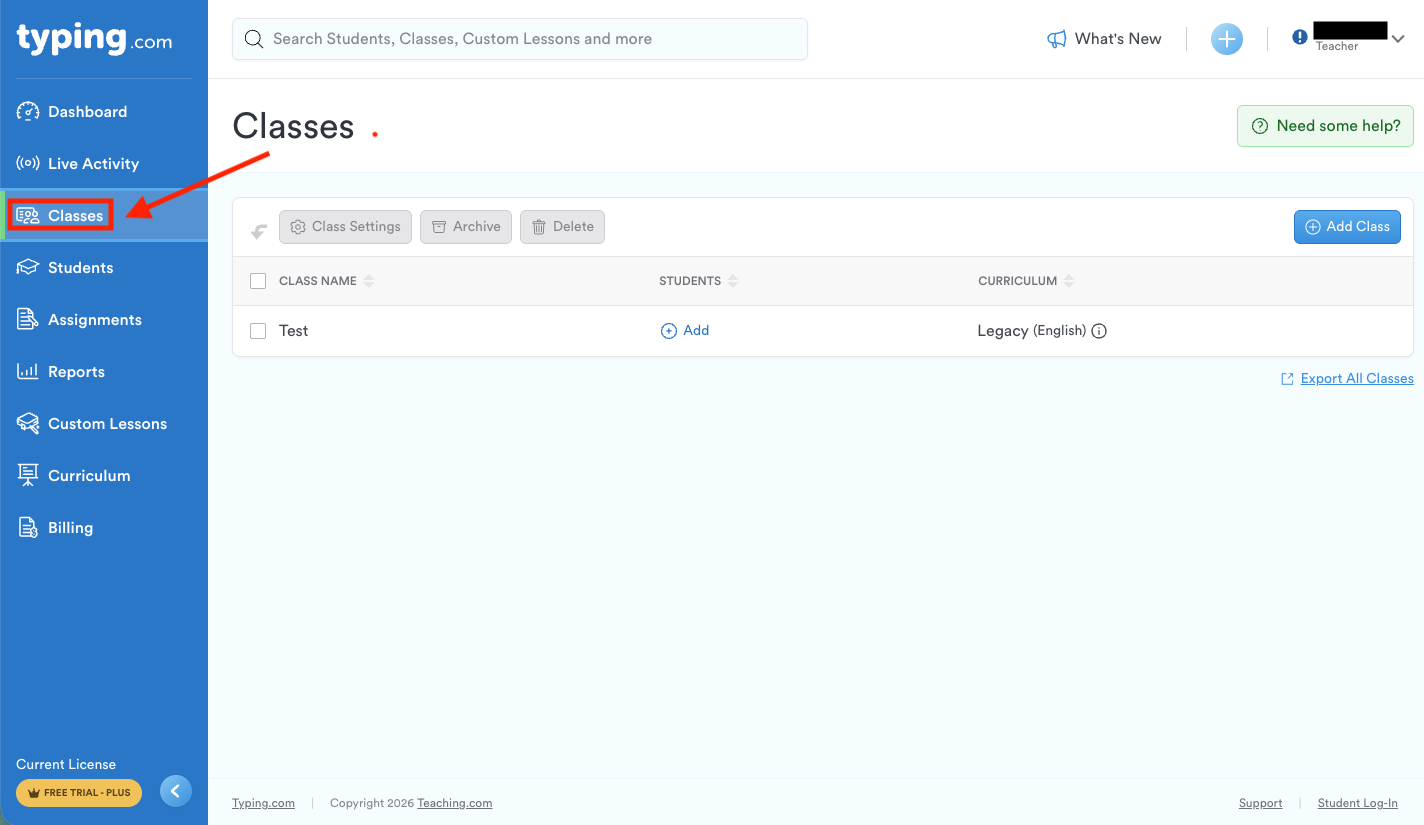
Step 1: After logging into your account, click on "Classes" from the left-hand side.
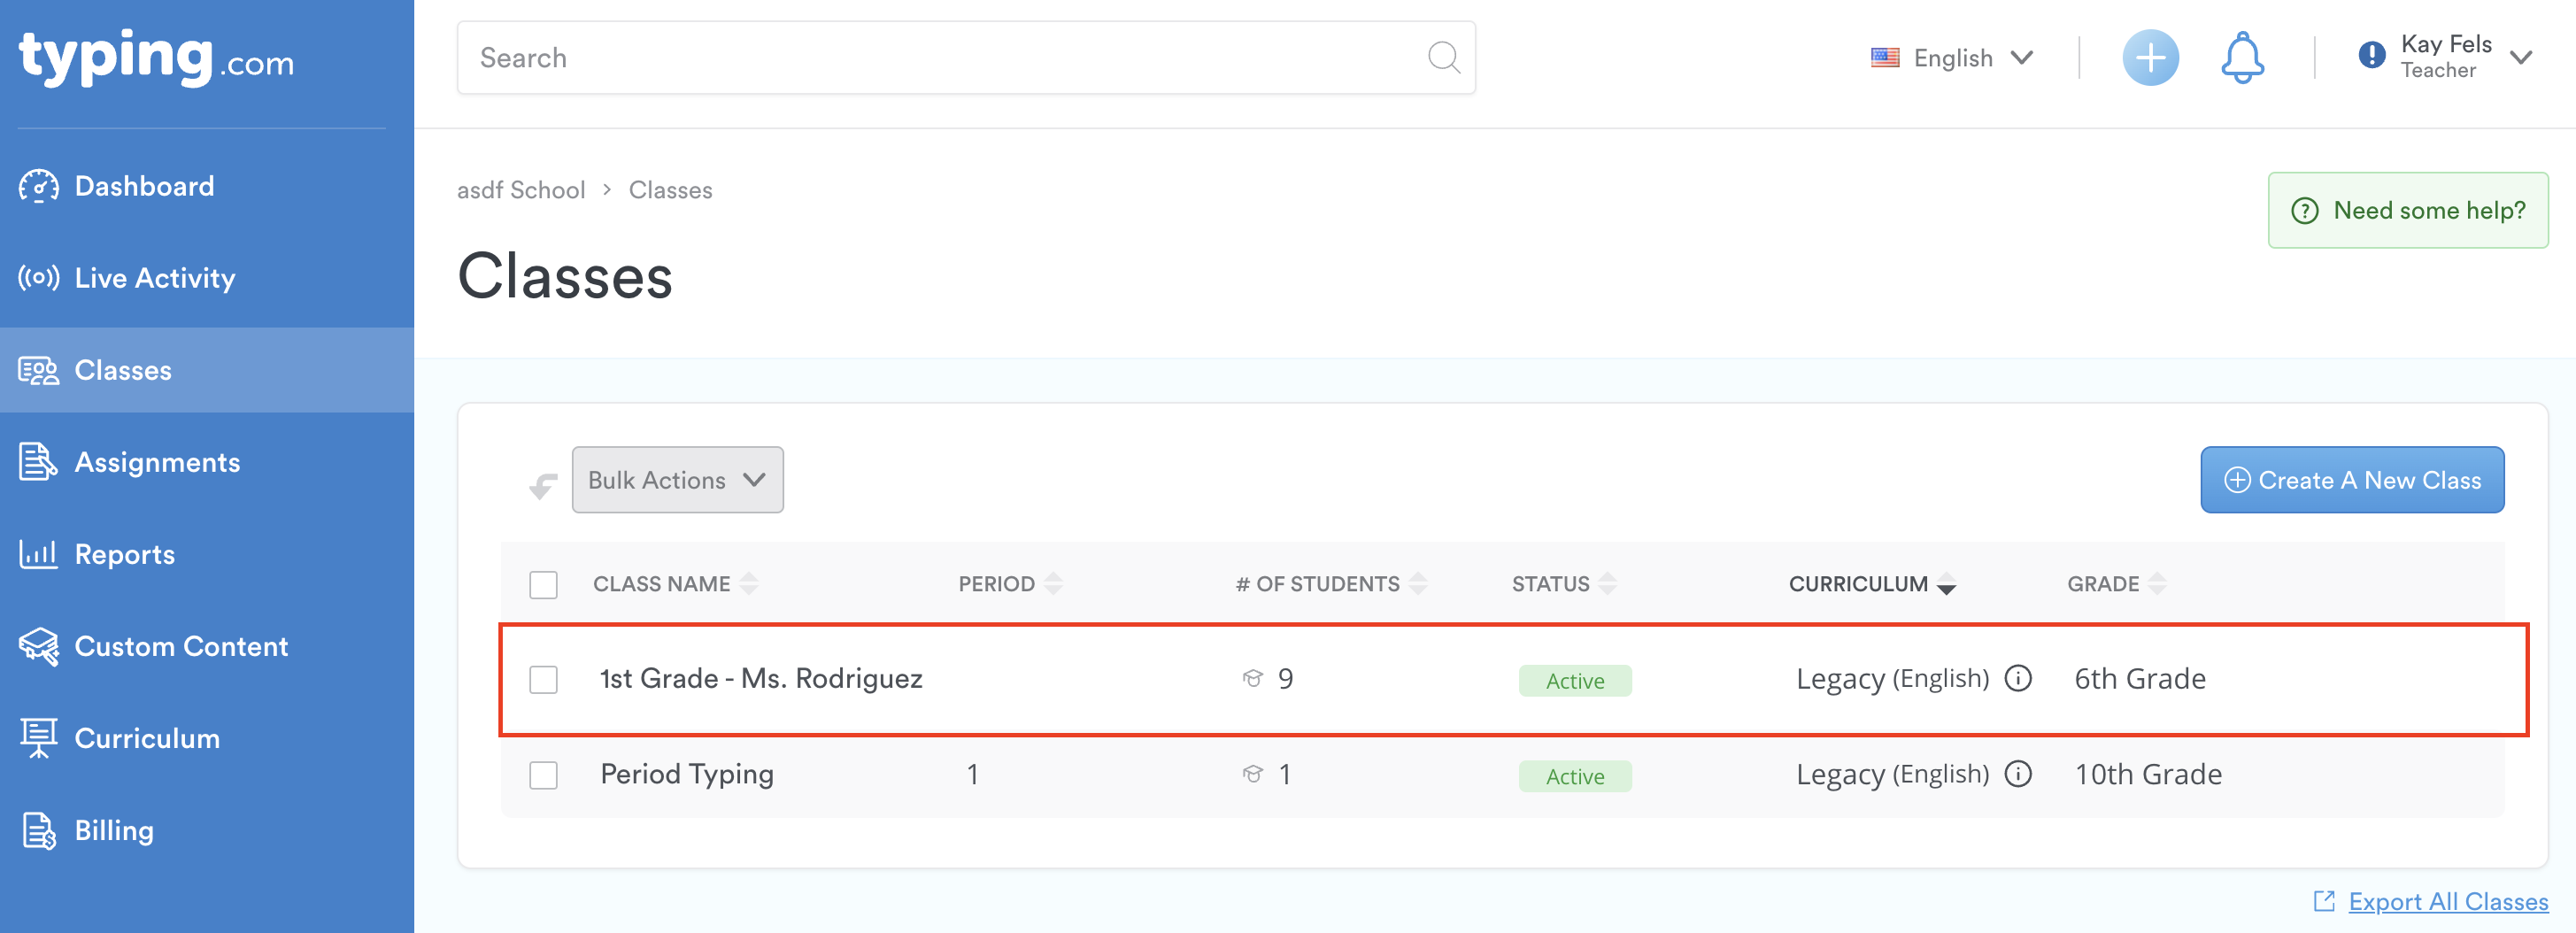
Step 2: Select the class whose reports you want to view.
Step 3: Within the class page, click on the "Reports" tab.
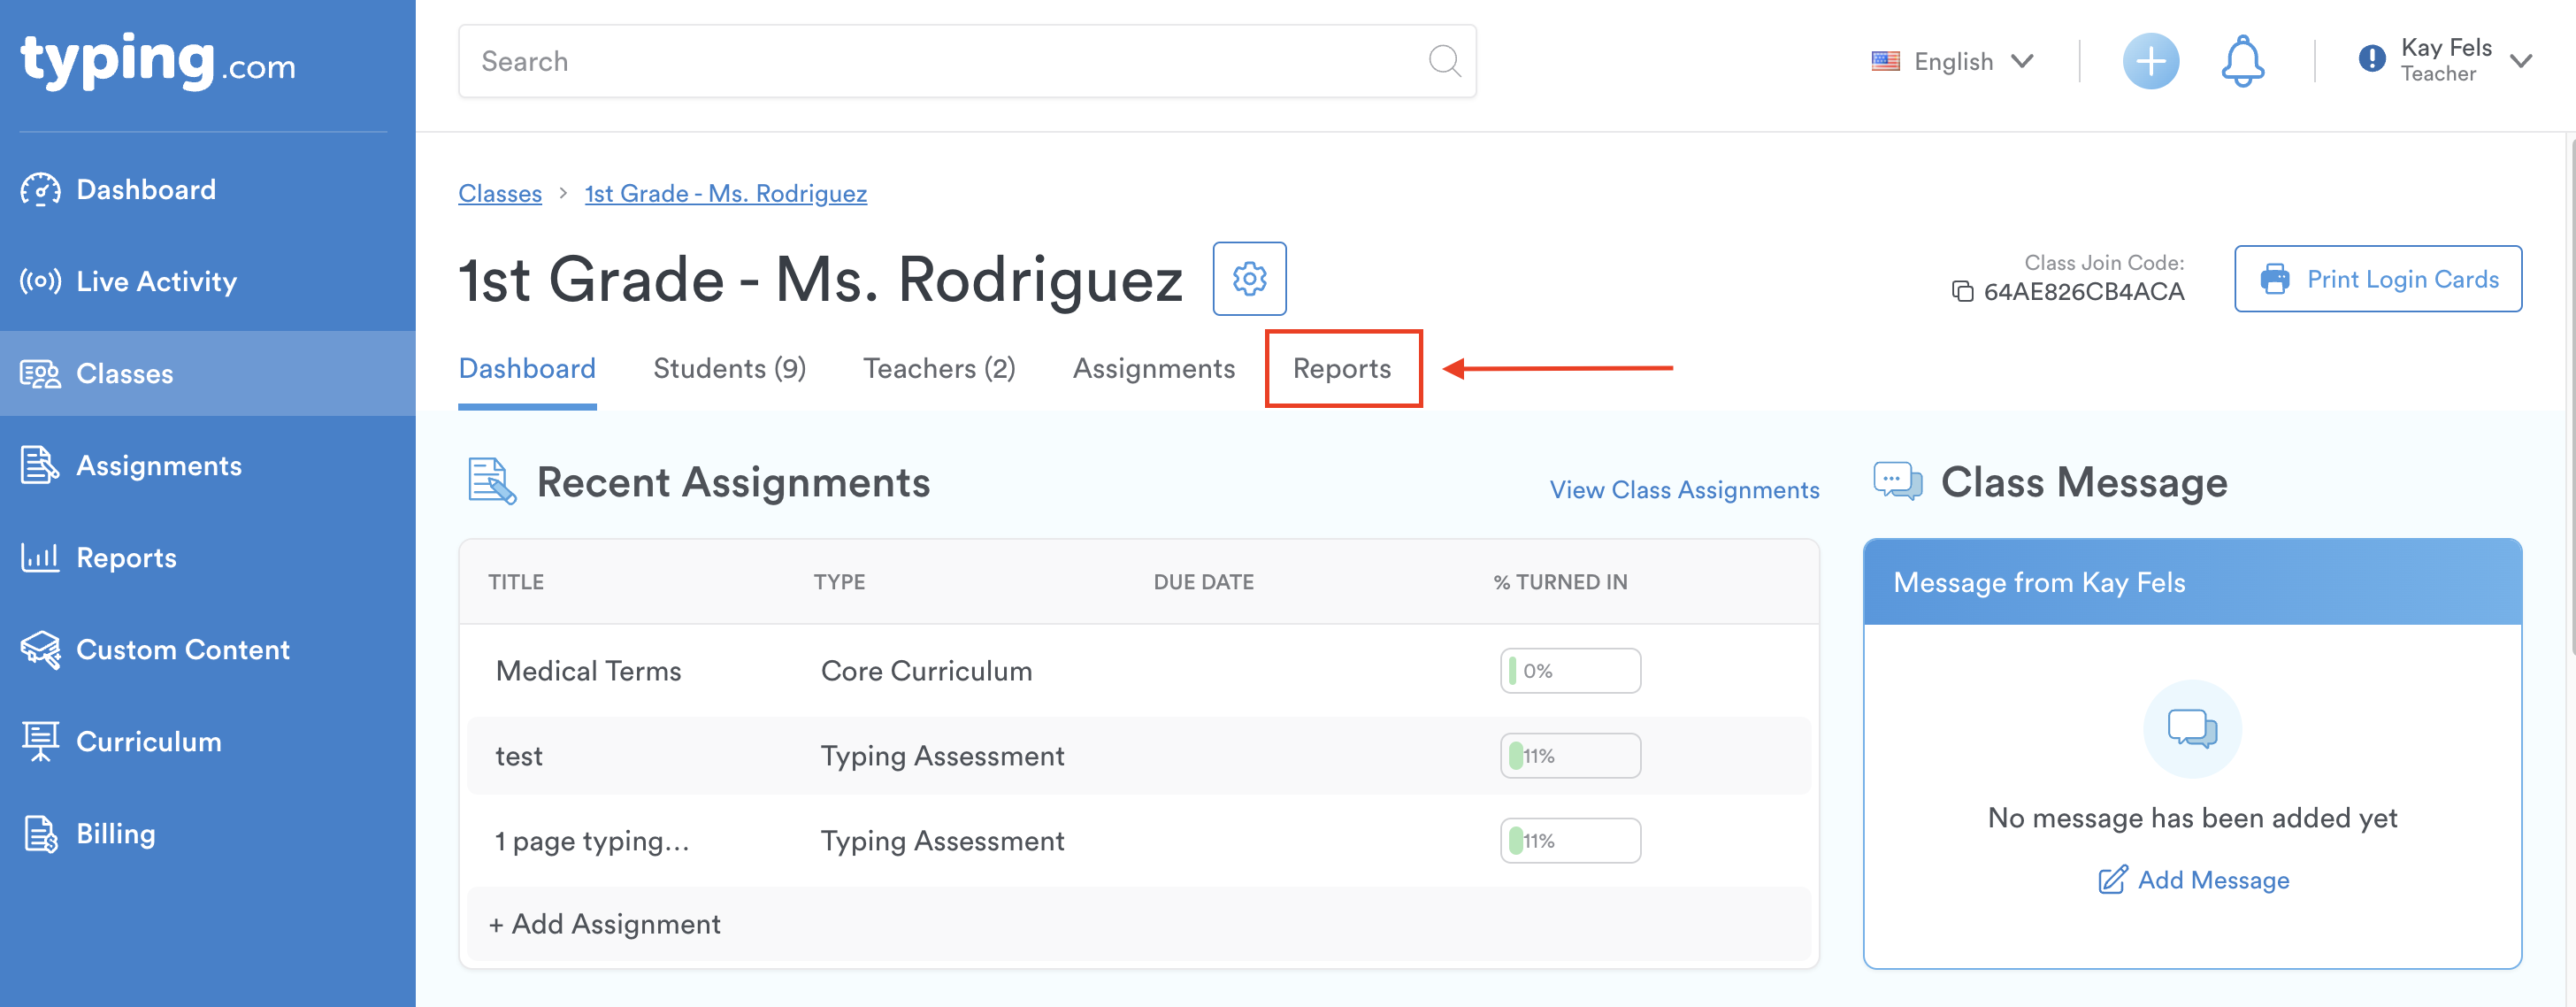
Step 4: Click "View Report" for "Written Prompt Responses."
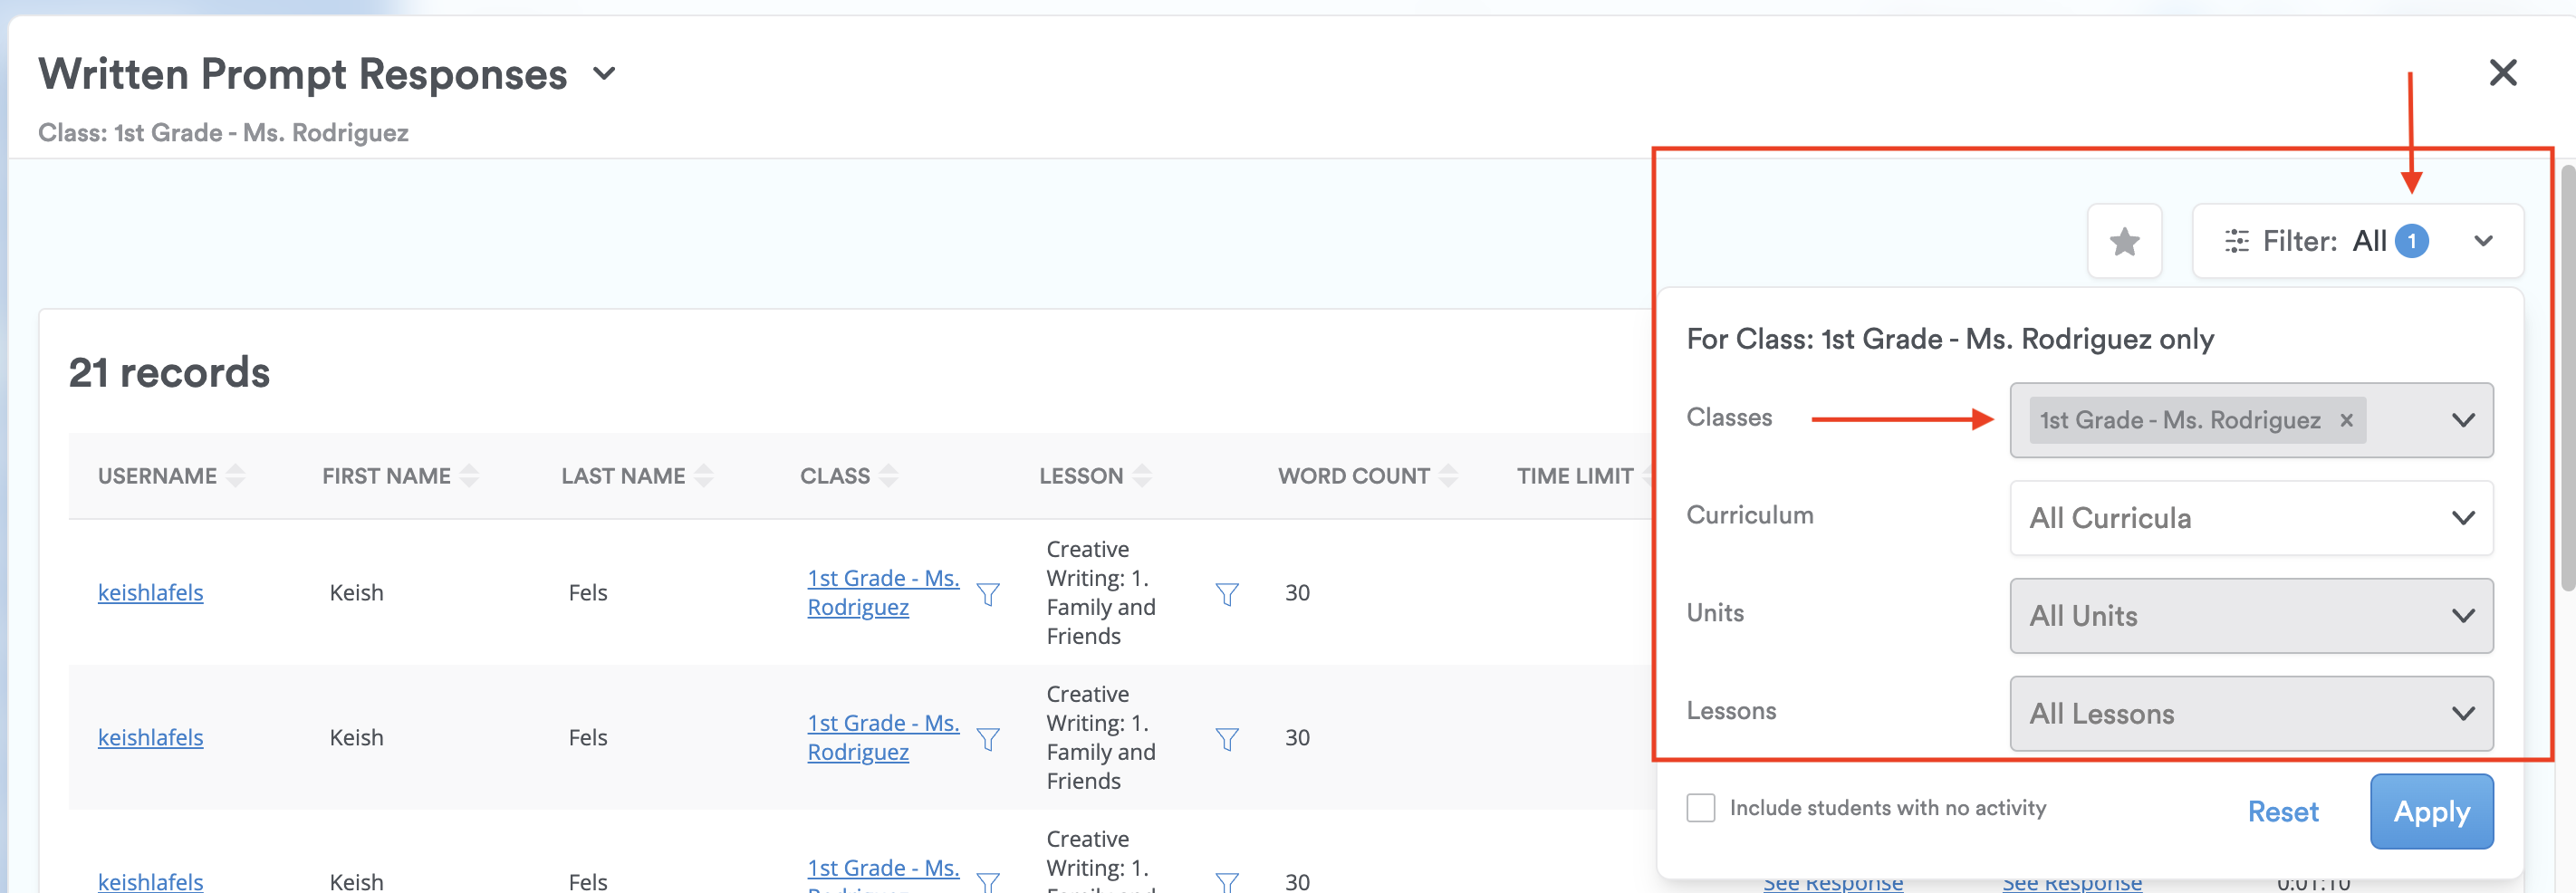
Step 5: You will notice a filter is automatically applied. The classes filter was automatically applied. This means the only responses from this report you will see are from the class you selected from.
Step 6: Follow steps 5 -6 from the previous section.
For a specific student:
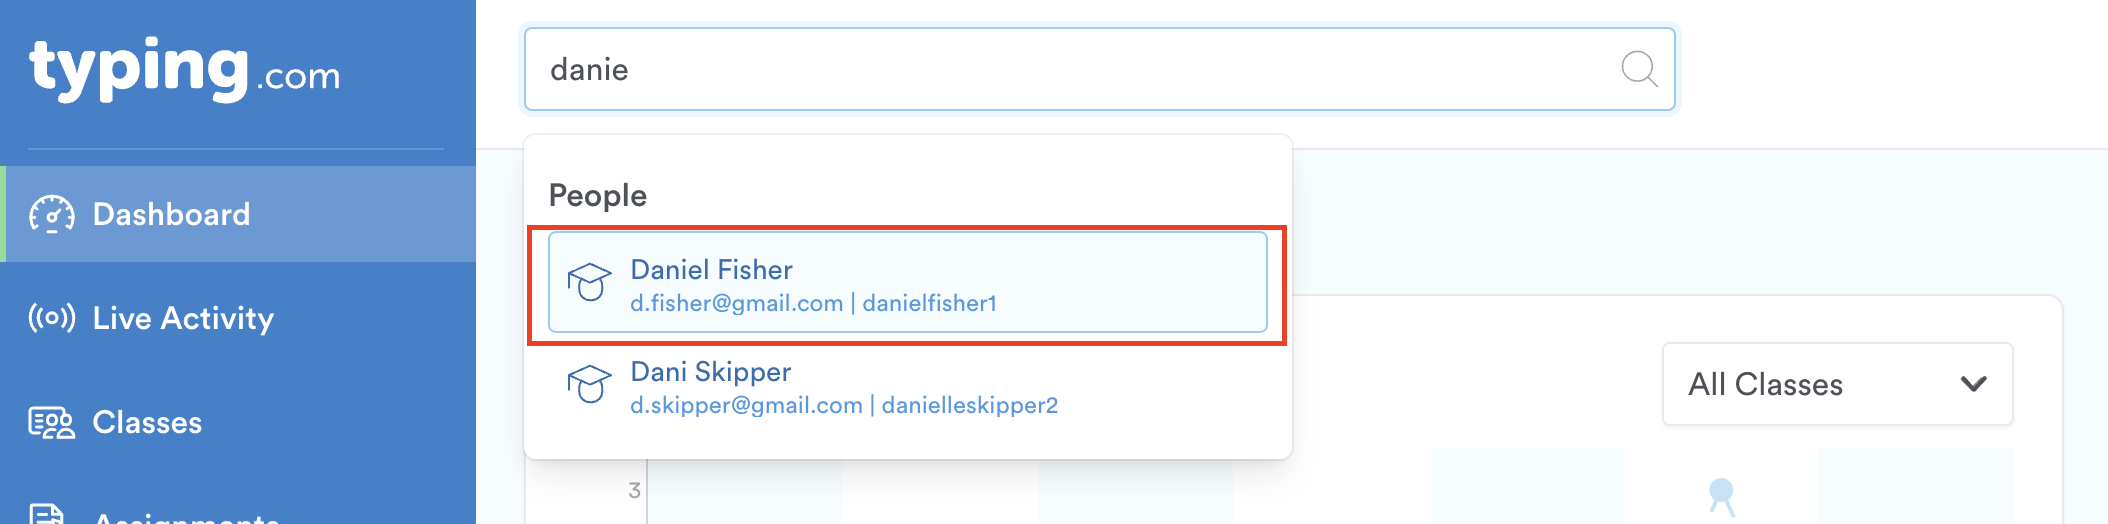
Step 1: After logging into your account, type the student's name in the search bar.

Step 2: Select the student from the list.
Step 3: Once on the student's profile, click on the "Reports" tab.
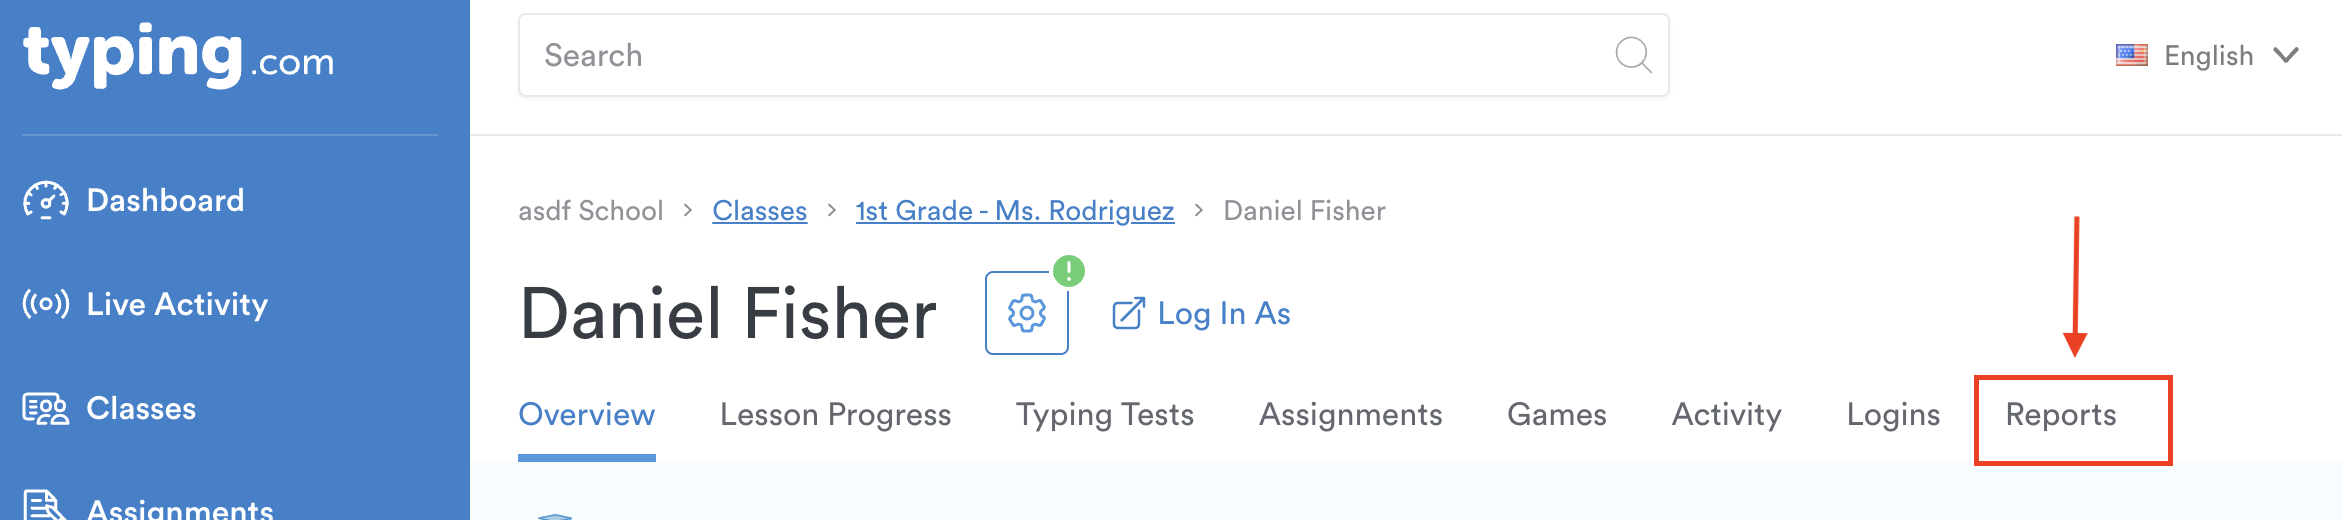
Step 4: Click "Written Prompt Responses."
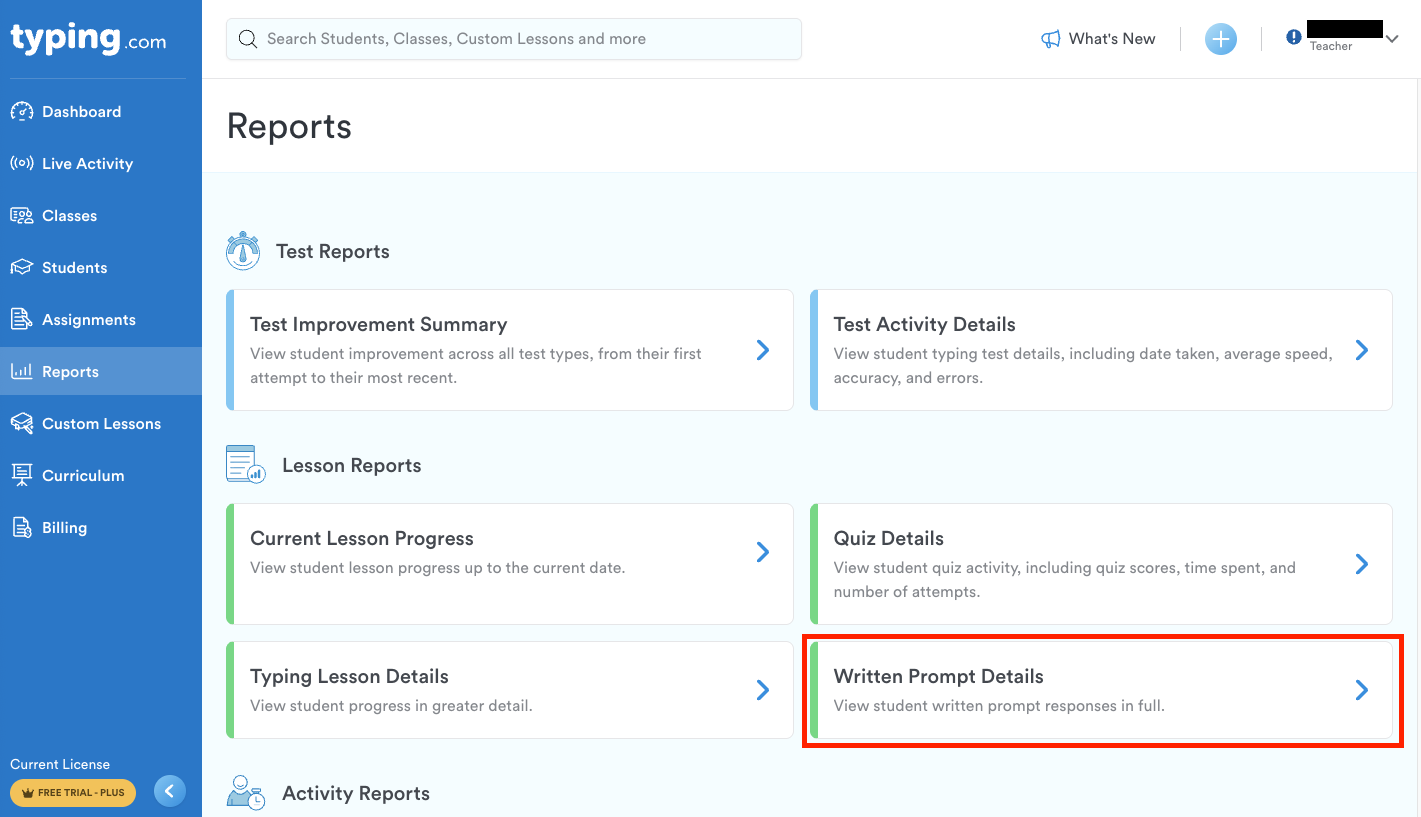
Step 5: Follow steps 5 -6 from the previous section.
That's it—you've created a written prompt lesson! If students are already logged in, have them log out and back in to see the new prompt. After they complete the assignment, you can easily review their responses using the reports feature. Whether you're looking at responses for multiple classes, a specific class, or an individual student, accessing and managing student work has never been easier.
For more tips and assistance, feel free to explore our resources or contact us at support@typing.com.