Edit Your Account & Other Settings (Student)
Do you need to change your password, or put in your first and last name? Join a different class? Change the website language or your keyboard layout? Or turn on something that makes typing easier - Read Aloud, a dyslexia-friendly font, one-handed typing? If the answer is yes to any of these questions, you're in the right place.
Here, we'll show you how to change your account settings.
One setting you won't be able to change is your username; this is your account's unique identifier in our system and there is no way to change it.
Pro-Tip:If you belong to a class and don't see a particular setting, it's likely that your teacher has restricted access to the students.
Let’s get started.
Step 1: Log in to your account here.
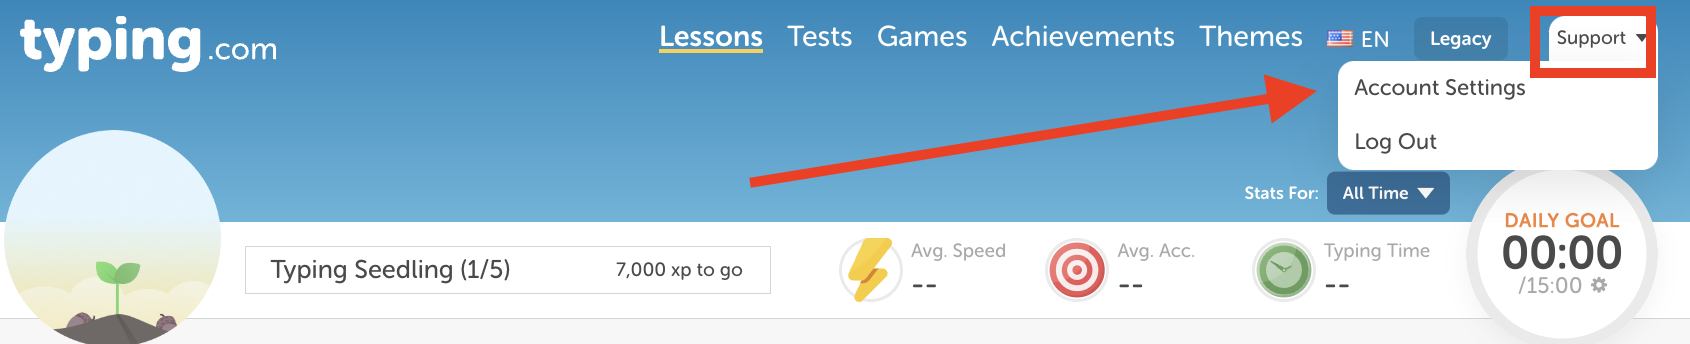
Step 2: Click your name in the top right corner, then click Account Settings.
Step 3: The page is split into sections: Account Overview, Account Details, Join a Classroom, Language & Keyboard, Accessibility and Permanently Delete Account. To join a class, type the join code your teacher gave you into the Join Code box under Join a Classroom and click Join Classroom.
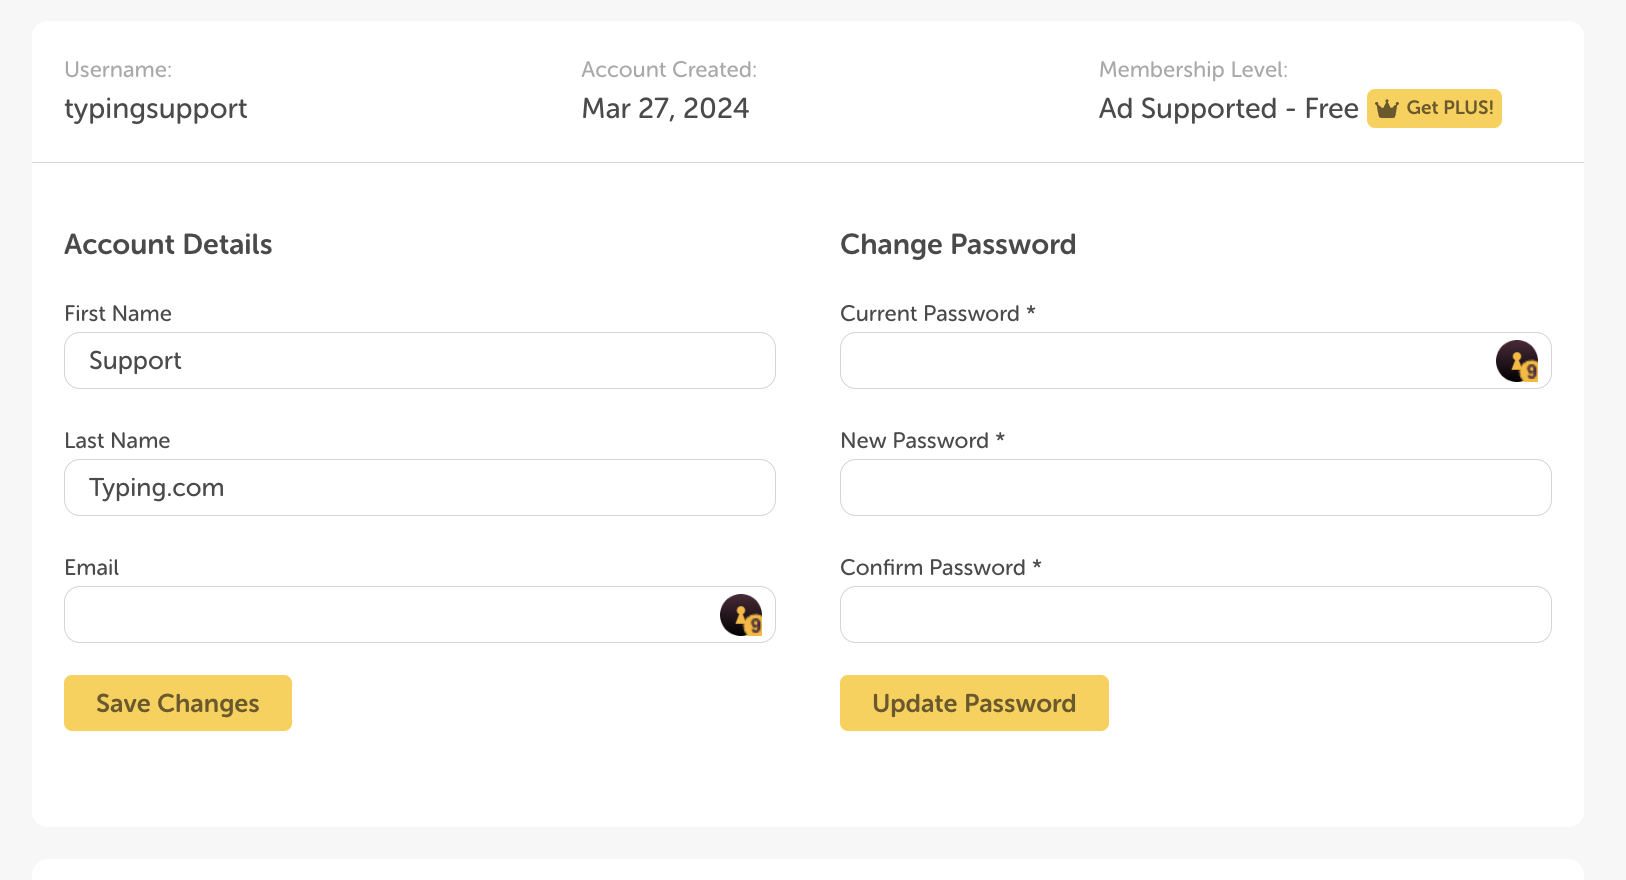
Account Overview at the top shows your username, the date your account was created and your membership level. These are there for reference - you can't change them.
Account Details
Under Profile Information you can fill in your First Name, Last Name and Email. Click Save Changes when you're done.
Under Change Password, type your current password, then your new password twice, and click Update Password.
Don't see the Account Details section, or can't edit the fields in it? If you're in a class, your teacher may have restricted what you're allowed to change - ask them if you need something updated. If you sign in with Google rather than with a Typing.com password, the section isn't shown at all; see the note below.
Language & Keyboard
Website Language changes the language of the site itself - US English, UK English, Español or Português.
Keyboard Layout tells Typing.com which keyboard you're actually typing on, so the on-screen keyboard matches your real one. There are 30 to pick from, covering regional layouts as well as Dvorak and Colemak.
Not sure which one you have? Click (Need help deciding?) next to Keyboard Layout and Typing.com will work it out with you in three steps: pick your keyboard's language, then choose the picture whose key placement matches your keyboard, then click Update Keyboard Layout to apply the layout it suggests.
Accessibility
These switches change how Typing.com looks and sounds so it suits you better. They're grouped by what they help with, and all of them are off until you turn them on.
Seeing
Low Vision - bumps up contrast and uses clearer type across the site.
Read Aloud - reads lesson instructions, letters and finger placement tips out loud to you.
Reading & learning
Dyslexic Font - uses a dyslexia-friendly font for better readability and fewer letter mix-ups.
Hearing
Closed Captions - adds captions to videos so you can read what is said.
Typing Sounds - plays a key sound as you type, so you can hear your progress.
Hands & typing
Right Hand - reach every key with just your right hand.
Left Hand - reach every key with just your left hand.
It's one hand at a time - turning one of these on turns the other off.
Pro-Tip: If you're in a class, your teacher can switch these on for everybody at once, so you may find some are already on when you get here.
Permanently Delete Account
At the very bottom, Delete My Account removes your account and all of your progress for good. There's no undoing it, so only use it if you're certain.
If you're using Google SSO (single sign-on), note that you cannot change your name within Typing.com account settings. You'll need to update your information in your Google Account settings. Click here for a Google article with steps to change your Google account name.
Settings inside a lesson: Some settings live in the lesson itself rather than on this page. Once you're working on a lesson screen you'll have these (unless your teacher has restricted them):
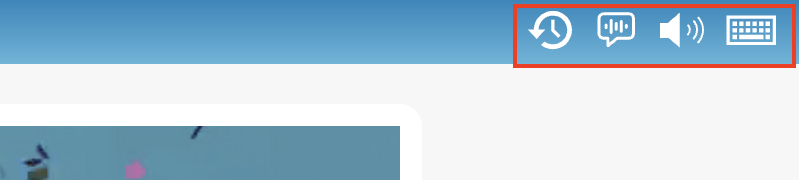
Along the top of the lesson, on the right, there are three controls, and a fourth just above the keyboard:
Redo - starts the screen you're working on again.
Sounds - opens Sound Settings, where you can turn typing sounds and error sounds on or off.
Read Aloud - opens Read Aloud Settings, which reads the lesson to you.
Keyboard Settings - sits just above the on-screen keyboard, on its right. It lets you show or hide the keyboard and the hands, type with one hand, animate the hands, and switch the keys between uppercase and lowercase. To change your keyboard layout, use Account Settings.
That’s it! Now you know how to change the settings for your account.