
Create Custom Lessons (Teacher)
Creating custom lessons and tests is a fantastic way to tailor content specifically for your classes and incorporate cross-curricular material. Whether you’re a free or a PLUS user, Typing.com offers tools to help you craft engaging and personalized typing experiences for your students. Let's dive in and explore how to create custom lessons and tests!
Note: Free users will be able to create custom typing lessons. PLUS users will be able to create custom typing tests and written prompts.
📢 VIDEO: https://youtu.be/iEQiRT4oLgA
Pro-Tips
If your students can't see the custom lessons you created, ensure the lessons are enabled. Go to your class > settings > lessons tab > check the box next to the custom lesson to enable it > save all changes. Review this article for further assistance. Have the students log out and log back in to see the changes.
If you create a custom test, students will see it under "Custom Lessons" on the Lessons page, not the Tests page.
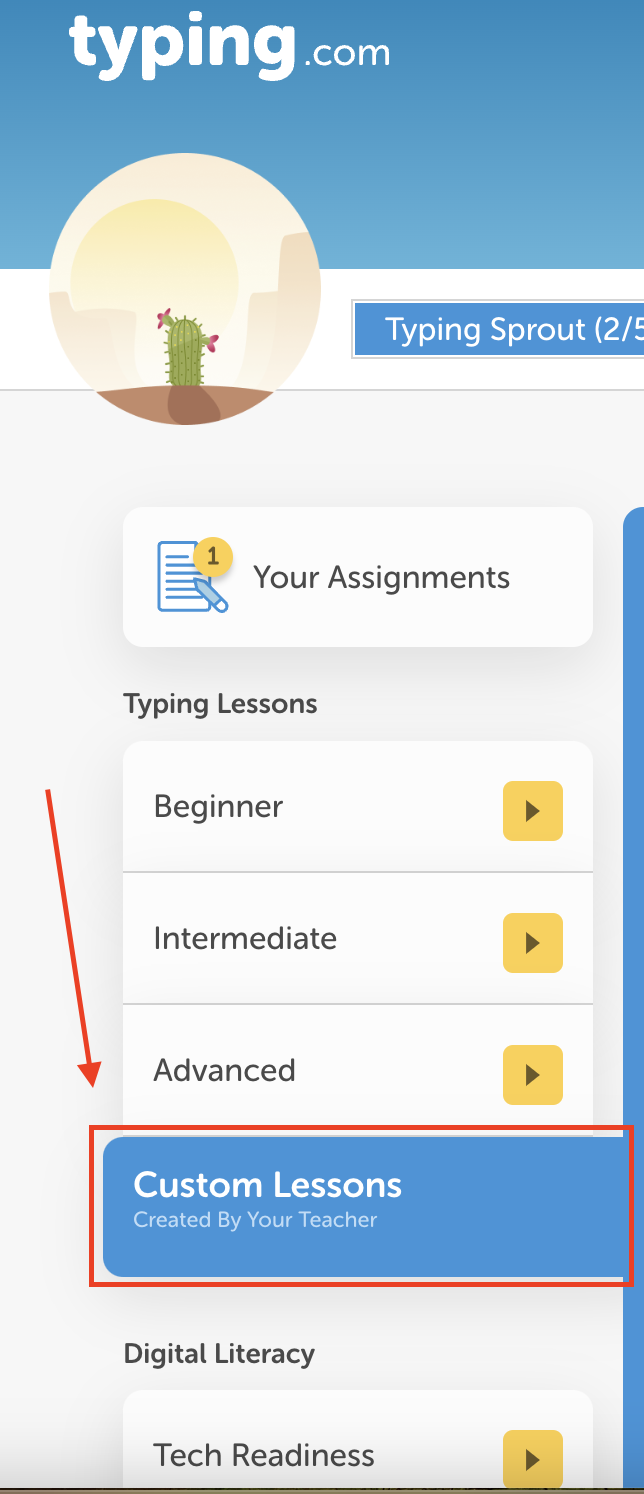
Break lessons into multiple screens to keep students engaged and break up the monotony.
Step 1: Log in to your Teacher Portal HERE.
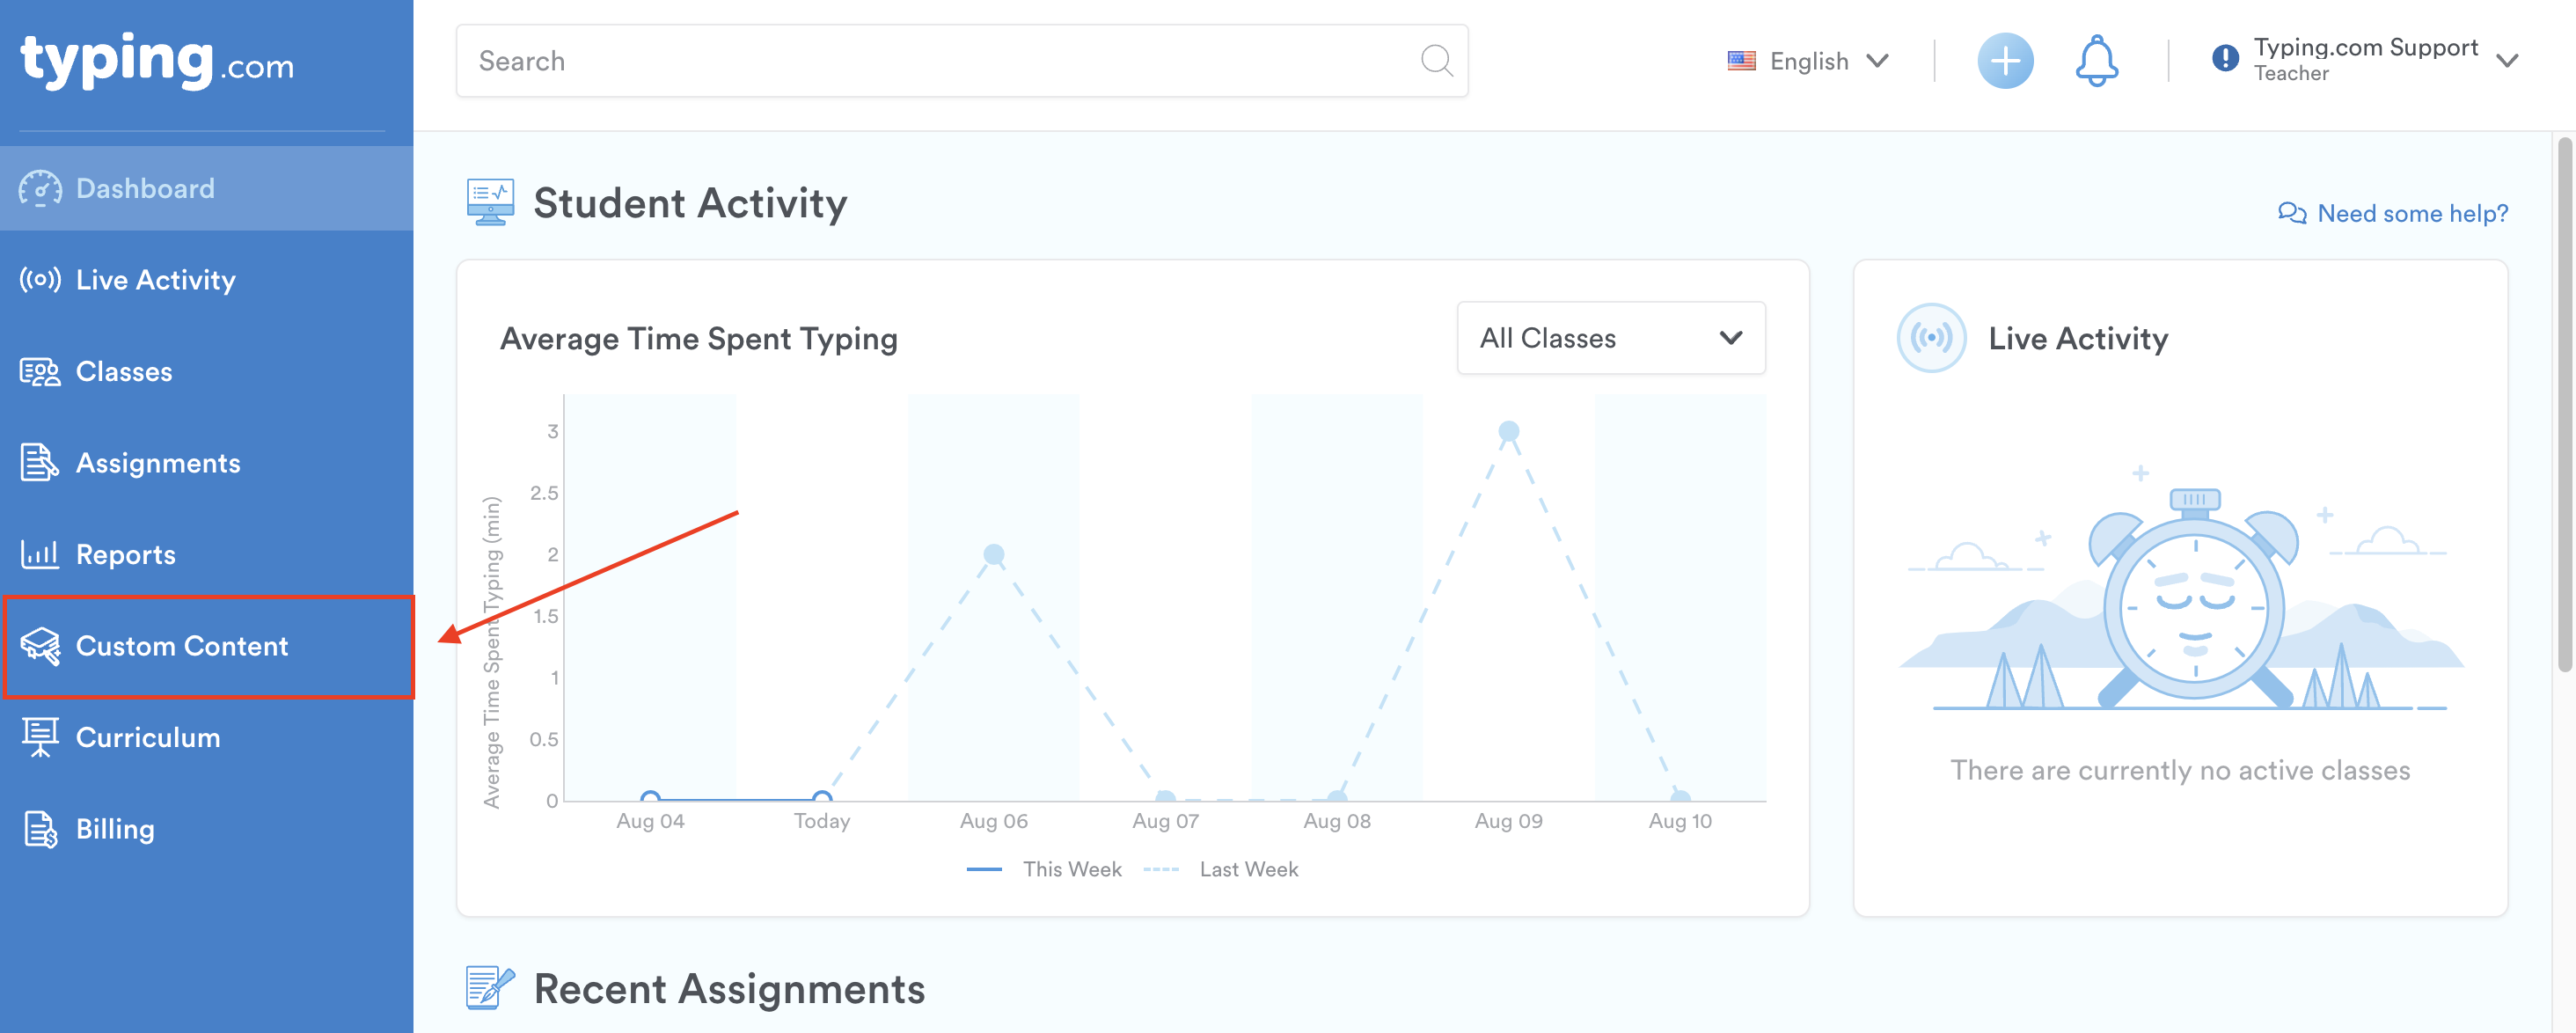
Step 2: Click "Custom Content" on the left-hand side.
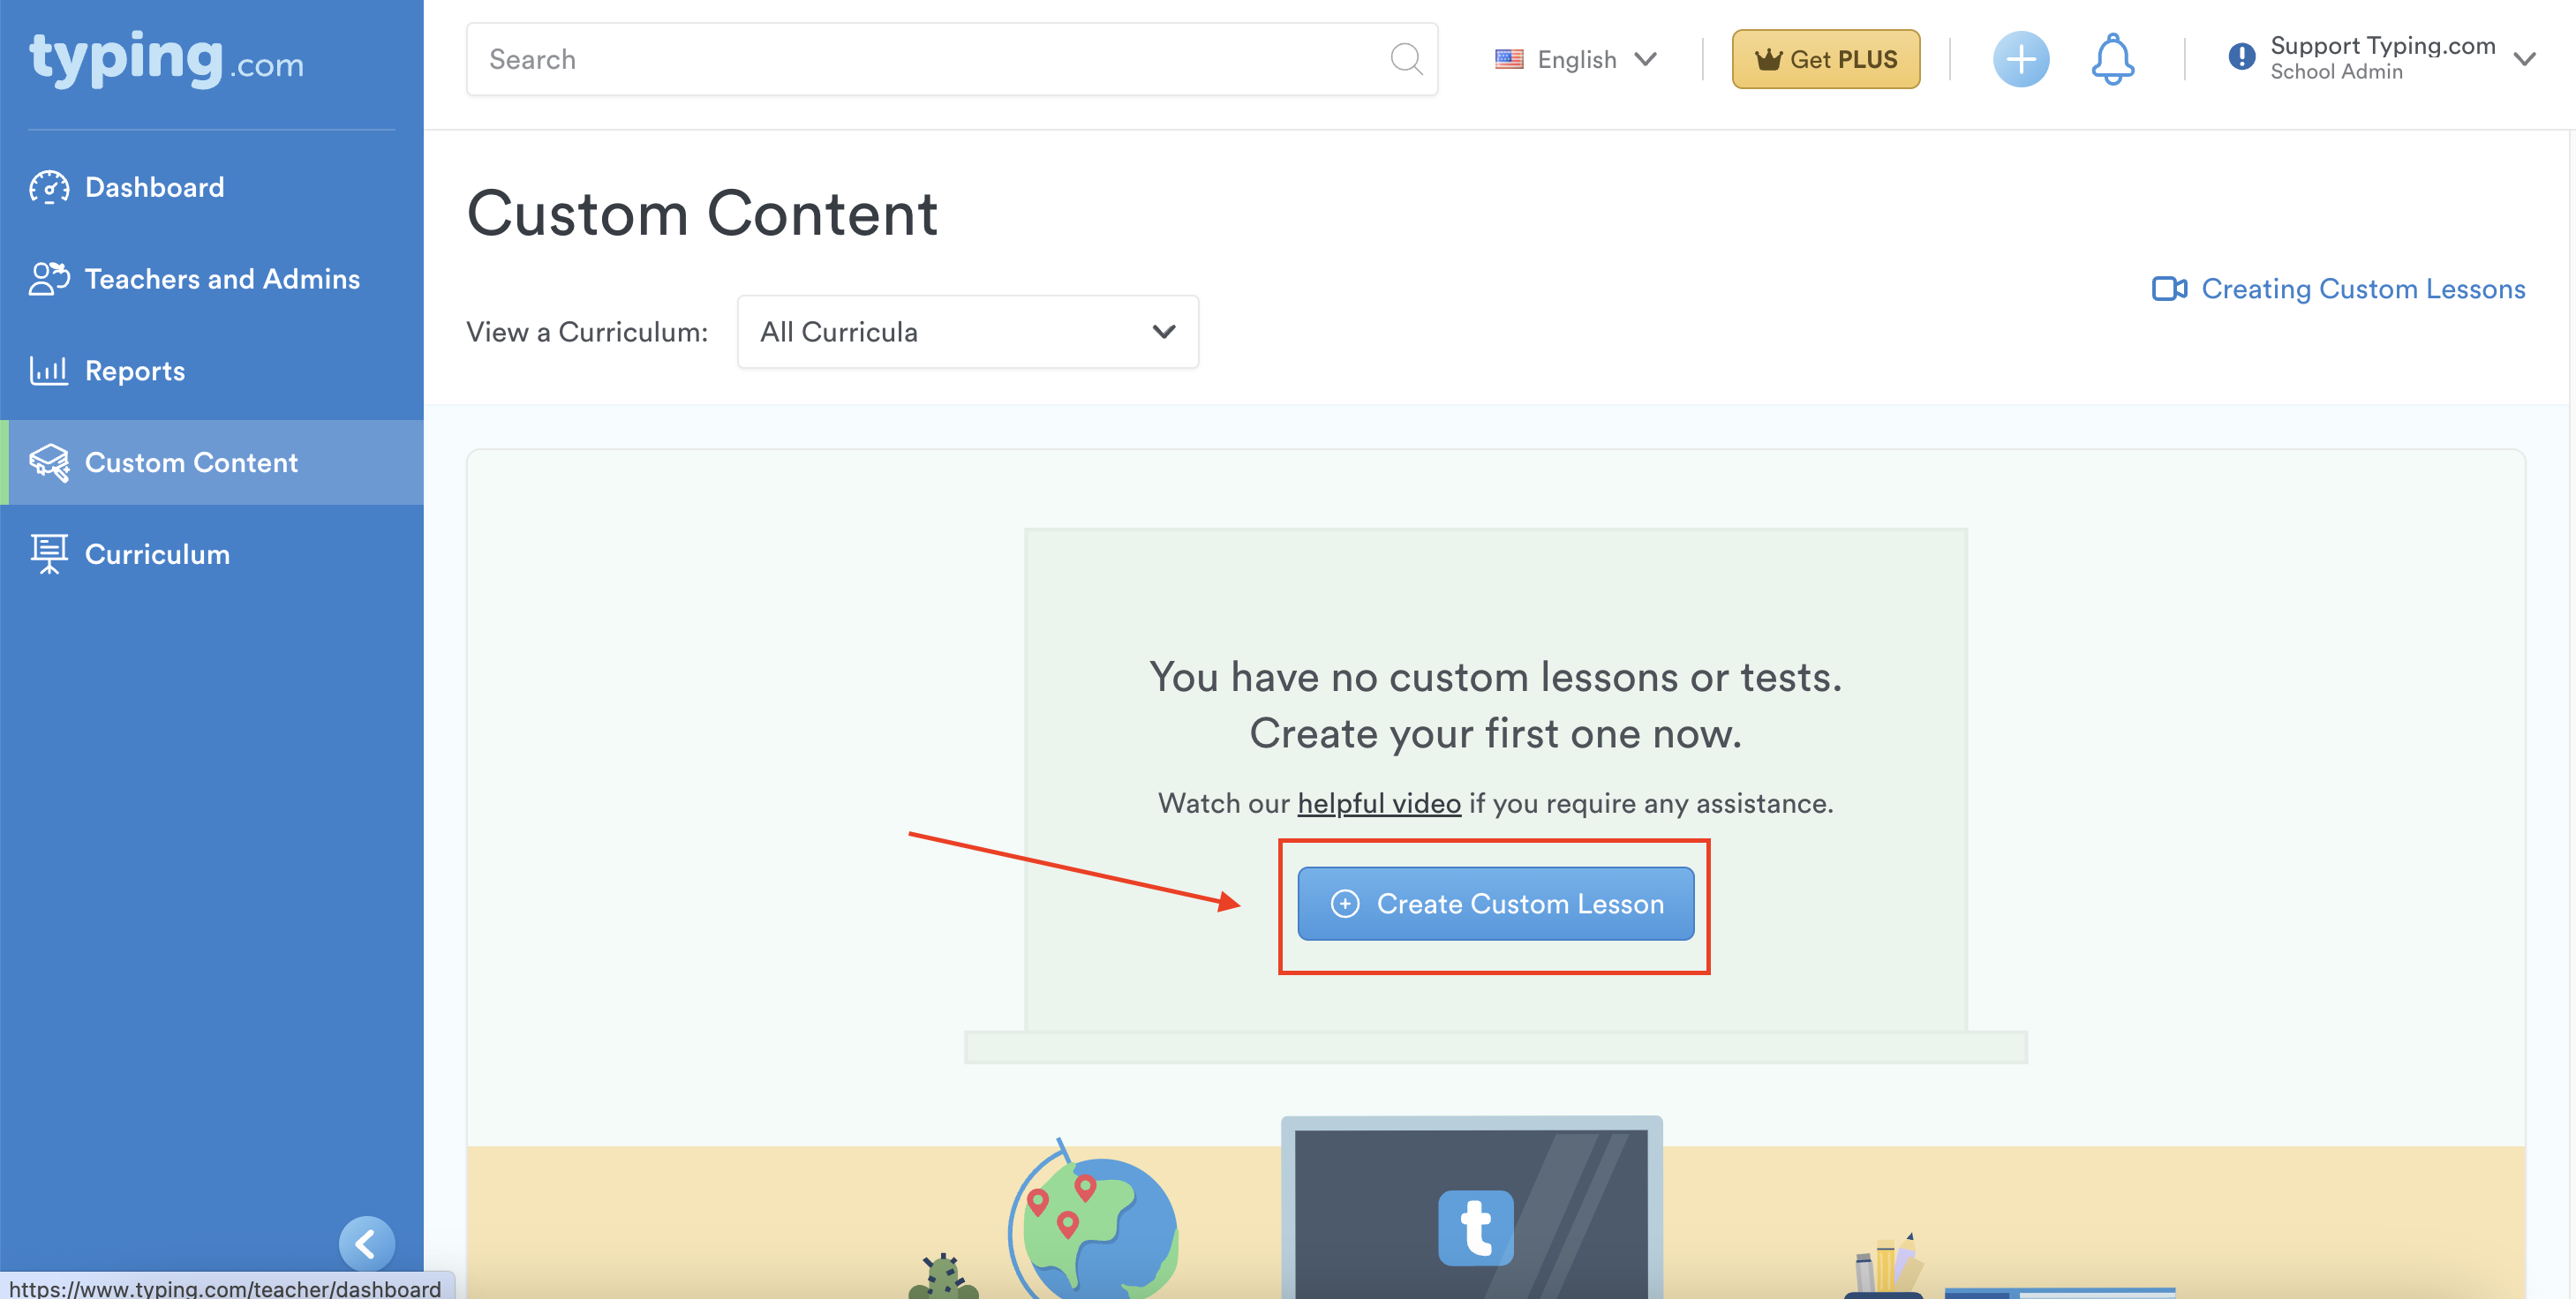
Step 3: Click "Create Custom Lesson."
Step 4: Choose which type of custom lesson you want to create.
(Note: Free users will only see Typing Lesson as an option.)
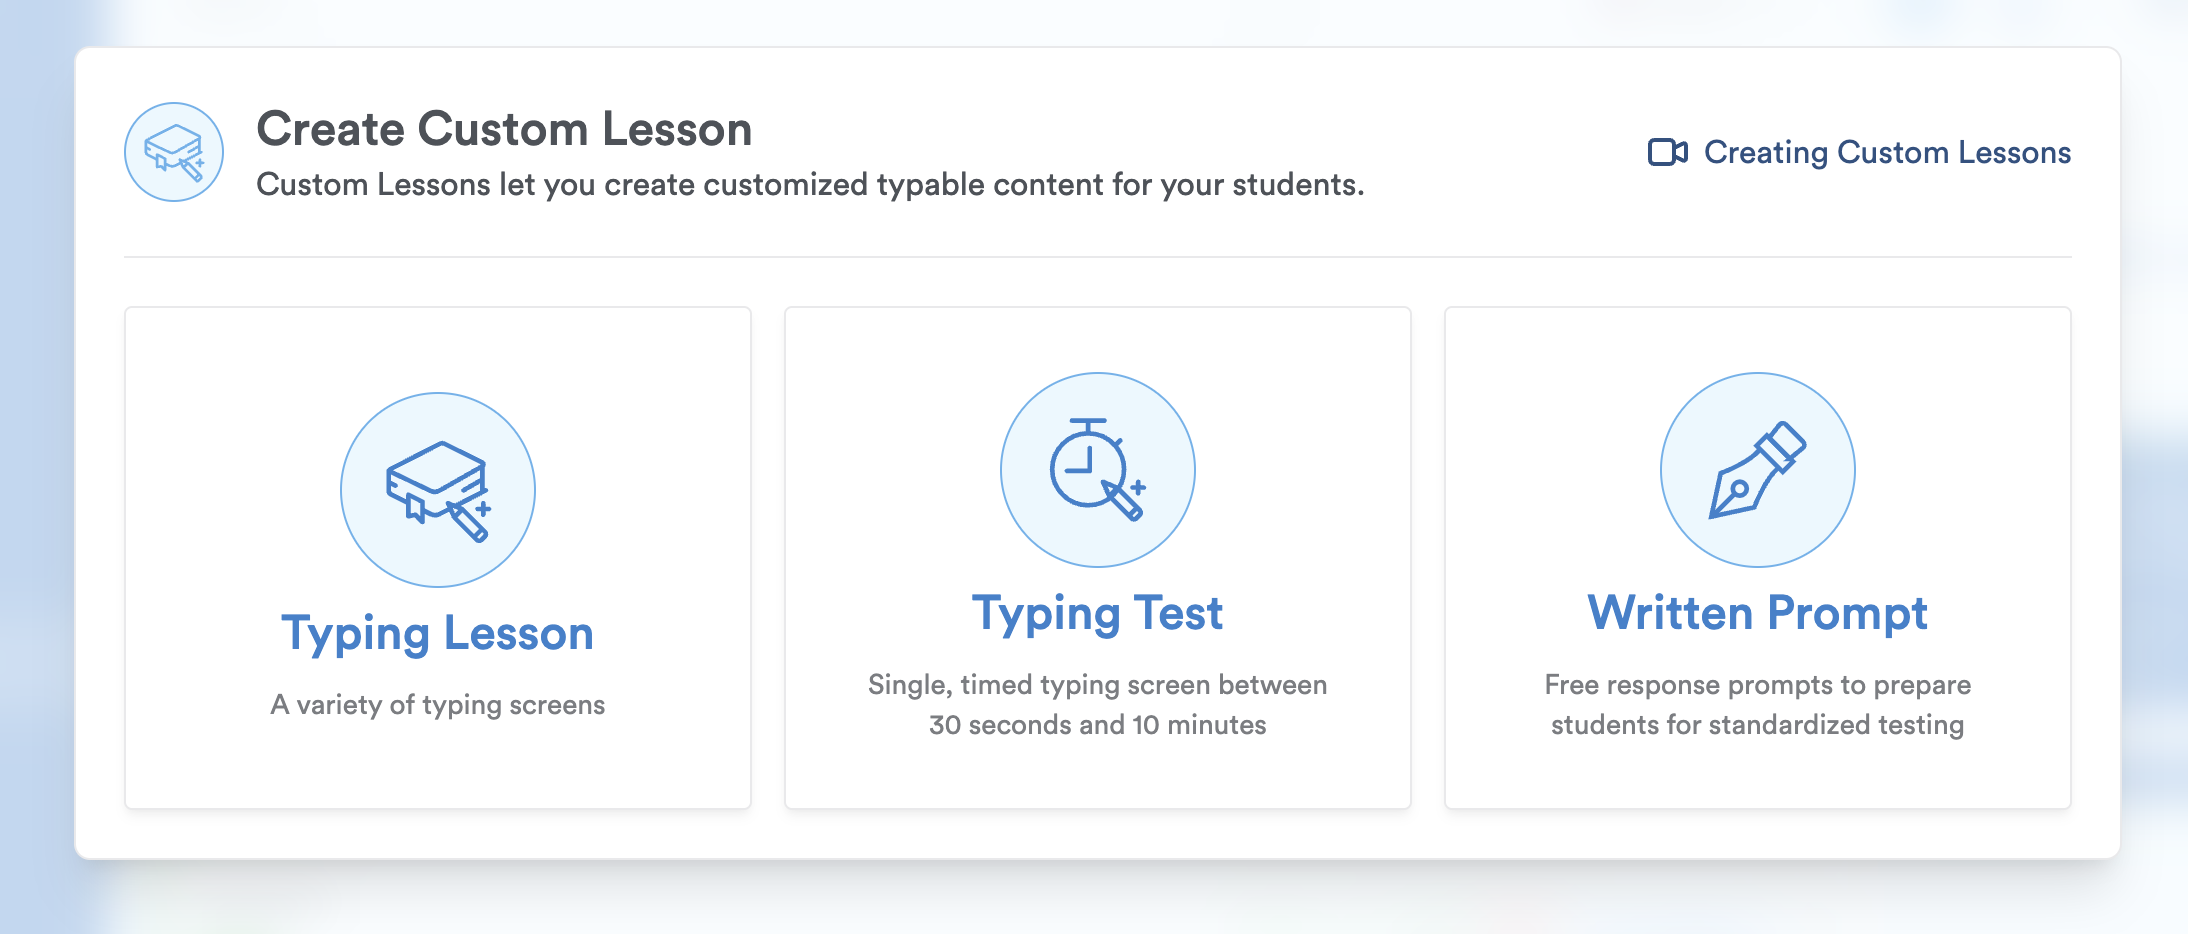
Typing Lesson: A variety of typing screens which include: standard, advanced, games, falling letter, block letters, and coding. (Note: Free users can only use the standard screen type.)
Typing Test: Single, timed typing screen between 30 seconds and 10 minutes.
Written Prompt: Free response prompts to prepare students for standardized testing.
Step 5: Enter the required information such as the lesson title, lesson status, the on-screen keyboard option, and screen type.
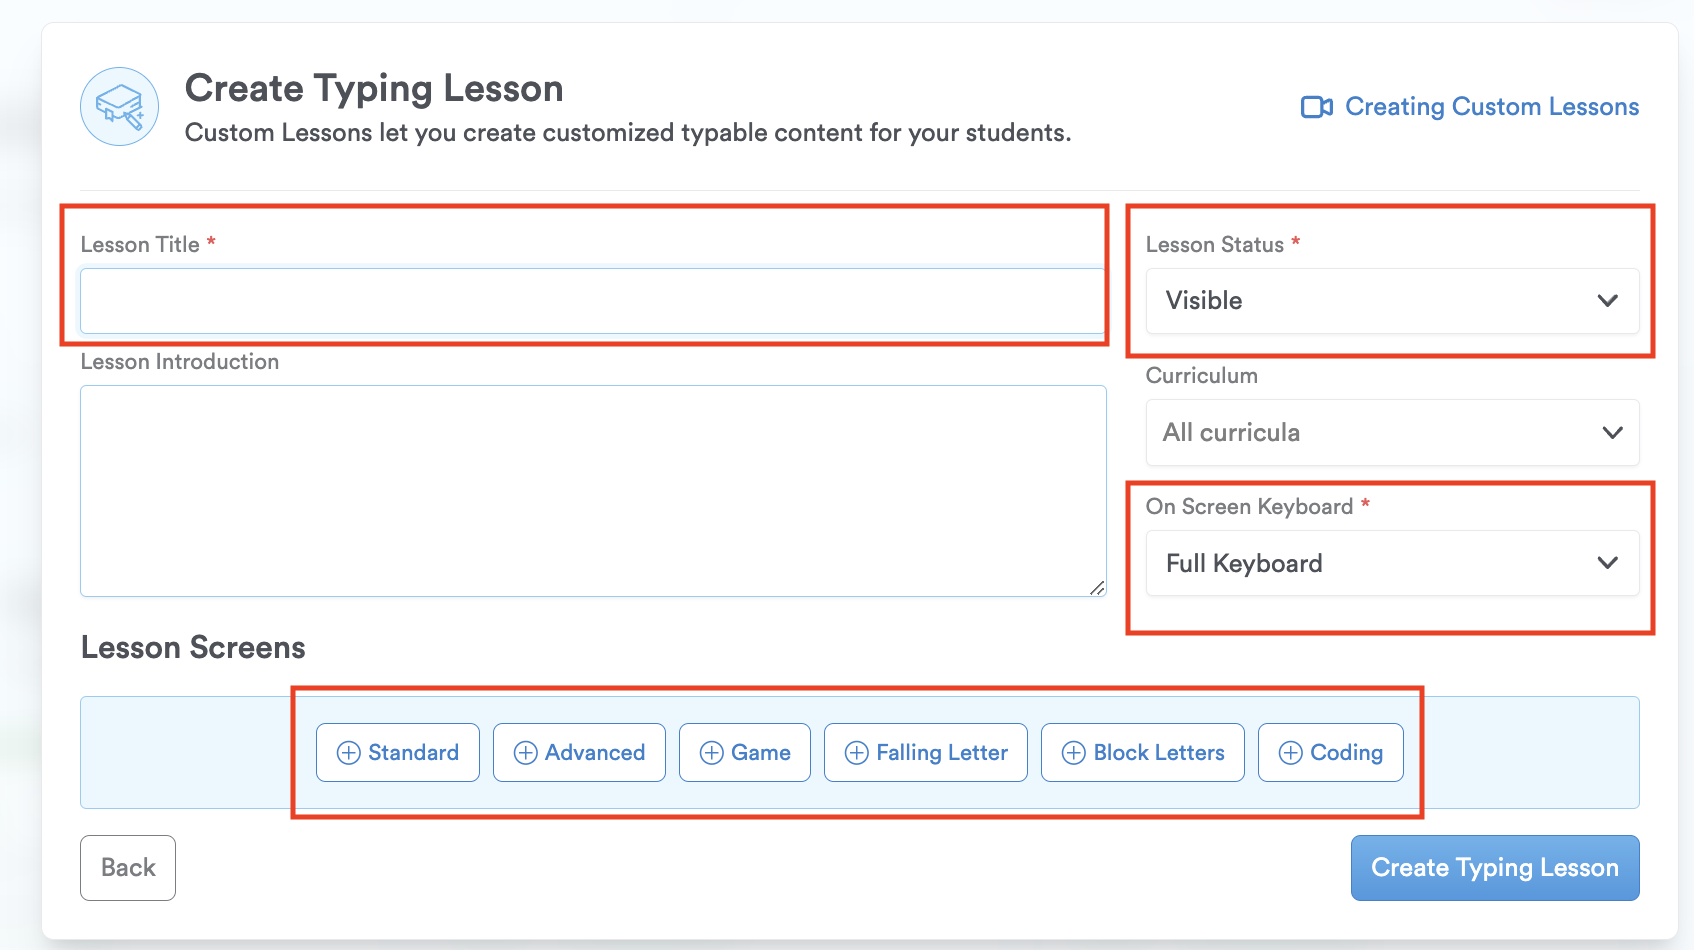
Step 6: Enter your lesson content in the lesson screen box.
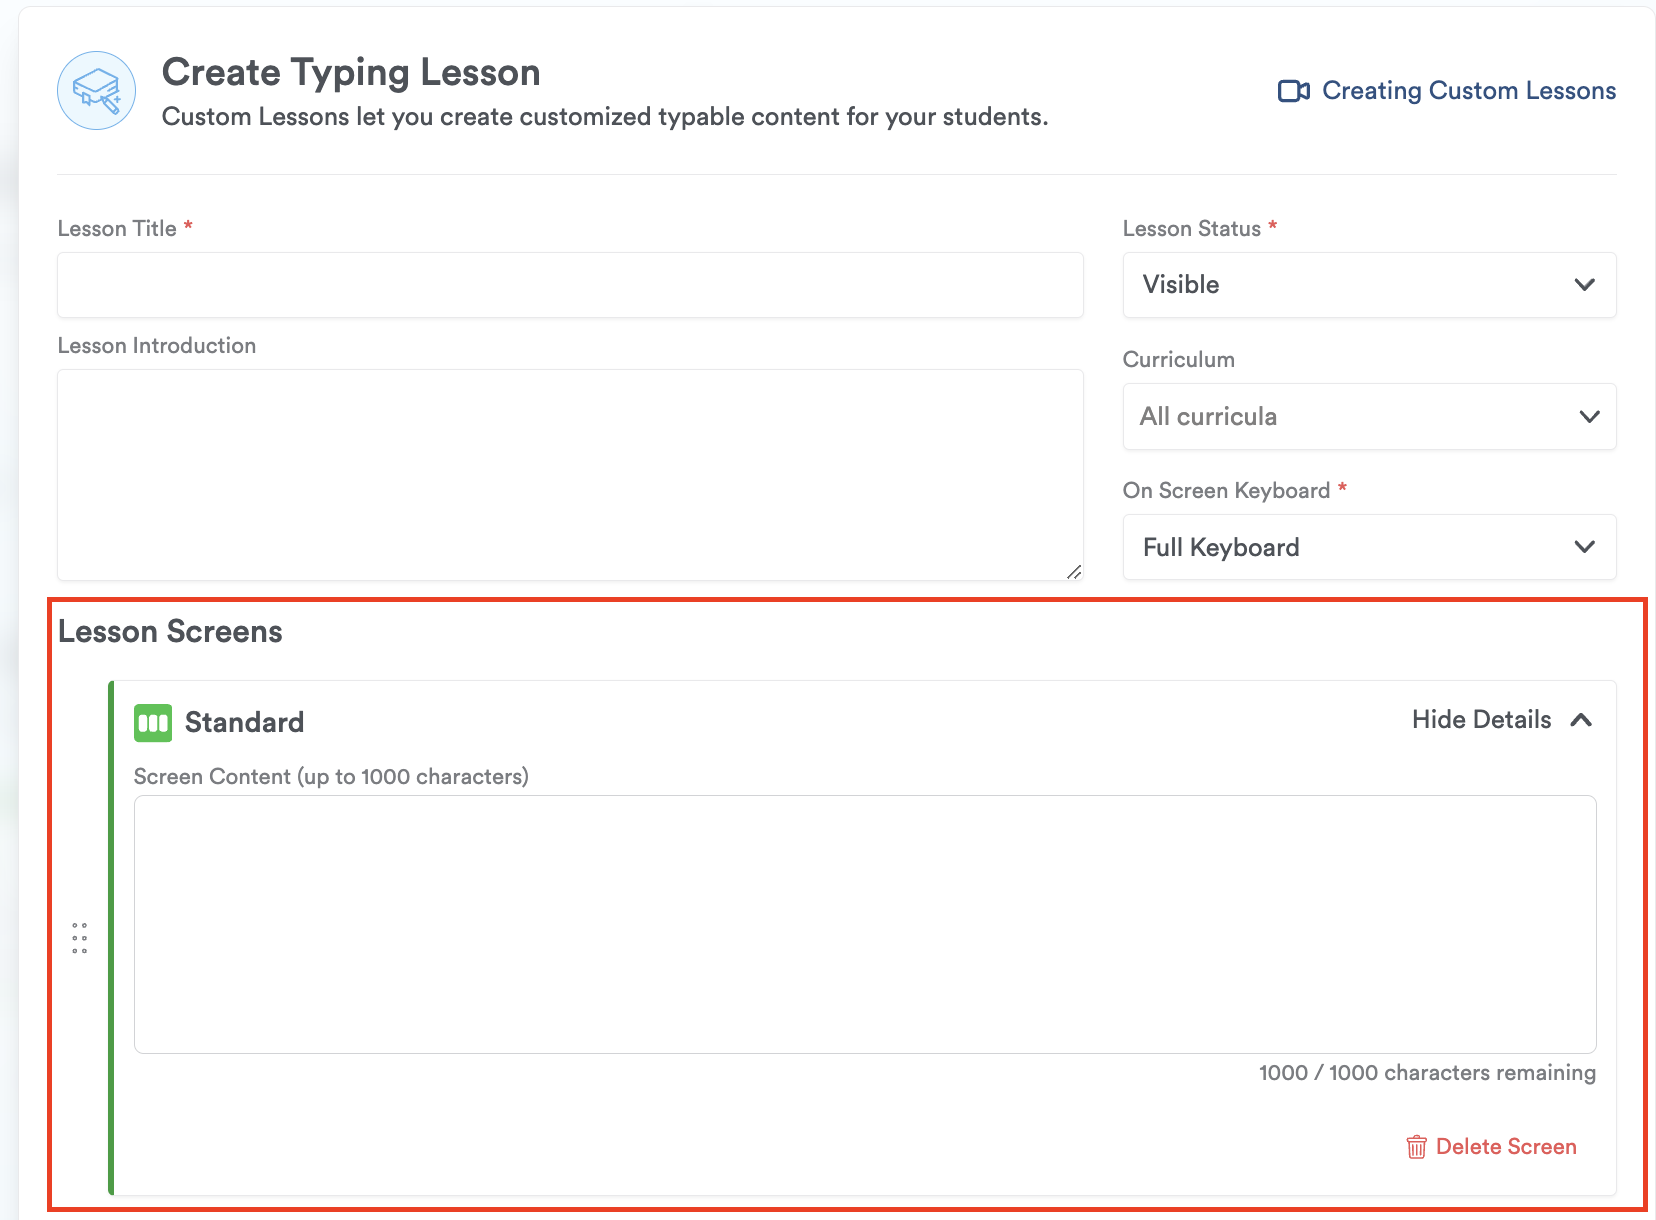
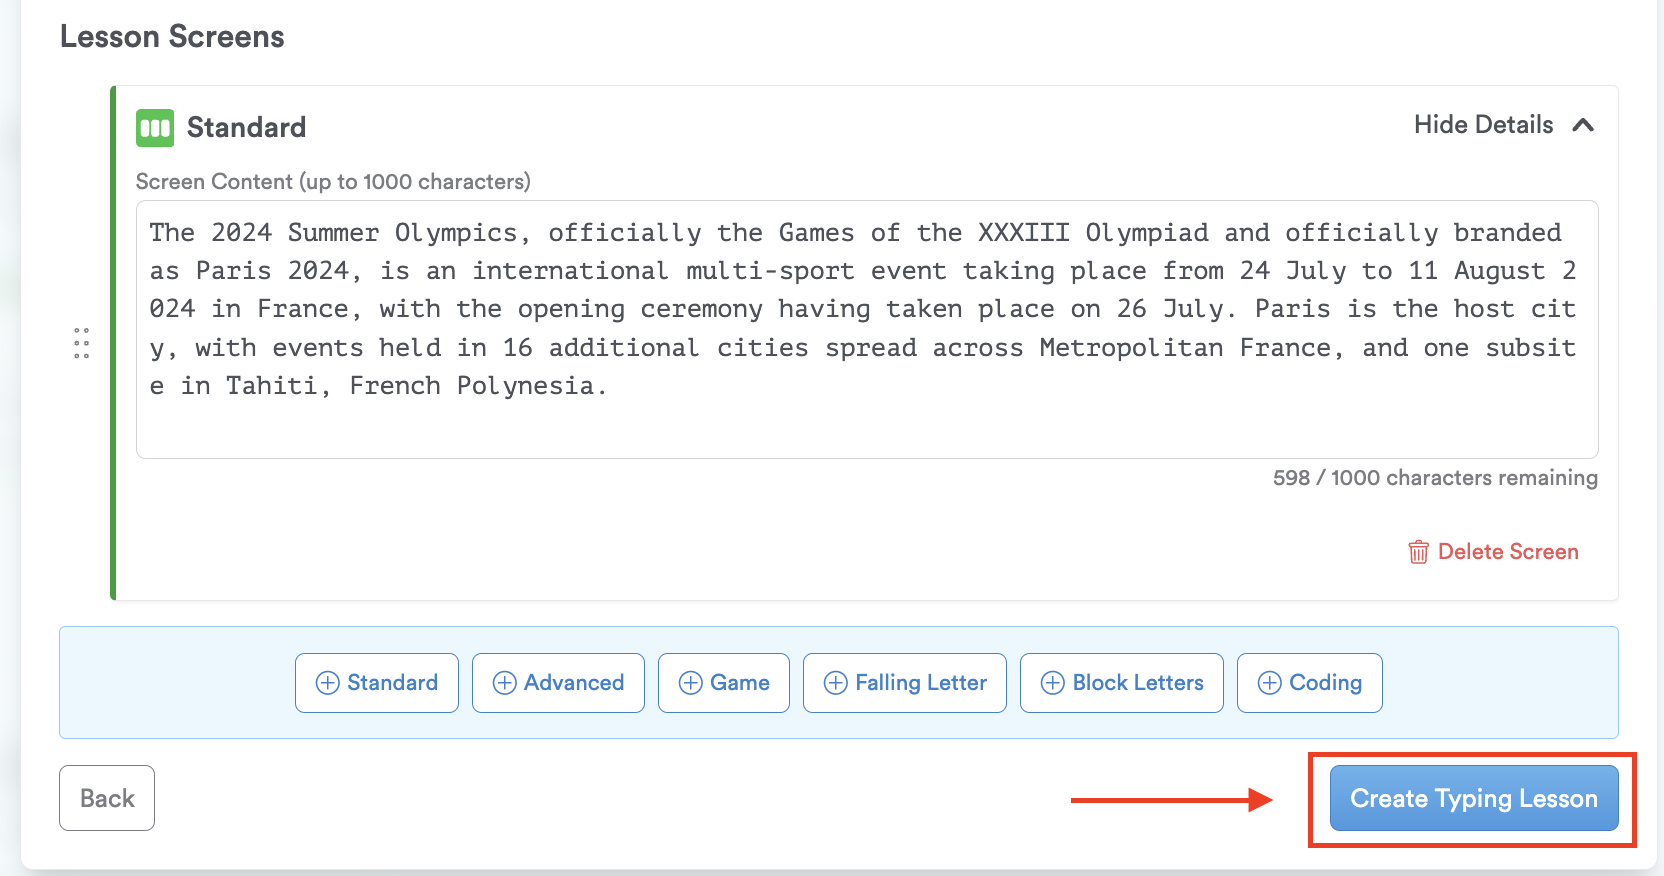
Step 7: Add another screen by selecting the screen type, or if you are finished, click "Create Typing Lesson." Once you have created your lesson screens, click “Create Custom Lesson."
Pro-tip: If you have multiple screens, you can reorder the screens by dragging and dropping the lessons screens.
Step 8: When your students log in, they should be able to see the lessons you just created. If they were already logged in, they will need to log out and log back in to see them.
Quick Method
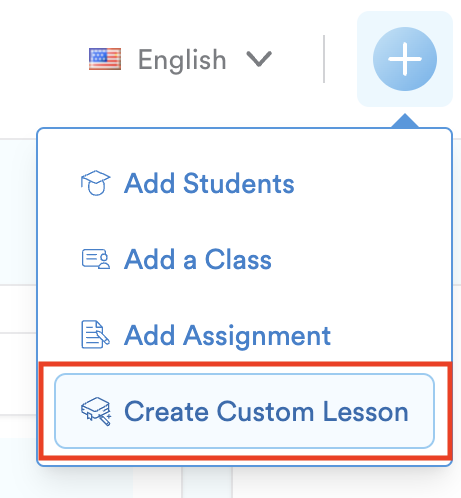
Want to access creating a custom lesson quickly? Click on the blue plus button next to the notifications bell icon at the top of the page, then select 'Create Custom Lesson' from the dropdown menu. This allows you to create a custom lesson from any page at any moment.

That's it! You’ve now learned how to create custom lessons and tests tailored to your students' needs. This feature not only enhances the learning experience but also allows you to incorporate diverse content. Keep inspiring your students with personalized and engaging lessons.